This is the multi-page printable view of this section. Click here to print.
Usage
- 1: Configuration
- 1.1: Navidrome Configuration Options
- 1.2: Using custom tags with Navidrome
- 1.3: Customizing Persistent IDs in Navidrome
- 2: Features
- 2.1: How to Use Smart Playlists in Navidrome (Beta)
- 2.2: Multi-Library Support
- 2.3: Jukebox mode
- 2.4: Sharing
- 2.5: Scrobbling
- 2.6: Plugins
- 2.7: Jellyfin API (Experimental)
- 3: Library Management
- 3.1: Tagging Guidelines
- 3.2: Artwork location resolution
- 3.3: Missing Files
- 3.4: Exclude Content From Library
- 4: Integration
- 4.1: External Integrations (A.K.A. Agents)
- 4.2: AudioMuse-AI
- 4.3: Externalized Authentication
- 4.4: Monitoring Navidrome
- 5: Administration
- 5.1: Automated Backup
- 5.2: Command-Line Interface (CLI)
- 5.2.1: navidrome artwork
- 5.2.2: navidrome backup
- 5.2.3: navidrome doctor
- 5.2.4: navidrome inspect
- 5.2.5: navidrome missing
- 5.2.6: navidrome plugin
- 5.2.7: navidrome pls
- 5.2.8: navidrome scan
- 5.2.9: navidrome search
- 5.2.10: navidrome service
- 5.2.11: navidrome user
- 5.3: Security Considerations
- 5.4: Anonymous Data Collection
1 - Configuration
1.1 - Navidrome Configuration Options
Navidrome allows some customization using environment variables, loading from a configuration file or using command line arguments.
When the same option is set using multiple methods, Navidrome uses the following order of precedence (highest to lowest): environment variables, command line arguments, configuration file.
Configuration File
Some options are only configurable using a configuration file. If you are using environment variables (ex: with Docker), you may not be able to set all options.
If you want to use a configuration file with Docker, you can do so by creating a navidrome.toml config file in the
host folder that is mapped to your /data volume. Docker installations automatically look for a navidrome.toml file in the /data folder.
Navidrome tries to load the configuration from a navidrome.toml file in the current working
directory, if it exists. You can create this file and put any of the configuration options below
in it. Example of a configuration file (select your OS):
# This is just an example! Please see available options to customize Navidrome for your needs at

# https://www.navidrome.org/docs/usage/configuration/options/#available-options

LogLevel = 'DEBUG'
Scanner.Schedule = '@every 24h'
TranscodingCacheSize = '150MiB'
MusicFolder = '/mnt/music'
# This is just an example! Please see available options to customize Navidrome for your needs at
# https://www.navidrome.org/docs/usage/configuration/options/#available-options
LogLevel = 'DEBUG'
Scanner.Schedule = '@every 24h'
TranscodingCacheSize = '150MiB'
# IMPORTANT: Use single quotes for paths in Windows
MusicFolder = 'C:\Users\JohnDoe\Music'
# Set this to the path of your ffmpeg executable
FFmpegPath = 'C:\Program Files\ffmpeg\bin\ffmpeg.exe'# This is just an example! Please see available options to customize Navidrome for your needs at
# https://www.navidrome.org/docs/usage/configuration/options/#available-options
LogLevel = 'DEBUG'
Scanner.Schedule = '@every 24h'
TranscodingCacheSize = '150MiB'
MusicFolder = '/Users/JohnDoe/Music'
# This is the default path for Homebrew installed ffmpeg
FFmpegPath = '/opt/homebrew/bin/ffmpeg'You can also specify a different path for the configuration file, using the -c/--configfile option.
Navidrome can load the configuration from toml, json, yml and ini files.
The example below assume you have created a navidrome.toml file in your home directory:
$ navidrome --configfile "/home/johndoe/navidrome.toml"C:\> navidrome --configfile "c:\User\JohnDoe\navidrome.toml"$ navidrome --configfile "/User/JohnDoe/navidrome.toml"Command Line Arguments
You can set most of the config options below passing arguments to navidrome executable.
The example below shows how to set the MusicFolder using the command line, assuming you have your music library
under your home directory:
$ navidrome --musicfolder "/mnt/music"C:\> navidrome --musicfolder "c:\User\JohnDoe\Music"$ navidrome --musicfolder "/User/JohnDoe/Music"Please note that command line arguments must be all lowercase. For a list of all available command line options,
just call navidrome --help.
For command and workflow examples (scan, inspect, backups, users, service management), see the CLI reference.
Environment Variables
Any configuration option can be set as an environment variable, just add a the prefix ND_ and
make it all uppercase. Ex: ND_LOGLEVEL=debug. See below for all available options
Available Options
Basic configuration
Advanced configuration
Notes
- Durations are specified as a number and a unit suffix, such as “24h”, “30s” or “1h10m”. Valid time units are “s”, “m”, “h”.
- Sizes are specified as a number and an optional unit suffix, such as “1GB” or “150 MiB”. Default unit is bytes. Note: “1KB” == “1000”, “1KiB” == “1024”
- Transcoding can be required in some situations. For example: trying to play a WMA file in a webbrowser, will only work for natively supported formats by the browser you are using. (so playing that with Mozilla Firefox on Linux, will not work. Mozilla even has their own guide about audio codecs).
1.2 - Using custom tags with Navidrome
Overview
As all tags imported are stored and indexed in the database, to improve performance and reduce storage requirements, Navidrome only imports a predefined set of tags. The complete list of default tags imported are listed here.
However, Navidrome supports importing and using custom tags from your music files. Custom tags allow you to extend the metadata beyond the default supported tags. This functionality can be configured via the configuration file.
Configuring custom tags
This customization is only available when using a configuration file.
If you want to use a configuration file with Docker, you can do so by creating a navidrome.toml config file in the
host folder that is mapped to your /data volume. Docker installations automatically look for a navidrome.toml file in the /data folder.
Important: After making changes to tag configurations, you must perform a full scan for the changes to take effect. A quick scan will not process the updated tag configurations.
Custom tags are defined under the Tags configuration section. A custom tag configuration accepts the following properties:
- Aliases: A list of all alternative names that can found in your music files, but should be considered the same tag.
Ex:
album artist,albumartist. This is a required field. - Type: Specifies the type of data stored in the tag. It can be used to validate or transform values.
Supported types are
int,float,date,uuid. If not specified, the tag will be treated as astring. - MaxLength: The length limit for the tag value. Default is 1024 characters.
- Album: A boolean flag indicating whether this tag applies to an album as well. Default is
false. If set totrue, the tag will be considered when generating the PID for an album. - Split: Tags are always considered multivalued, but you can specify a list of delimiters used to split a tag value into multiple entries.
- Ignore: A boolean flag indicating whether this tag should be ignored. Default is
false. Useful for disabling tags that are imported by default. See example below.
Note that tags are case-insensitive, so you don’t need to specify all possible case variations in the Aliases list.
Example configuration
Below is an example of how to set up custom tag options in your configuration file.
Tags.MyCustomTag.Aliases = ["mycustomtag", "customtag"]
Tags.MyCustomTag.MaxLength = 50
Tags.MyCustomTag.Album = false
Tags.MyCustomTag.Split = ["; ", " / "]
In this example, the custom tag mycustomtag is configured with two aliases, a type of string (default), and a maximum
length of 50 characters. Additionally, it sets the splitting delimiters so that if a tag value contains ; or /
it will be split into multiple values.
Common use cases
Here are some common use cases for custom tags.
Adding a new tag for disambiguation
By default, Navidrome uses MusicBrainz IDs to identify albums and tracks. However, if your music library is tagged with information from other DBs, like Discogs, you can add custom tags to store the Discogs IDs.
Example:
Tags.discogs_release_id.Aliases = ['discogs_release_id']
Tags.discogs_release_id.Album = true
PID.Album = 'discogs_release_id|albumartistid,album,albumversion,releasedate'
See the PID configuration for more information on how to configure album disambiguation.
Disabling tags
Any custom tag found in your music files, but not defined with the Tags configuration option will be ignored by
Navidrome. If you need to disable a tag that is already imported by default, you can do so by explicitly
setting its Ignore flag to true.
Example: disabling the subtitle tag
Tags.Subtitle.Ignore = true
Changing separators
The preferable way to have multivalued tags is to use your tag editor and add multiple values for the same tag.
However, if your library is already tagged with multiple values separated by a known delimiter, you can configure
Navidrome to split the tag value by that delimiter into multiple entries. Just keep in mind that this can have unwanted
side effects if the delimiter is used in other contexts. (Ex: using '/' as an artist delimiter can break artists like
AC/DC, '&' as a delimiter can break artists like Simon & Garfunkel)
Example: Splitting the artist tag by \ and ;
Tags.Artist.Split = ['\', '; ']
If you want to disable splitting for a tag, you can set the Split option to an empty list.
Tags.Genre.Split = []
Artist splitting
By default, Navidrome will split the artist tag value by various common separators to identify multiple artists.
The default Tags.Artist.Split value is:
Tags.Artist.Split = [" / ", " feat. ", " feat ", " ft. ", " ft ", "; "]
Because the slash separator is " / " (with surrounding spaces) rather than a bare /, a name like AC/DC is left
intact by default. Note that "; " only requires a trailing space, so a value like Foo; Bar is still split.
To customize the separators, override this option. Be careful when adding a bare / (without spaces): it will split
names like AC/DC. See Scanner.ArtistSplitExceptions to protect specific
names from being split.
Note that the separators are case insensitive, so both FEAT. and feat. will be recognized by default.
Separating Writer and Composer tags
By default, Navidrome maps both composer and writer tag values to a single (multi-valued) composer field in its
database. If you want to keep these as separate metadata fields, you can define custom tags for each one:
Tags.Composer.Aliases = ['composer', 'tcom', 'composer', '©wrt', 'wm/composer', 'imus']
Tags.Writer.Aliases = ['writer', 'txxx:writer', 'iwri']
This will allow you to filter or sort by writer in Smart Playlists.
Adding tags for custom filtering/sorting in Smart Playlists
If you want to create a Smart Playlist that filters or sorts by a custom tag, you can define the tag in the configuration file, then use it in the Smart Playlist as a regular field.
1.3 - Customizing Persistent IDs in Navidrome
Persistent IDs in Navidrome
Persistent IDs (PIDs) are configurable identifiers introduced to provide stable references for Tracks and Albums in Navidrome, significantly improving how media is managed and identified.
Overview of Persistent IDs
Persistent IDs are unique, user-configurable identifiers for tracks and albums, enabling Navidrome to accurately detect and manage moved or re-tagged files, and disambiguate albums with identical names or duplicated entries.
Key Features
- Configurable and Flexible: Users can define their PID structure using various tags, including
musicbrainz_trackid,albumid,discnumber,tracknumber,title,folder,albumartistid,catalognum, Discogs IDs, or even custom tags - Accurate File Detection: Navidrome recognizes moved or re-tagged files, preventing duplication or mismatches.
- Album Disambiguation: Easily differentiate albums with identical names through custom tags like
albumversion(e.g., Deluxe Editions).
Default Configuration
The default configuration prioritizes MusicBrainz IDs (MBIDs) when available:
PID.Track = "musicbrainz_trackid|albumid,discnumber,tracknumber,title"
PID.Album = "musicbrainz_albumid|albumartistid,album,albumversion,releasedate"
Track PID:
- Uses
musicbrainz_trackidif available. - Otherwise, combines
albumid,discnumber,tracknumber, andtitle. (albumidis derived fromPID.Album.)
- Uses
Album PID:
- Uses
musicbrainz_albumidif available. - Otherwise, combines
albumartistid,album,albumversion, andreleasedate.
- Uses
Customizing PIDs
You can create custom PID configurations to meet specific needs, such as:
Grouping albums by folder:
PID.Album = "folder"Using Discogs or custom IDs for albums:
Tags.discogs_release_id.Aliases = ['DISCOGS_RELEASE_ID']
PID.Album = 'discogs_release_id|albumartistid,album,albumversion,releasedate'
Using the pre-0.55.0 (pre-BFR) behaviour:
PID.Album = "album_legacy"
PID.Track = "track_legacy"
This will use the old ID generation method, which is based on the file path for tracks and name+releaseDate for albums.
- Full Rescan Required: Changing PID configurations triggers a full rescan. Navidrome will reassign PIDs accordingly, preserving playlists, stars, ratings, shares, and playcounts.
- Backup Your Database: Before changing PID configurations, back up your Navidrome database to prevent data loss.
Handling File Moves and Retagging
When files are moved, Navidrome uses PIDs to accurately identify and reconnect these files on the next scan:
- First, Navidrome attempts to match a missing file with new ones based on exact tags.
- If exact tags do not match, Navidrome checks for a matching PID.
- Finally, if no PID match is found, it attempts to match the file based on the original file path, excluding the
file extension (ex:
/artist/album/01-track.mp3→/artist/album/01-track.flac).
This ensures minimal disruption to playlists, ratings, and play counts when managing your media library.
You can also retag your files, and Navidrome will automatically update the PIDs based on the new tags.
Retagging and moving files cannot be done in the same scan, because Navidrome will not match new files with the old ones. First, retag the files and perform a scan, then move them and scan again, or move first, scan, and then retag.
Artist IDs
Currently, Artist PIDs rely solely on the artist name due to limitations in TagLib/Picard regarding MBIDs for
composer and other roles, potentially causing duplicate entries. For this reason they are not configurable.
Future enhancements are planned to address this.
Troubleshooting and Support
If issues arise when enabling or configuring PIDs:
- Review Navidrome logs.
- Validate your configuration file.
2 - Features
2.1 - How to Use Smart Playlists in Navidrome (Beta)
Smart Playlists in Navidrome offer a dynamic way to organize and enjoy your music collection. They are created using
JSON objects stored in files with a .nsp extension. These playlists are automatically updated based on specified
criteria, providing a personalized and evolving music experience.
Smart Playlists are currently in beta and may have some limitations. Please report any issues or suggestions in the Navidrome GitHub discussions.
Creating Smart Playlists
To create a Smart Playlist, you need to define a JSON object with specific fields
and operators that describe the criteria for selecting tracks. The JSON object is stored in a .nsp file
Here are some examples to get you started:
Example 1: Recently Played Tracks
This playlist includes tracks played in the last 30 days, sorted by the most recently played.
{
  "name": "Recently Played",
  "comment": "Recently played tracks",
  "all": [{ "inTheLast": { "lastPlayed": 30 } }],
  "sort": "lastPlayed",
  "order": "desc",
  "limit": 100
}
Example 2: 80’s Top Songs
This playlist features top-rated songs from the 1980s.
{
  "all": [
    { "any": [{ "is": { "loved": true } }, { "gt": { "rating": 3 } }] },
    { "inTheRange": { "year": [1981, 1990] } }
  ],
  "sort": "year",
  "order": "desc",
  "limit": 25
}
Example 3: Favourites
This playlist includes all loved tracks, sorted by the date they were loved.
{
  "all": [{ "is": { "loved": true } }],
  "sort": "dateLoved",
  "order": "desc",
  "limit": 500
}
Example 4: All Songs in Random Order
This playlist includes all songs in a random order. Note: This is not recommended for large libraries.
{
  "all": [{ "gt": { "playCount": -1 } }],
  "sort": "random"
  // limit: 1000 // Uncomment this line to limit the number of songs
}
Example 5: Multi-Field Sorting
This playlist demonstrates multiple sort fields - songs from the 2000s, sorted by year (descending), then by rating (descending), then by title (ascending).
{
  "name": "2000s Hits by Year and Rating",
  "all": [{ "inTheRange": { "year": [2000, 2009] } }],
  "sort": "-year,-rating,title",
  "limit": 200
}
Example 6: Library-Specific Playlist
This playlist includes only high-rated songs from a specific library (useful in multi-library setups).
{
  "name": "High-Rated Songs from Library 2",
  "all": [{ "is": { "library_id": 2 } }, { "gt": { "rating": 4 } }],
  "sort": "-rating,title",
  "limit": 100
}
Example 7: Percentage-Based Limit
This playlist includes 10% of all loved tracks, selected randomly. Use limitPercent instead of limit to specify a percentage of matching tracks (1-100). A minimum of 1 track is always returned when there are matches.
{
  "all": [{ "is": { "loved": true } }],
  "sort": "random",
  "limitPercent": 10
}
Example 8: Recently Added Albums, in Album Order
Sorting by the track-level dateadded scatters an album’s tracks, because each track has its own timestamp. Sorting by albumdateadded keeps the album together and puts the most recently added albums first, while discnumber and tracknumber order the tracks within each album.
{
  "name": "Recently Added Albums",
  "all": [{ "inTheLast": { "albumdateadded": 30 } }],
  "sort": "-albumdateadded,album,discnumber,tracknumber"
}
An album’s “date added” is the oldest file creation date among its tracks. If you copied or restored many albums at once, they can end up with the exact same timestamp — and when albums tie, the following sort fields (discnumber, tracknumber) apply across all of them, interleaving their tracks. Adding album breaks the tie so each album stays together.
Example 9: Daily Mix (stable for a day)
This playlist picks 20 random tracks played in the last 30 days, and keeps the same track list for a full day
before re-evaluating. Without refreshDelay, a playlist like this would change after every song you play,
which breaks offline caches. See Refreshing Playlists for details.
{
  "name": "Daily Mix",
  "all": [{ "inTheLast": { "lastPlayed": 30 } }],
  "sort": "random",
  "limit": 20,
  "refreshDelay": "1d"
}
Creating Smart Playlists using the UI
Currently Smart Playlists can only be created by manually editing .nsp files. We plan to add a UI for creating and
editing Smart Playlists in future releases.
In the meantime, if you want a graphical way to create playlists, you can use Feishin, a desktop/web client for Navidrome, that supports creating Smart Playlists:
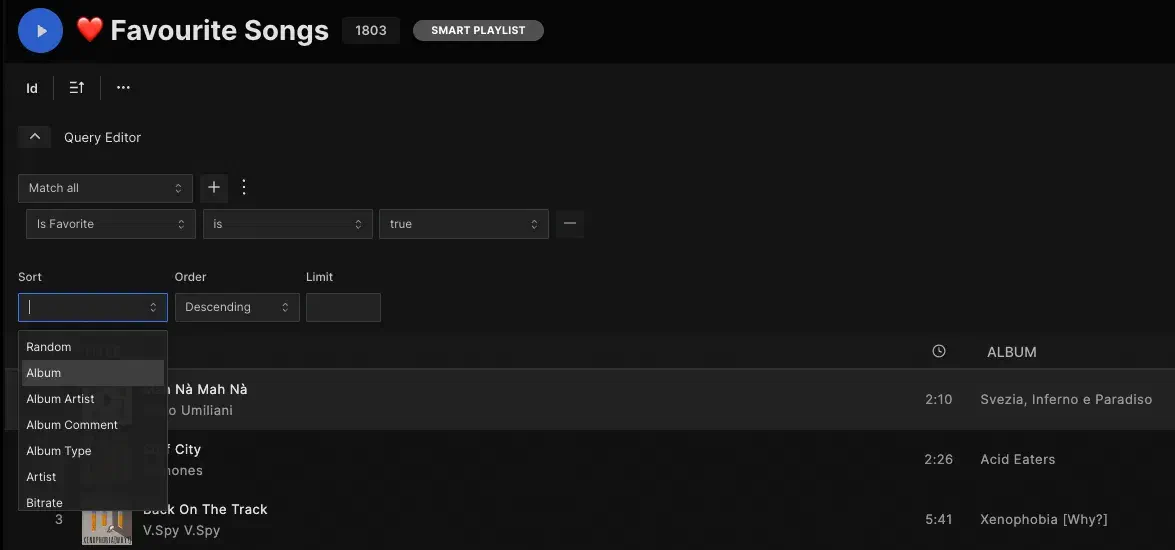
Smart Playlists created/edited in Feishin will be available in Navidrome UI as soon as they are saved.
Importing Smart Playlists
Smart Playlists are imported the same way as regular (.m3u) playlists, during the library scan. Place your .nsp
files in any folder in your library or the path specified by the PlaylistsPath configuration. Navidrome will
automatically detect and import these playlists.
Managing Smart Playlists
Visibility and Ownership
- Visibility: To make a Smart Playlist accessible to all users, set it to ‘public’. When referencing a playlist
from another
.nspfile (withinPlaylistandnotInPlaylist), the playlist must be accessible to the smart playlist’s owner: owners can reference their own playlists (public or private), any user can reference public playlists, and admins can reference any playlist. See Referencing Other Playlists for details. - Ownership: By default, Smart Playlists are owned by the first admin user. You can change the ownership in the Playlists view to allow other users to manage them.
User-Specific Playlists
Smart Playlists based on user interactions (e.g., play count, loved tracks) are automatically updated based on
the owner’s interactions. If you want personalized playlists for each user, create separate .nsp files for each user
and assign ownership accordingly.
Refreshing Playlists
Smart Playlists are refreshed automatically when they are accessed by the UI or any Subsonic client. This ensures
that the playlist is up-to-date when you view it. To avoid unnecessary load, there is a minimum delay between refreshes.
This delay can be adjusted by setting the
SmartPlaylistRefreshDelay configuration option.
By default, this is set to 5s, meaning that Smart Playlists refreshes are spaced at least 5 seconds apart.
You can adjust this value in the configuration file.
Per-Playlist Refresh Delay
You can override the global delay for an individual playlist by adding a refreshDelay to its .nsp file. The
playlist then keeps the same track list until that much time has passed since it was last evaluated. This is useful
for “daily mix” style playlists whose rules would otherwise reshuffle the tracks on every access, and it keeps the
track list stable for clients that cache playlists for offline playback.
{
  "name": "Weekly Discoveries",
  "all": [{ "notInTheLast": { "lastPlayed": 90 } }],
  "sort": "random",
  "limit": 50,
  "refreshDelay": "1w"
}
The value is a duration string. Besides the standard units (h, m, s), d (days) and w (weeks) are also
supported, so values like "12h", "1d", "1w" or "1d12h" all work. The delay is a rolling window measured
from the last evaluation, not aligned to calendar days. When refreshDelay is not set, the global
SmartPlaylistRefreshDelay applies.
Editing the playlist’s rules (by changing the .nsp file or via a client) always takes effect on the next access,
even if the refresh delay has not elapsed yet.
Troubleshooting Common Issues
Playlist Not Showing Up
If a Smart Playlist is not showing up in the Navidrome UI, check the following:
- Check the logs for any errors during the library scan.
- Ensure the
.nspfile is in the correct folder and has the correct permissions. - Ensure the file is correctly formatted and does not contain any syntax errors. Tip: Use a JSON validator to check the file (ex: https://jsonlint.com/)
- Check the playlist’s visibility and ownership settings.
Referencing Other Playlists
When referencing another playlist (using the inPlaylist or notInPlaylist operators), ensure that the referenced
playlist is accessible to the smart playlist’s owner:
- The owner can reference their own playlists, whether public or private.
- Any user can reference playlists that are set to ‘public’.
- Admins can reference any playlist, regardless of owner or visibility.
This applies whether the referenced playlist is a regular or another Smart Playlist. If the referenced playlist is not accessible, Navidrome logs a warning during the scan and the rule simply matches no tracks, rather than failing the whole playlist.
Special Characters in Conditions
If you encounter issues with conditions like contains or endsWith, especially with special characters like
underscores (_), be aware that these might be ignored in some computations. Adjust your conditions accordingly.
Sorting by multiple fields
You can now sort by multiple fields by separating them with commas. You can also control the sort direction for each field by prefixing it with + (ascending, default) or - (descending).
Examples:
"sort": "year,title"- Sort by year first (ascending), then by title (ascending)"sort": "year,-rating"- Sort by year (ascending), then by rating (descending)"sort": "-lastplayed,title"- Sort by last played date (descending), then by title (ascending)
The global order field can still be used and will reverse the direction of all sort fields.
Deleting Users with Shared Smart Playlists
If you encounter issues deleting users with shared Smart Playlists, check if the playlists are used by other users. See this issue for details.
Editing Playlists
To change the rules of a Smart Playlist, you need to edit the .nsp file directly
(or use Feishin). Changes are automatically detected during the next library scan.
The list of tracks in a Smart Playlist is read-only and cannot be edited directly.
Additional Resources
Fields
Here’s a table of fields you can use in your Smart Playlists:
| Field | Description |
|---|---|
title | Track title |
album | Album name |
hascoverart | Track has cover art |
tracknumber | Track number |
discnumber | Disc number |
year | Year of release |
date | Recording date |
originalyear | Original year |
originaldate | Original date |
releaseyear | Release year |
releasedate | Release date |
size | File size |
compilation | Compilation album |
missing | Track file is missing |
explicitstatus | Explicit content status |
dateadded | Date added to library |
datemodified | Date modified |
discsubtitle | Disc subtitle |
comment | Comment |
lyrics | Lyrics |
sorttitle | Sorted track title |
sortalbum | Sorted album name |
sortartist | Sorted artist name |
sortalbumartist | Sorted album artist name |
albumcomment | Album comment |
catalognumber | Catalog number |
filepath | File path, relative to the MusicFolder |
filetype | File type |
codec | Audio codec |
duration | Track duration |
bitrate | Bitrate |
bitdepth | Bit depth |
samplerate | Sample rate |
bpm | Beats per minute |
channels | Audio channels |
rgtrackgain | ReplayGain track gain (dB) |
rgtrackpeak | ReplayGain track peak |
rgalbumgain | ReplayGain album gain (dB) |
rgalbumpeak | ReplayGain album peak |
loved | Track is loved |
dateloved | Date track was loved |
lastplayed | Date track was last played |
daterated | Date track was last rated |
playcount | Number of times track was played |
rating | Track rating |
averagerating | Average rating across all users |
albumrating | Album rating (0-5) |
albumloved | Whether album is starred |
albumplaycount | Album total play count |
albumlastplayed | Album last play date |
albumdateloved | Date album was starred |
albumdaterated | Date album was rated |
albumdateadded | Date album was added to library |
albumdatemodified | Date album was last updated |
albumduration | Album total duration (seconds) |
albumsongcount | Number of tracks in the album |
albumsize | Album total size (bytes) |
artistrating | Artist rating |
artistloved | Whether artist is starred |
artistplaycount | Artist total play count |
artistlastplayed | Artist last play date |
artistdateloved | Date artist was starred |
artistdaterated | Date artist was rated |
mbz_album_id | MusicBrainz Album ID |
mbz_album_artist_id | MusicBrainz Album Artist ID |
mbz_artist_id | MusicBrainz Artist ID |
mbz_recording_id | MusicBrainz Recording ID |
mbz_release_track_id | MusicBrainz Release Track ID |
mbz_release_group_id | MusicBrainz Release Group ID |
library_id | Library ID (for multi-library filtering) |
Notes
- Dates must be in the format
"YYYY-MM-DD". - Booleans must not be enclosed in quotes. Example:
{ "is": { "loved": true } }. - Boolean fields:
hascoverart,compilation,missing,loved,albumloved,artistloved. filepathis relative to your music library folder. Ensure your paths are correctly specified without the/musicprefix (or whatever value you set inMusicFolder).- Numeric fields like
library_id,year,tracknumber,discnumber,size,duration,bitrate,bitdepth,samplerate,bpm,channels,playcount,rating,averagerating,albumduration,albumsongcount,albumsize, and the ReplayGain fields (rgtrackgain,rgtrackpeak,rgalbumgain,rgalbumpeak) support numeric comparisons (gt,lt,inTheRange, etc.). - Multi-Library: Smart Playlists can include songs from multiple libraries if the user has access to them. Use the
library_idfield to filter songs from specific libraries. - Album & Artist Fields: Fields prefixed with
albumorartist(e.g.,albumrating,artistplaycount) filter tracks based on their parent album or artist properties. This lets you create playlists like “tracks from highly-rated albums” or “tracks from frequently-played artists”.albumdateadded,albumdatemodified,albumduration,albumsongcountandalbumsizedescribe the album itself rather than your listening history, so they are the same for every track on an album — which is what makes them useful as a sort key (see Example 8).
Special Fields
random: Used for random sorting (e.g.,"sort": "random")
MusicBrainz Fields
The following fields contain MusicBrainz IDs that can be used to create playlists based on specific MusicBrainz entities:
mbz_album_id: Filter by specific MusicBrainz albummbz_album_artist_id: Filter by specific MusicBrainz album artistmbz_artist_id: Filter by specific MusicBrainz artistmbz_recording_id: Filter by specific MusicBrainz recordingmbz_release_track_id: Filter by specific MusicBrainz release trackmbz_release_group_id: Filter by specific MusicBrainz release group
Custom Tags
Any tags imported from the music files, that are not listed above, can be also used as fields in your Smart Playlists. Check the complete list of tags imported by navidrome. You can also add your own custom tags to your music files and use them in your Smart Playlists. Check the Custom Tags for more information.
Operators
Here’s a table of operators you can use in your Smart Playlists:
| Operator | Description | Argument type |
|---|---|---|
is | Equal | String, Number, Boolean |
isNot | Not equal | String, Number, Boolean |
gt | Greater than | Number |
lt | Less than | Number |
contains | Contains | String |
notContains | Does not contain | String |
startsWith | Starts with | String |
endsWith | Ends with | String |
inTheRange | In the range (inclusive) | Array of two numbers or dates |
before | Before | Date ("YYYY-MM-DD") |
after | After | Date ("YYYY-MM-DD") |
inTheLast | In the last | Number of days |
notInTheLast | Not in the last | Number of days |
inPlaylist | In playlist | Playlist condition (see below) |
notInPlaylist | Not in playlist | Playlist condition (see below) |
isMissing | Field is absent or empty | Boolean (see below) |
isPresent | Field has a value | Boolean (see below) |
The nature of the field determines the argument type. For example, year and tracknumber require a number,
while title and album require a string.
Checking for Missing or Present Tags
The isMissing and isPresent operators let you match tracks based on whether a field has any value at all,
regardless of what that value is. They are supported for:
- Tag fields, such as
genre,mood, or any custom tag - Role fields, such as
composerorconductor - Numeric fields where Navidrome stores no value when the tag is absent: the ReplayGain fields
(
rgtrackgain,rgtrackpeak,rgalbumgain,rgalbumpeak),bpm, andbitdepth(a missing bit depth also matches lossy formats such as MP3, which have no bit depth) - Text fields, where an empty value also counts as missing:
album,comment,lyrics,catalognumber,discsubtitle,albumcomment,explicitstatus,sorttitle,sortalbum,sortartist,sortalbumartist, and the MusicBrainz ID fields (mbz_album_id,mbz_album_artist_id,mbz_artist_id,mbz_recording_id,mbz_release_track_id,mbz_release_group_id)
Each takes a single field mapped to a boolean. The boolean inverts the check, so isMissing and isPresent are
mirror images of each other:
{ "all": [{ "isMissing": { "genre": true } }] }
The example above matches tracks that have no genre tag. The following all describe the opposite condition
(tracks that do have a genre tag):
{ "isMissing": { "genre": false } }
{ "isPresent": { "genre": true } }
The inPlaylist and notInPlaylist operators take a condition object with the playlist’s id:
{ "inPlaylist": { "id": "dVX0hgcj4JJFjTs66xpEqI" } }
To get a playlist’s ID, navigate to the playlist in the Navidrome UI
and check the URL. The ID is the last part of the URL after the /playlists/ path:
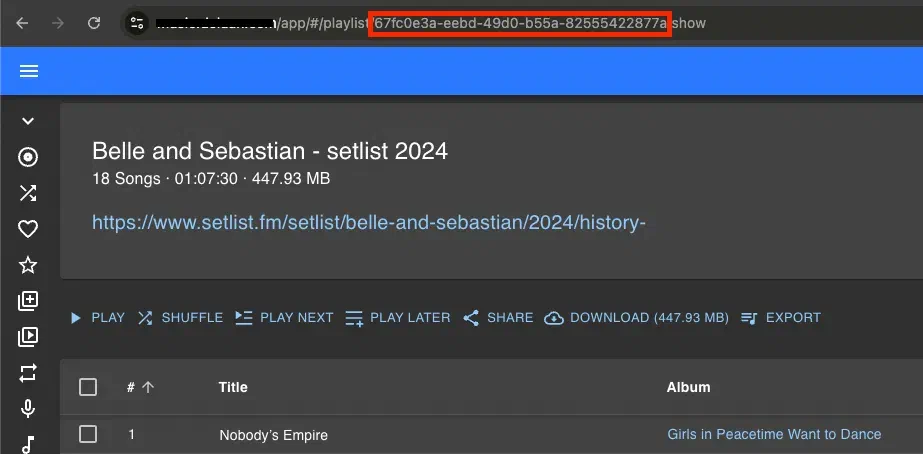
Here’s a complete example of a Smart Playlist that includes all tracks from another playlist, shuffled randomly:
{
  "all": [{ "inPlaylist": { "id": "dVX0hgcj4JJFjTs66xpEqI" } }],
  "sort": "random",
  "limit": 50
}
Alternatively, the inPlaylist and notInPlaylist operators can take a path argument, which can either be
absolute or relative to your playlist. This allows your smart playlists to be tranferrable between servers.
{ "inPlaylist": { "path": "../other_playlist.nsp" } }
Here’s an example of building a smart playlist out of multiple more focused playlists. Keep all the rules under a
single top-level group (all or any) and nest a group when you need to mix the two logics: a top-level any and
all cannot be combined at the same level.
{
  "name": "Overplayed Favorites",
  "comment": "Most Played Favorites Played Within Last 4yr",
  "public": true,
  "all": [
    { "inPlaylist": { "path": "most-played-favorites.nsp" } },
    { "notInPlaylist": { "path": "favorites-not-played-in-4-yrs.nsp" } }
  ],
  "sort": "playCount, lastPlayed"
}
2.2 - Multi-Library Support
Overview
Navidrome supports multiple music libraries since v0.58.0, allowing you to organize your music into separate collections with user-specific access controls. This feature is perfect for:
- Separating different types of content (music vs. audiobooks)
- Organizing by quality (lossy vs. lossless)
- Separating personal collections (family members, roommates)
- Organizing by genre or era (classical, jazz, modern)
- Managing different sources (official releases vs. bootlegs/live recordings)
How Multi-Library Works
Default Library
When Navidrome starts, it automatically creates a default library using your MusicFolder configuration. This becomes “Library 1” and all existing users automatically get access to it, ensuring backward compatibility.
User Access Control
- Admin users automatically have access to all libraries
- Regular users must be explicitly granted access to libraries by an administrator
- Users can only see and access music from libraries they have permission to use
- Each user can switch between their accessible libraries using the library selector in the UI
Data Isolation
- Albums are scoped to a single library; each library maintains its own set of albums and their songs.
- Artists can have albums and songs spread across multiple libraries. The same artist may appear in several libraries, each with different albums or tracks.
- Artist statistics and metadata are aggregated across all libraries where the artist appears.
- Playlists can contain songs from multiple libraries (if the user has access to those libraries)
- Smart playlists can be scoped to specific libraries
- Search results are filtered by the user’s accessible (and selected) libraries
Setting Up Multi-Library
Creating Additional Libraries
Access Library Management
- Log in as an administrator
- Go to Settings → Libraries
Create a New Library
- Click the "+" button to add a new library
- Provide a Name for the library (e.g., “Audiobooks”, “FLAC Collection”)
- Set the Path to the folder containing your music files
- Optionally set the library as default for new users
- Click Save
Initial Scan
- The new library will automatically begin scanning
- Monitor the scanning progress in the Activity Panel
- Large libraries may take time to complete the initial scan
Managing User Access
Assign Libraries to Users
- Go to Settings → Users
- Click on a user to edit their settings
- In the Libraries section, check the libraries the user should access
- Click Save
Verify Access
- Users will see a library selector in the sidebar if they have access to multiple libraries
- The library selector is displayed in the top left corner of the UI
- Users can select multiple libraries to browse and listen to their music
Configuration Considerations
File Organization
Each library should have its own root folder structure:
/music/main/           # Default library (MusicFolder)
├── Artist 1/
├── Artist 2/
└── ...

/music/audiobooks/     # Audiobooks library
├── Author 1/
├── Author 2/
└── ...

/other_path/lossless/       # High-quality library
├── Artist 1/
├── Artist 2/
└── ...
It is up to the user where to save music collections. You can store your artists in /music or any other path you want to use.
Permissions
- The Navidrome user must have read access to all library folders
- Consider using the same ownership/permissions across all library folders
- Ensure adequate disk space for each library’s cache and metadata
Performance
- Each library maintains its own file system watcher
- Multiple libraries scanning simultaneously may impact performance
- Consider staggering initial scans of large libraries
- Large numbers of libraries may affect UI performance
Using Multi-Library
Switching Libraries
- Use the library selector in the sidebar to select visible libraries
- All browsing, searching, and playback is scoped to the selected libraries
Cross-Library Features
- Playlists: Can contain songs from multiple libraries (user must have access)
- Smart Playlists: Can be scoped to specific libraries using filters
- Search: Results from all accessible libraries (filtered by permissions)
- Statistics: Maintained separately per library
API and Client Support
Subsonic API
- The
getMusicFoldersendpoint returns all libraries accessible to the authenticated user - All other endpoints respect the user’s library permissions
- Clients that support multiple music folders will work with Navidrome’s multi-library feature
Client Compatibility
Most Subsonic-compatible clients that support multiple music folders will work with Navidrome’s multi-library feature. Check your client’s documentation for music folder support.
Troubleshooting
Library Not Scanning
- Verify the path exists and is readable by the Navidrome user
- Check the logs for permission errors
- Ensure the path doesn’t overlap with other libraries
User Cannot Access Library
- Verify the user has been granted access to the library in user settings
- Check that the library has completed its initial scan
Performance Issues
- Monitor system resources during simultaneous library scans
- Consider adjusting scanner settings if experiencing high I/O
Best Practices
- Design your folder structure before creating libraries
- Use clear, descriptive names for libraries
- Consider future growth when organizing
Related Features
- Configuration Options: Basic setup and MusicFolder configuration
- Smart Playlists: Create dynamic playlists with library-specific filters
- Backup: Protecting your multi-library setup
2.3 - Jukebox mode
Introduction
Navidrome’s Jukebox feature is a built-in functionality that allows users to play music directly to the server’s audio hardware. This essentially turns your server into a jukebox, enabling you to play songs or playlists remotely through a supported Subsonic client. With the Jukebox feature, you can control the audio playback in real-time, just like you would with any other media player. It’s a convenient way to enjoy your music collection without the need for additional hardware or software. Ideal for parties, background music, or personal enjoyment, this feature enhances the versatility of your Navidrome server setup.
Navidrome’s Jukebox mode is based on the OpenSource audio player MPV. MPV is a mature and tested audio/videoplayer that is supported on many platforms. Navidrome’s Jukebox mode uses MPV for audio playback in combination with MPV’s feature to be controlled through IPC.
MPV Installation
MPV must be present on the system where the Navidrome server runs. You might find it already installed or could install it yourself using the methods given on the MPV’s installation page.
The minimal requirement is the IPC support. MPV added IPC support with version 0.7.0 for Linux and macOS and added Windows support with version 0.17.0. Your OS will most probably include newer versions (0.3X) which we recommend. After the installation check the version with:
$ mpv --version
Jukebox mode will use the MPV audio device naming scheme for its configuration. To get an overview about the available audio devices on the system do:
$ mpv --audio-device=help
Here is an example on macOS:
List of detected audio devices:
  'auto' (Autoselect device)
  'coreaudio/AppleGFXHDAEngineOutputDP:10001:0:{D109-7950-00005445}' (BenQ EW3270U)
  'coreaudio/AppleUSBAudioEngine:Cambridge Audio :Cambridge Audio USB Audio 1.0:0000:1' (Cambridge Audio USB 1.0 Audio Out)
  'coreaudio/BuiltInSpeakerDevice' (MacBook Pro-Lautsprecher)
or on Linux:
List of detected audio devices:
  'auto' (Autoselect device)
  'alsa' (Default (alsa))
  'alsa/jack' (JACK Audio Connection Kit)
  'alsa/default:CARD=Headphones' (bcm2835 Headphones, bcm2835 Headphones/Default Audio Device)

  ...

  'jack' (Default (jack))
  'sdl' (Default (sdl))
  'sndio' (Default (sndio))
Please use the full device name if you do not want to use MPV’s auto device. For example on macOS:
"coreaudio/AppleUSBAudioEngine:Cambridge Audio :Cambridge Audio USB Audio 1.0:0000:1"
Configuration
Jukebox mode is enabled by setting this option in your configuration file
(normally navidrome.toml):
Jukebox.Enabled = true
In most cases, this should be the only config option needed.
The MPV binary should be found automatically on the path. In case this does not work use this configuration option:
MPVPath = "/path/to/mpv"
Jukebox mode will use MPV’s auto device for playback if no device is given.
One can supply an array of multiple devices under Jukebox.Devices (note: this config option cannot be set as an environment variable):
Jukebox.Devices = [
    # "symbolic name " "device"
    [ "internal",     "coreaudio/BuiltInSpeakerDevice" ],
    [ "dac",          "coreaudio/AppleUSBAudioEngine:Cambridge Audio :Cambridge Audio USB Audio 1.0:0000:1" ]
]
and select one by using Jukebox.Default:
Jukebox.Default = "dac"
Here is one example configuration:
# Enable/Disable Jukebox mode
Jukebox.Enabled = true

# List of registered devices, syntax:
#  "symbolic name " - Symbolic name to be used in UI's
#  "device" - MPV audio device name, do mpv --audio-device=help to get a list

Jukebox.Devices = [
    # "symbolic name " "device"
    [ "internal",     "coreaudio/BuiltInSpeakerDevice" ],
    [ "dac",          "coreaudio/AppleUSBAudioEngine:Cambridge Audio :Cambridge Audio USB Audio 1.0:0000:1" ]
]

# Device to use for Jukebox mode, if there are multiple entries above.
# Using device "auto" if missing
Jukebox.Default = "dac"
The MPVCmdTemplate / Snapcast integration
There might be cases, where you want to control the call of the mpv binary. Noteable mentions would be the integration with Snapcast
for multi room audio. You can use the MPVCmdTemplate for this.
The default value is mpv --audio-device=%d --no-audio-display --pause %f --input-ipc-server=%s.
| Symbol | Meaning |
|---|---|
%s | Path to IPC server socket |
%d | Audio device (see above) |
%f | Path to file to play |
To integrate with Snapcast alter the template:
MPVCmdTemplate = "mpv --no-audio-display --pause %f --input-ipc-server=%s --audio-channels=stereo --audio-samplerate=48000 --audio-format=s16 --ao=pcm --ao-pcm-file=/tmp/snapfifo"
This assumes Snapcast is running on the same machine as Navidrome. Check the Snapcast documentation for details.
Usage
Once Jukebox mode is enabled and configured, to start playing music through your servers speakers you’ll need to download a third-party Subsonic client. This client acts as a remote control. Not all Subsonic clients support Jukebox mode and you’ll need to check that your client supports this feature.
Jukebox mode is currently not supported through the Navidrome Web UI.
Troubleshooting
If Jukebox mode is enabled one should see the message “Starting Jukebox service” in the log. The number of detected audio devices and the device chosen will be given in the log as well:
INFO[0000] Starting playback server
INFO[0000] 4 audio devices found
INFO[0000] Using default audio device: dac
For further troubleshooting, set Navidrome’s loglevel to DEBUG:
LogLevel = 'DEBUG'
2.4 - Sharing
Navidrome has a “Sharing” feature which allows users to generate a shareable link for a track, album, artist, or playlist. This link can then be sent to friends, allowing them to listen or download the music without having an account on your Navidrome instance.
Enabling and Disabling Sharing
The Sharing feature is enabled by default. To turn it off, set EnableSharing=false in your
configuration file, or set the environment variable ND_ENABLESHARING=false.
Any user can create shares. Each user only sees and manages the shares they created (editing a share’s description and expiration date, or deleting it); administrators can see and manage all shares. A share’s content is limited to the libraries its owner can access.
Sharing is controlled by a single server-wide toggle, so there is no per-user setting for who may create shares. If you’d rather your users not create public links, disable the feature as shown above.
Default Expiration for Shares
By default, new shares (public links) expire after 1 year (“8760h”). You can set a different default expiration time for all new shares using the DefaultShareExpiration config option. This sets how long new shares will be valid, unless you manually change the expiration when creating the share.
Set it in your config file:
DefaultShareExpiration = "8760h" # Shares expire after 1 year by default
Or as an environment variable:
ND_DEFAULTSHAREEXPIRATION=8760h
Use values like "24h" or "1h30m". Valid suffixes are "h" (hours), "m" (minutes), and "s" (seconds).
Using the Sharing Feature
When browsing your music collection, you will notice a “Share” button or menu item available for each item, be it a track, album, artist, or playlist. To share an item, simply click on this “Share” button.
Upon clicking the “Share” button, a dialog box will appear, allowing you to configure your share. This includes setting a description other configurations for the share.
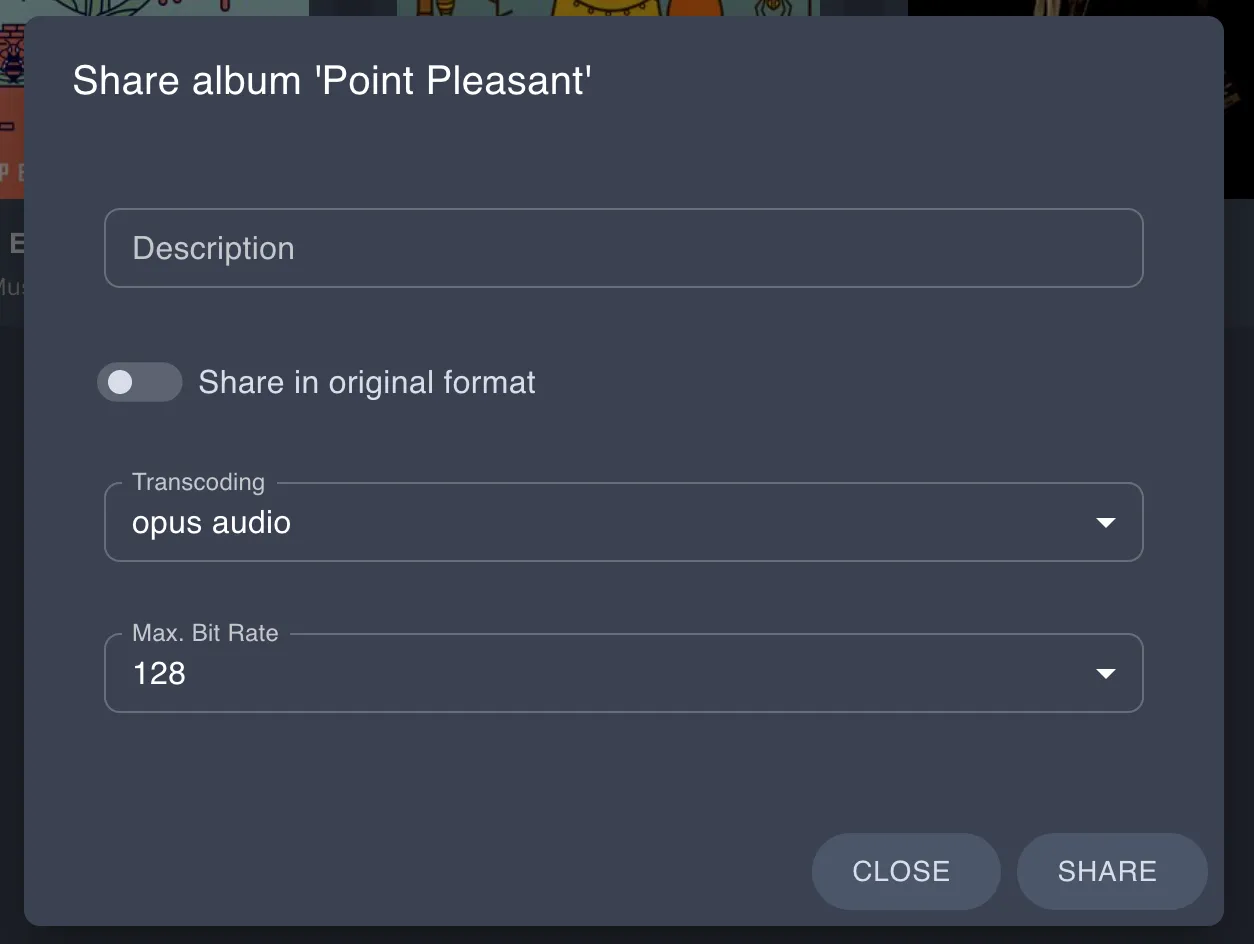
Once you have configured your share as desired, click the “Share” button. This will generate a unique shareable link, which you can then copy and share with your friends.
The generated sharable links will be in the following format: http://yourserver.com/share/XXXXXXXXXX. If you have Navidrome behind a reverse proxy, ensure you allow traffic to /share.
Subsonic API Endpoints
The Sharing feature also implements the related Subsonic API endpoints. See the API docs for implemented endpoints
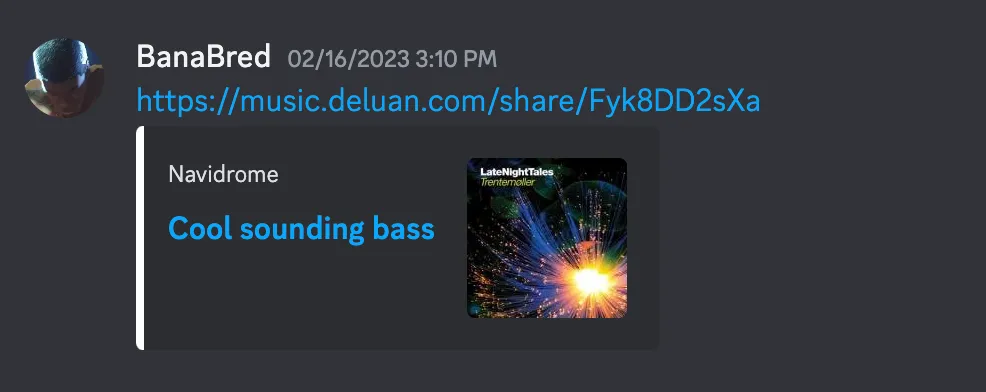
Meta-tags to HTML
Meta-tags are added to the HTML to provide some information about the shared music on chat platforms. Example of a link shared in Discord:
2.5 - Scrobbling
Navidrome allows you to easily scrobble your played songs to Last.fm and ListenBrainz.
Last.fm
- Ensure you have the API Key and API Secret set according to the instructions in External Integrations.
- Go to your user profile’s Personal Settings.
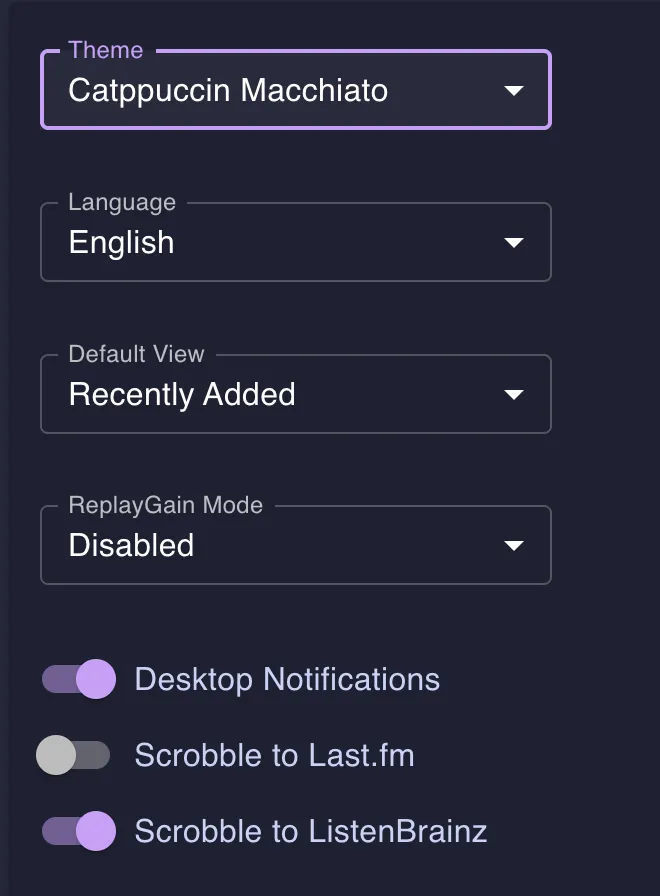
- Toggle the option
Scrobble to Last.fm, a new browser tab will open directing you to Last.fm.
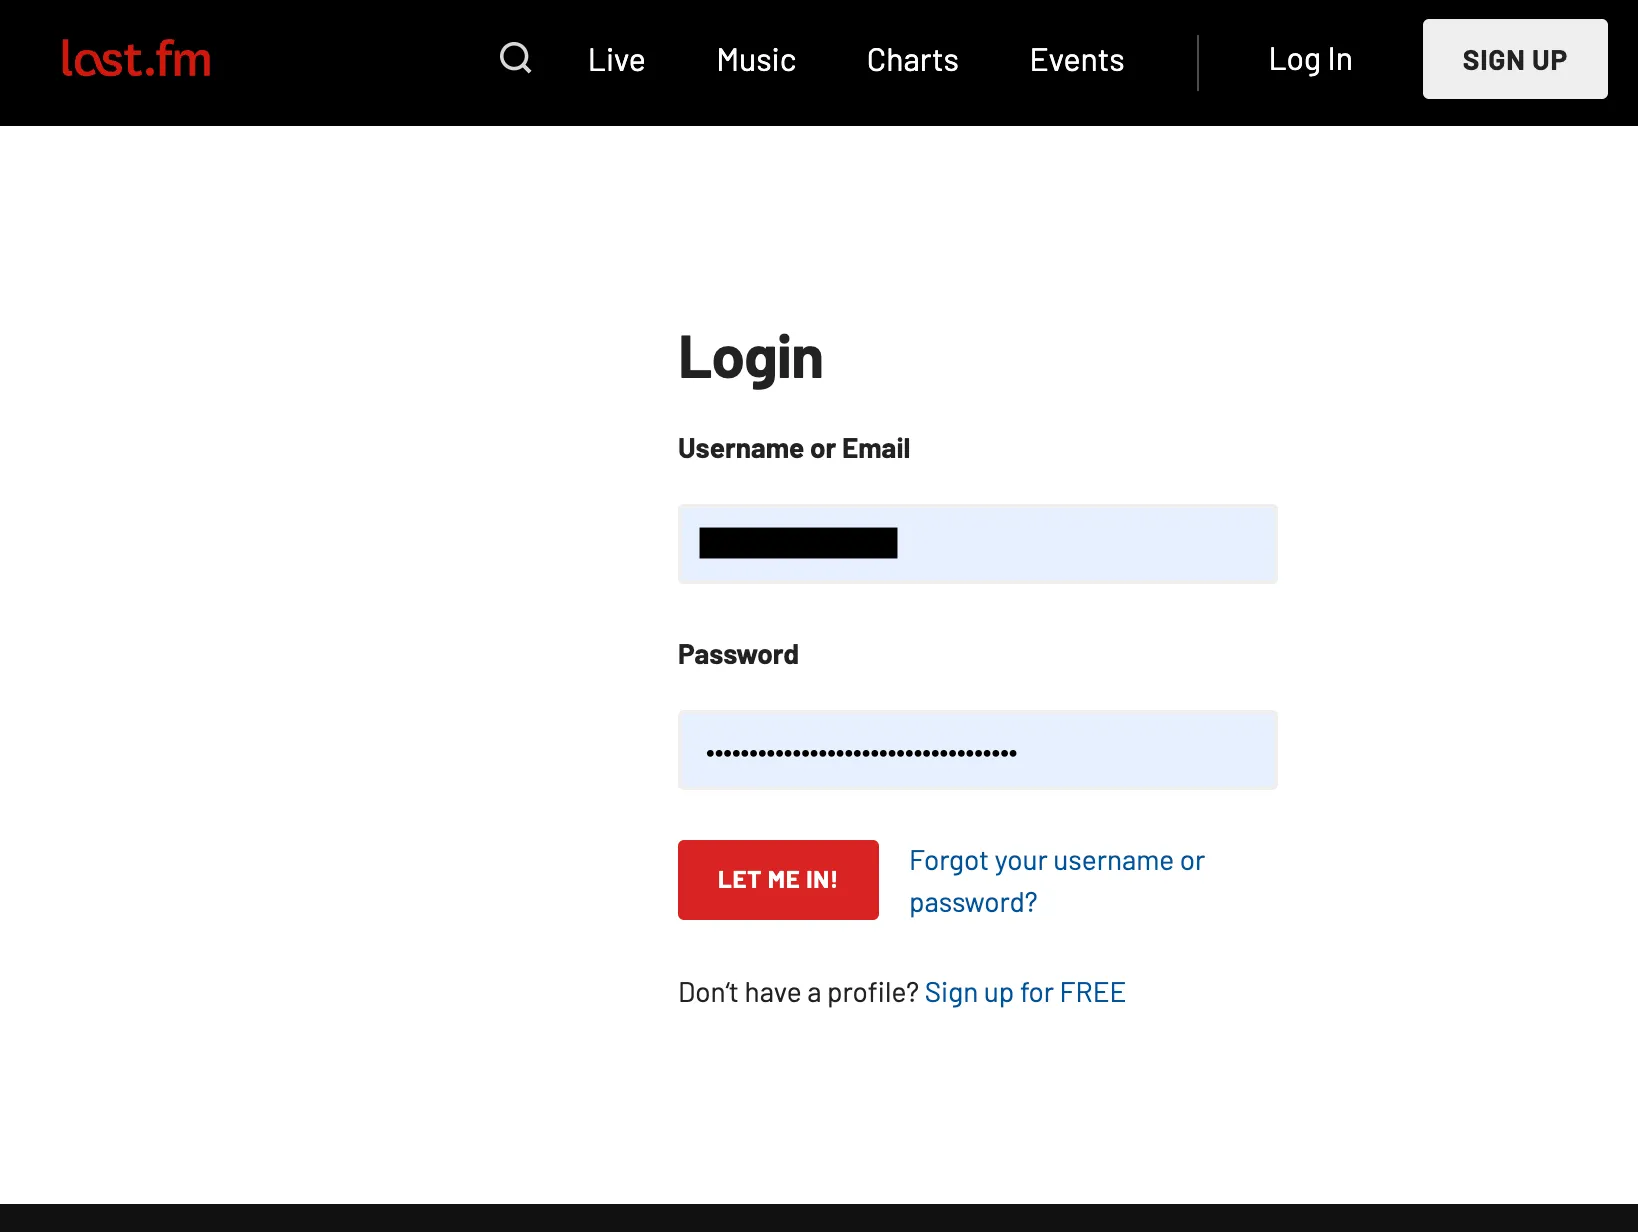
- If you are not logged in, then log in with your Last.fm credentials.
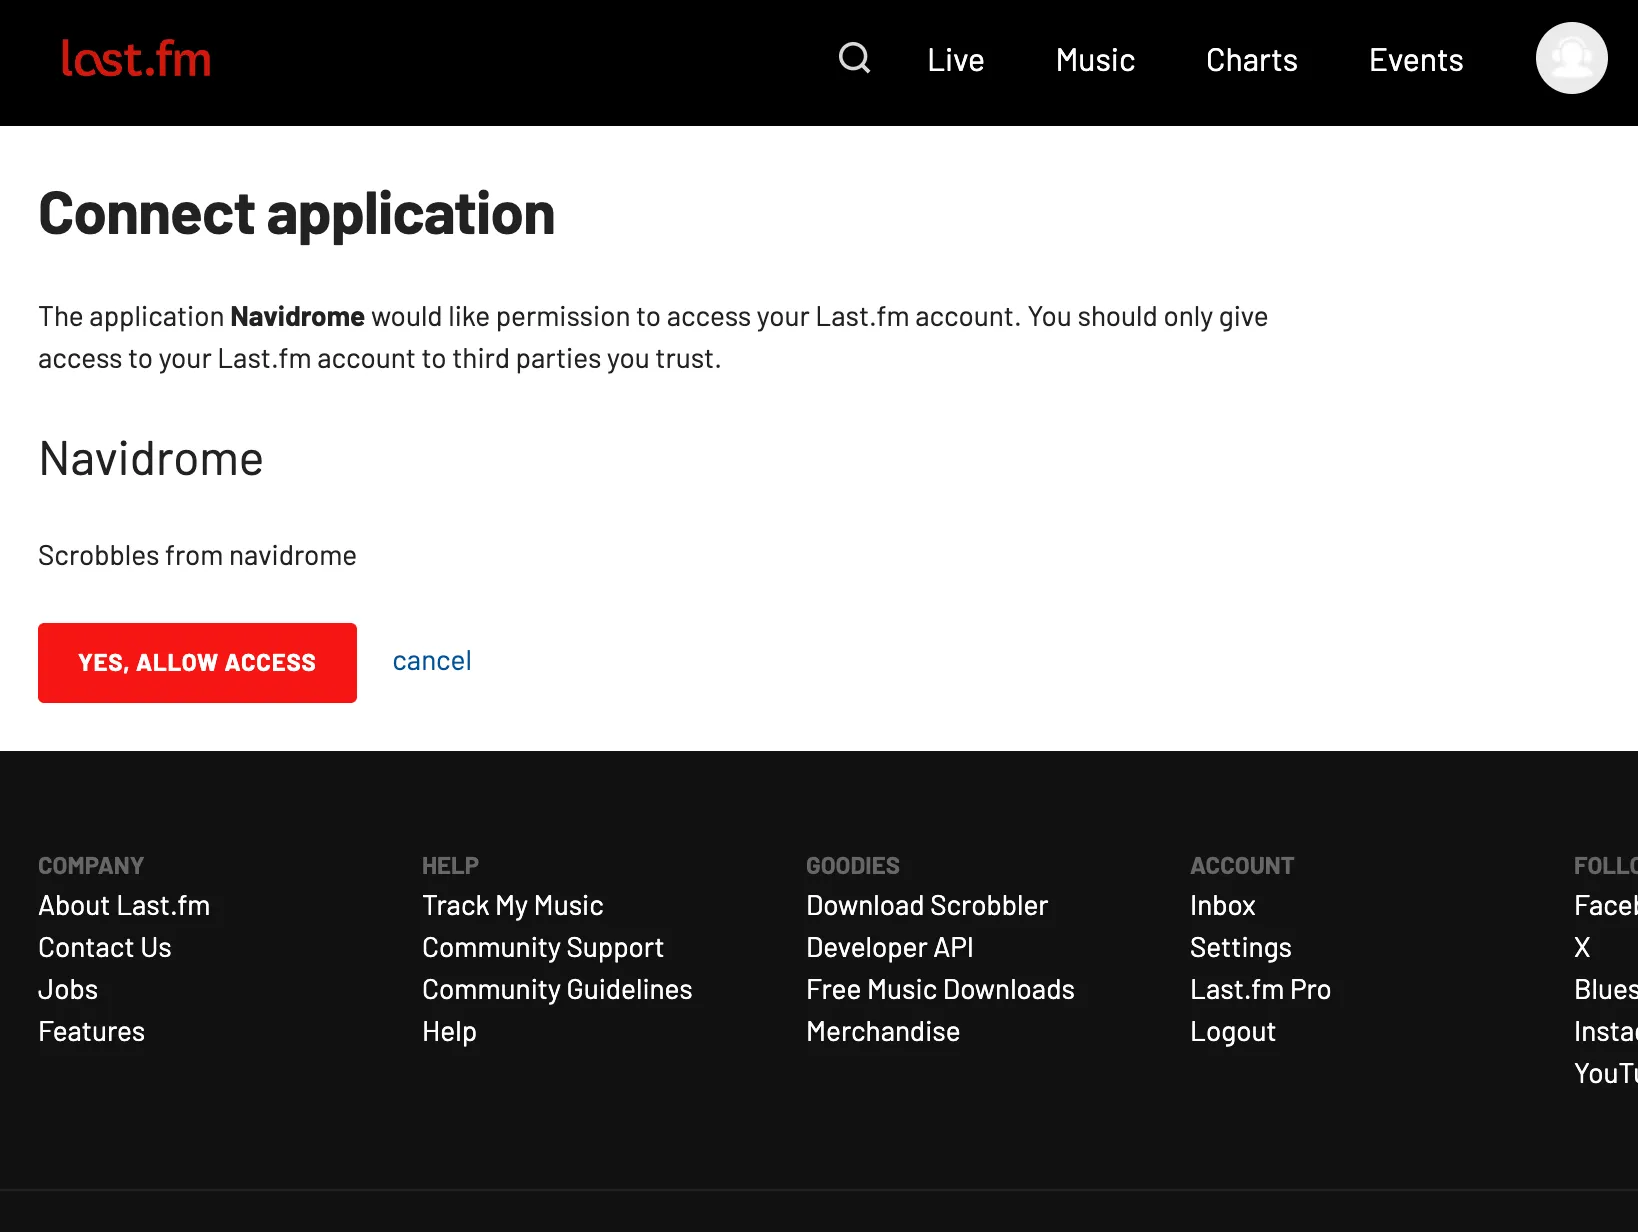
- Click “Yes, allow access”.
ListenBrainz
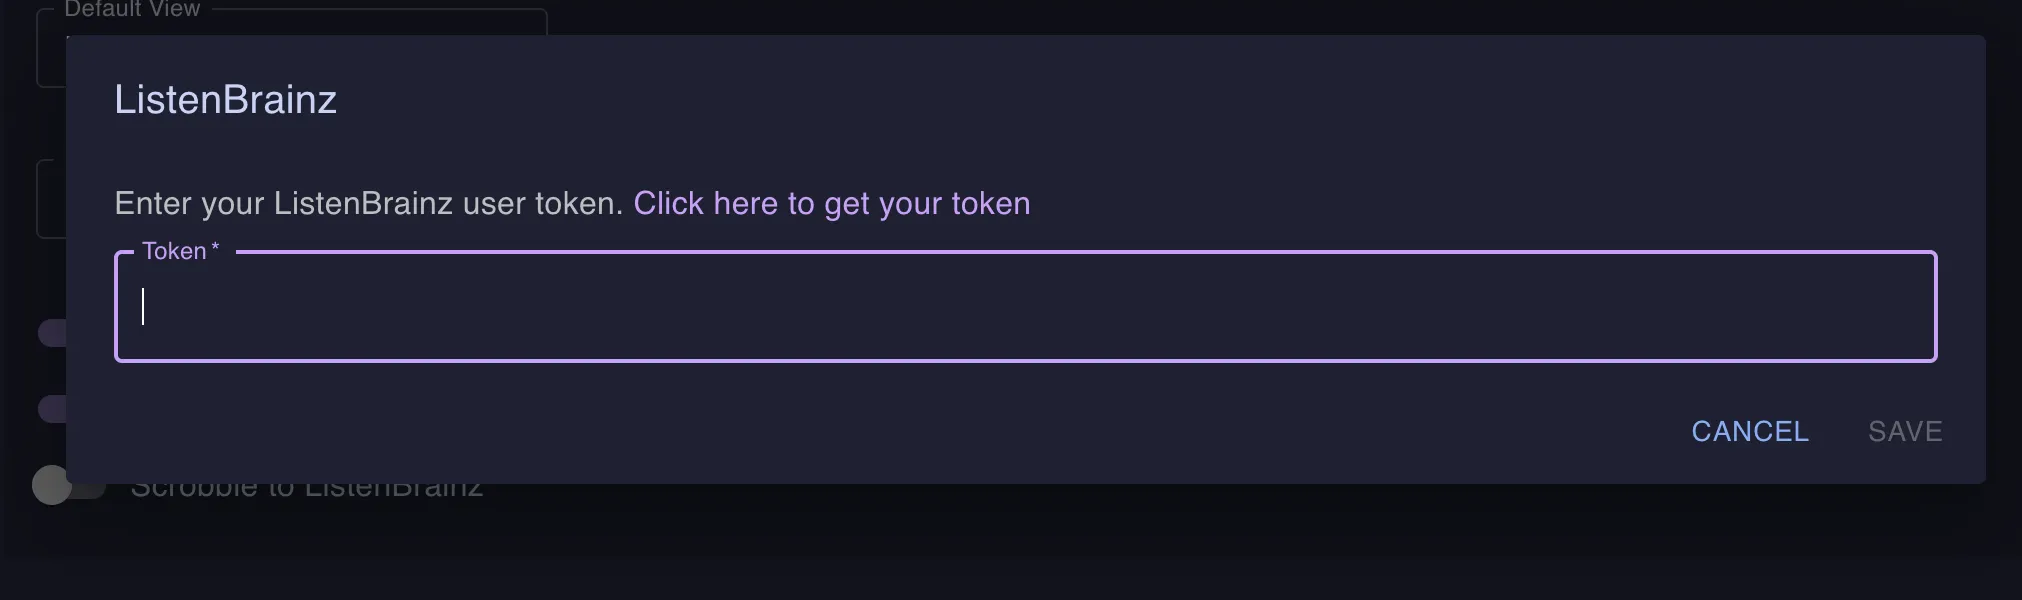
- Toggle the option
Scrobble to ListenBrainz. If you already have a User key generated, skip to step 4. - Click on the appropriate link in the pop-up that opens.
- On the ListenBrainz website, either generate a new token or copy your existing one, then go back to your Navidrome tab.
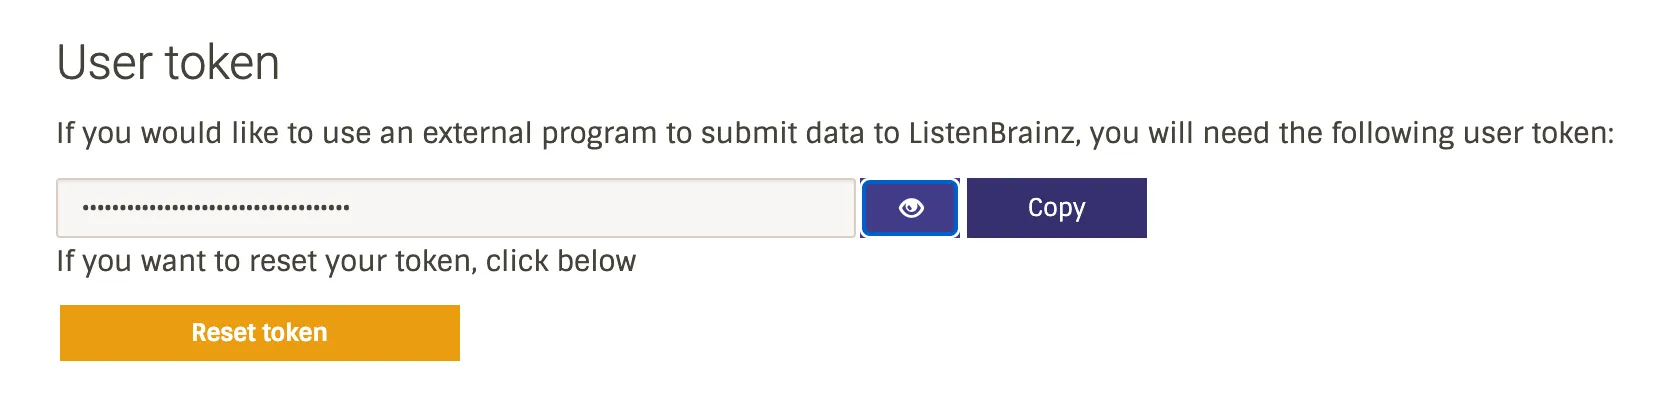
- Paste the token in the pop-up and save.
If you are using a self-hosted ListenBrainz-compatible server (e.g., Maloja), you can change the ListenBrainz.BaseURL config option to point to your instance.
Scrobble Filter
Starting with version 0.64.0, each user can keep some songs out of their scrobbles. Maybe you do not want holiday music in your Last.fm profile, or you only want songs rated 4 stars or more to shape your recommendations.
The filter uses the same JSON rules as smart playlists. Navidrome does not send matching songs to Last.fm, ListenBrainz or scrobbler plugins. It still counts the play locally, so play counts and scrobble history stay complete.
To set a filter, edit the user and paste the rules in the Scrobble filter field. Admins can do this for any user in
Settings > Users. Regular users can set their own filter from their profile, if
EnableUserEditing is on. Leave the field empty to
scrobble everything.
Skip songs with the genre “Christmas”:
{"all":[{"is":{"genre":"Christmas"}}]}
Skip songs rated below 4 stars. Unrated songs have a rating of 0, so this skips them too:
{"all":[{"lt":{"rating":4}}]}
Skip everything in one library:
{"all":[{"is":{"library_id":3}}]}
The filter checks one song at a time, so limit, limitPercent, offset and refreshDelay make no sense here.
Navidrome rejects rules that use them, and rules with unknown fields.
Scrobble History
Starting with version 0.59.0, Navidrome tracks your scrobble/listen history natively. This means that for music added after this version, Navidrome maintains a complete record of when each track was played. This historical data will be used in future features such as statistics and analytics (“Navidrome Wrapped” style reports).
Note: For music that was added before version 0.59.0, the scrobble history will start from the moment you upgrade. The total count of scrobbles per song may not match the song’s playcount for tracks that were already in your library before the upgrade.
2.6 - Plugins
Navidrome supports a plugin system that allows you to extend its functionality with community-developed extensions. Plugins run in a secure WebAssembly sandbox, providing isolation from the main application while enabling powerful customizations.
Plugins are developed by the community. While they run in a secure sandbox, you should always review a plugin’s documentation and source code before installation.
What Plugins Can Do
Plugins can extend Navidrome in several ways:
- Metadata Agents: Fetch artist biographies, album information, and images from external sources
- Scrobblers: Send your listening history to external services beyond the built-in Last.fm and ListenBrainz support
- Scheduled Tasks: Run periodic background tasks
- Event Handlers: React to events like playback or websocket events
Each plugin declares which capabilities it provides, and you can enable only the plugins you need.
Finding Plugins
Community-developed plugins can be found on GitHub using the navidrome-plugin topic.
When evaluating a plugin, consider:
- Repository activity: Check when the plugin was last updated
- Documentation: Look for clear installation and configuration instructions
- Issues and discussions: Review any reported problems or user feedback
- Source code: Plugins are open source, so you can review the code before installing
Unless otherwise stated, plugins are not developed or maintained by the Navidrome team. Install plugins only from sources you trust, and review the plugin’s permissions and documentation carefully.
Installing Plugins
Download the plugin: Go to the plugin’s GitHub repository and download the
.ndpfile from the Releases page.Place in plugins folder: Copy the
.ndpfile to your plugins directory:- Default location:
<DataFolder>/plugins - Custom location: Set
Plugins.Folderin your configuration
- Default location:
Rescan for plugins: Click the “Rescan” button in the Plugins section of the web UI, or if you have
Plugins.AutoReload = trueconfigured, the plugin will be detected automatically.Enable the plugin: Go to the Navidrome web UI, navigate to the Plugins section in the admin area, and enable the plugin.
Configure the plugin: Some plugins require additional configuration. Check the plugin’s documentation for required settings.
Prefer the command line? Rescanning, enabling, disabling, and configuring plugins can also be done from the CLI. See the plugin command reference.
Server Configuration
The following configuration options control the plugin system:
Example Configuration
[Plugins]
Enabled = true
Folder = "/path/to/plugins"    # Optional: custom plugins folder
AutoReload = true              # Useful during development/testing
LogLevel = "debug"             # Enable detailed plugin logging
CacheSize = "200MB"            # WASM compilation cache size
Or using environment variables (useful for Docker):
ND_PLUGINS_ENABLED=true
ND_PLUGINS_FOLDER=/data/plugins
ND_PLUGINS_AUTORELOAD=true
ND_PLUGINS_LOGLEVEL=debug
Managing Plugins in the Web UI
Once plugins are installed, you manage them through the Navidrome web interface:
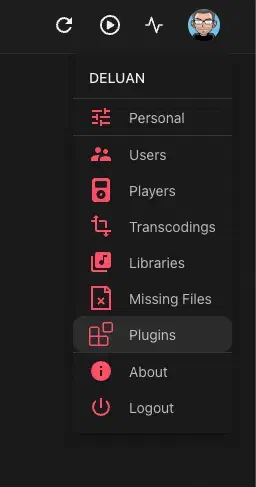
Viewing Installed Plugins
Navigate to the Plugins section in the admin area to see all installed plugins. Each plugin shows its name, description, version, and current status.
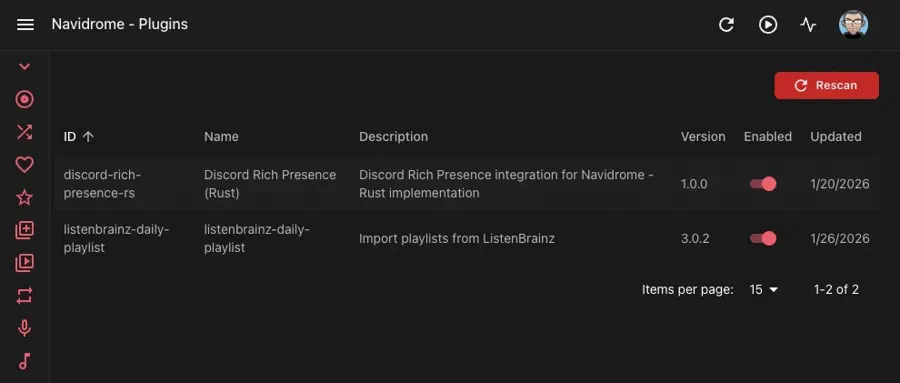
Enabling and Disabling Plugins
Toggle individual plugins on or off. Disabled plugins remain installed but won’t run.
Configuring Plugin Settings
Many plugins have configurable options. Click on a plugin to view and modify its settings. The available options depend on what the plugin supports - check the plugin’s documentation for details on each setting.
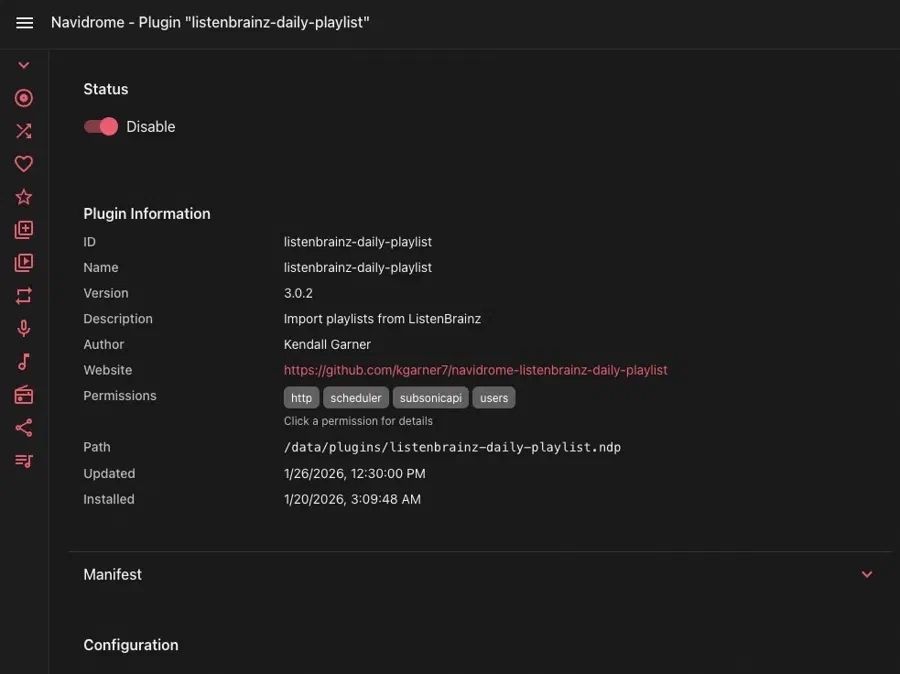
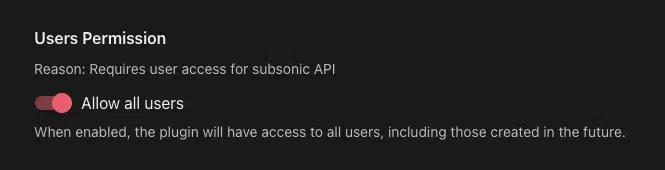
User Access
Some plugins are user-scoped, meaning they operate on a per-user basis (like scrobblers). For these plugins, you need to configure which users have access:
- All users: Grant access to every user
- Specific users: Select individual users who can use the plugin
Library Access
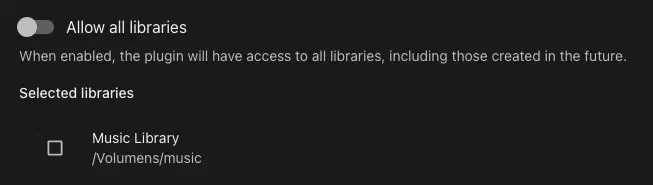
Plugins that interact with your music library may need library access configured:
- All libraries: Grant access to all libraries
- Specific libraries: Select which libraries the plugin can access
Security
WebAssembly Sandbox
All plugins run inside a WebAssembly (WASM) sandbox provided by the Extism runtime. This means:
- Plugins cannot directly access your filesystem (except explicitly granted library paths)
- Network access is restricted to hosts declared in the plugin’s manifest
- Plugins are isolated from each other and from Navidrome’s internal systems
Permission System
Each plugin declares the permissions it needs in its manifest:
- HTTP access: Which external hosts the plugin can contact
- Storage: Whether the plugin can store persistent data
- Library access: Whether the plugin needs to read your music files
- User access: Whether the plugin operates on a per-user basis
Review these permissions before enabling a plugin to understand what it can access.
Network Access to Local Services
A plugin can only open HTTP and WebSocket connections to the hosts listed in its manifest. Starting with version 0.64.0,
Navidrome checks the IP address when the connection opens, not only the host name. A host name in the manifest, like
api.example.com, never allows a connection to a private, loopback or link-local address, even if that name resolves
to one. This blocks a plugin from reaching your local network through DNS tricks or redirects.
To reach a service on your local network, the plugin manifest must list its IP address or a CIDR range, like
192.168.1.50 or 192.168.0.0/16, or allow all hosts with "*". Plugins that let you type the service address in
their settings, like AudioMuse-AI, usually use "*".
If a plugin worked before 0.64.0 and now cannot reach a service on your network, ask its author to update the manifest.
Best Practices
- Only install plugins from trusted sources
- Review the plugin’s source code if you have concerns
- Start with plugins disabled and enable them one at a time
- Monitor your logs after enabling new plugins
- Keep plugins updated to get security fixes
Troubleshooting
Plugin Not Appearing
- Verify the
.ndpfile is in the correct plugins folder - Check that
Plugins.Enabled = truein your configuration - Click the “Rescan” button in the Plugins section to detect new plugins
- Check logs for any errors during plugin discovery
Plugin Won’t Enable
- Check the Navidrome logs for error messages
- Verify all required permissions are configured (users, libraries)
- Ensure the plugin’s configuration requirements are met
- Try setting
Plugins.LogLevel = "debug"for more detailed logs - If the logs show
HTTP request ... is not allowed, the plugin uses an HTTP call that Navidrome 0.64.0 removed. Update the plugin, or ask its author for a version built with the current plugin SDK
Configuration Issues
- Refer to the plugin’s documentation for required settings
- Check that configuration values match the expected format
- Look for validation errors in the logs
Checking Logs
Enable debug logging for plugins to troubleshoot issues:
[Plugins]
LogLevel = "debug" # or "trace" for more verbosity
Plugin-related log messages will contain plugin=<plugin-name> in them, making it easy to filter and identify issues.
2.7 - Jellyfin API (Experimental)
Starting with version 0.64.0, Navidrome can answer a subset of the Jellyfin API. Music apps built for Jellyfin can connect to Navidrome and play your library. You do not need a Jellyfin server.
This API is new, and some clients may hit requests that Navidrome does not answer yet. It covers what a music client needs. Video, live TV and the Jellyfin admin dashboard are not part of it. Please report problems in GitHub issues.
Enabling the API
The Jellyfin API is off by default. Turn it on in your configuration file:
Jellyfin.Enabled = true
Or with an environment variable:
ND_JELLYFIN_ENABLED=true
Restart Navidrome. The API is now at the /jellyfin path of your server, for example http://192.168.1.10:4533/jellyfin.
If you set a BaseURL, the path goes after it: https://example.com/music/jellyfin.
Connecting a client
We test the API with Finamp, Jellify and Feishin. Other Jellyfin music clients may work too.
- In the client, add a new server.
- Enter the server address with
/jellyfinat the end, for examplehttp://192.168.1.10:4533/jellyfin. - Log in with your Navidrome username and password.
Every client device that connects shows up as a player in Settings > Players. If you set a transcoding format on that player, Navidrome applies it to the Jellyfin streams too. Downloads always send the original file.
Finding the server on your network
Some clients can find Jellyfin servers on your local network, so you do not have to type the address. Navidrome can answer these searches. This is off by default, because a real Jellyfin server on the same machine uses the same port. Turn it on with:
Jellyfin.AutoDiscovery = true
Navidrome then listens on UDP port 7359. If another program already uses that port, Navidrome logs a warning and keeps running without discovery.
The client gets the address from your BaseURL, if it has a host. If not, Navidrome sends its own IP address and
Port. If Navidrome listens only on one IP address (Address) and clients cannot reach that IP, set BaseURL to the
address clients should use.
Docker
Clients find the server with a broadcast message. On Linux, Docker does not send broadcast messages to a container in the default (bridge) network mode, even if you publish port 7359. You must use host networking:
services:
  navidrome:
    image: deluan/navidrome:latest
    network_mode: host
    environment:
      ND_JELLYFIN_ENABLED: "true"
      ND_JELLYFIN_AUTODISCOVERY: "true"
    # ...keep your user, volumes and other settings
With the docker command line tool, use --network host.
With host networking, Docker ignores the ports section. Navidrome uses the ports of the host directly: 4533 for the
web UI and API, and UDP 7359 for discovery. Navidrome also sees the real IP of the host, so you do not need to set
BaseURL for discovery.
If you cannot use host networking, turn auto-discovery off and type the server address in the client.
Keep UDP port 7359 on your local network. Do not forward it from the internet.
Quick Connect
Quick Connect lets you log in a new device without typing your password on it. It is on by default.
- In the client, choose Quick Connect. The client shows a 6-digit code.
- In the Navidrome web UI, open the user menu (top right) and click Quick Connect. You can also use a Jellyfin client where you are already logged in.
- Type the code. Navidrome shows the app and the device that asked for it. Check that you know them, then approve.
- The client logs in with your user.
A code expires after 10 minutes, or when Navidrome restarts. Each code logs in one time only. Approving codes counts against the same login rate limit as a normal login.
To turn Quick Connect off:
Jellyfin.QuickConnect = false
Login screen user list
Some clients show a list of users on the login screen, so you tap a name and type only the password. Anyone who can reach your server can see this list without logging in. For that reason Navidrome shows no users by default. To show some, list their usernames:
Jellyfin.ExposedPublicUsers = "alice, bob"
Sessions
A Jellyfin login token does not expire, same as in Jellyfin. To log a user out of all their Jellyfin clients, change that user’s password. Login attempts count against the same login rate limit as the web UI.
What works
- Libraries. Each Navidrome library the user can access shows up as its own music library in the client.
- Browsing and search. Artists, albums, songs, genres and playlists. Clients can filter by year and record label.
- Favorites and ratings for songs, albums, artists and playlists.
- Playlists. Create, rename, reorder, add and remove tracks, change the cover, and delete. Only the owner can change a playlist.
- Streaming, with transcoding and ReplayGain.
- Lyrics, from the same sources as the web UI (see
LyricsPriority). - Playback reports. Plays count in Navidrome and scrobble to Last.fm, ListenBrainz and scrobbler plugins.
- Instant Mix from a song, album, playlist or genre.
- Sonic similarity. With a sonic similarity plugin such as AudioMuse-AI, clients get similar tracks and song-to-song paths. Navidrome also answers the AudioMuse-AI endpoints that some clients, like Symfonium, call when they connect as a Jellyfin client.
Configuration options
Jellyfin.Enabled(ND_JELLYFIN_ENABLED, defaultfalse). Turns the Jellyfin API on.Jellyfin.ServerName(ND_JELLYFIN_SERVERNAME, default"Navidrome <version>"). The server name that clients show.Jellyfin.ExposedPublicUsers(ND_JELLYFIN_EXPOSEDPUBLICUSERS, default empty). Comma-separated usernames to show on the client login screen. See above.Jellyfin.AutoDiscovery(ND_JELLYFIN_AUTODISCOVERY, defaultfalse). Answers Jellyfin client searches on the local network (UDP port 7359). See above.Jellyfin.QuickConnect(ND_JELLYFIN_QUICKCONNECT, defaulttrue). Lets users log in new devices with a 6-digit code. See above.Jellyfin.MaxConcurrentStreams(ND_JELLYFIN_MAXCONCURRENTSTREAMS, default half the database connection pool, at least2). How many large list responses Navidrome sends at the same time. Each one holds a database connection until it ends, and extra requests wait. The default leaves the other half of the connections for the scanner, scrobbles and the web UI. You rarely need to change it.
Known limitations
- The genre list shows genres from all libraries, not only the ones the user can access.
- While artwork loads, clients show a placeholder in one solid color, not a blurred copy of the cover.
- The client’s live connection only keeps the session open. Navidrome does not push events, like library changes, over it.
Troubleshooting
If a client fails on some screen, it may be calling an endpoint that Navidrome does not answer yet. Set
LogLevel = "debug" and look for log lines with Jellyfin API: unhandled route. Each one shows the method and path the
client asked for. Add those lines when you open an issue.
3 - Library Management
3.1 - Tagging Guidelines
Why Proper Tagging is Important
Navidrome organizes your music library entirely based on the metadata tags in your audio files. Unlike some music players, it does not use folder names or file names to group tracks (why?). This means that having clean and consistent tags is crucial for your music to display correctly. Proper tagging ensures that albums aren’t split up, artists are listed correctly, and you can easily browse or search for your music in Navidrome.
Good tagging practices not only make your music library more enjoyable to use, but also make it future-proof: If you ever switch to a different music player/server, or want to use a different music management tool, having well-tagged files will make the transition smoother.
Tagging Basics and Best Practices
Consistent and Complete Metadata
- Fill in essential tags for every song: At minimum, each music file should have the Title (song name), Artist, Album, Album Artist, and Track Number. Optionally include Genre, Year/Date and Disc Number (for multi-disc albums). Consistent use of these fields allows Navidrome to accurately group and identify your music.
- Be consistent with naming: Use the same spelling and punctuation for artist and album names across all tracks. For example, decide whether an artist is “AC/DC” or “ACDC”, “The Beatles” or “Beatles”, and stick to one. Consistent naming prevents duplicate entries for what is actually the same artist or album.
- Avoid unknown or blank tags: Make sure important fields aren’t left blank or set to generic values like “Unknown Artist”. Tracks with missing tags may be hard to find or get grouped incorrectly in Navidrome.
Key Metadata Fields and Usage
Each tag field has a specific purpose. Here are the important ones and how to use them:
- Title: The name of the song. (Example: “Imagine”)
- Artist: The performing artist(s) for the song. (Example: “John Lennon”) If a track has multiple artists, include all of them here (see Handling Multiple Artists below).
- Album: The name of the album the song belongs to. All tracks in the same album should have exactly the same Album tag.
- Album Artist: The primary artist for the album. This is usually the album’s main artist or group, or “Various Artists” for a compilation. Every track in an album should share the same Album Artist so Navidrome knows they belong to one album. For example, on a soundtrack or compilation album, set Album Artist to “Various Artists”. If a track has multiple album artists (like collaboration albums), include all of them here (see Handling Multiple Artists below).
- Track Number: The song’s track number on the album. This can be just the track number (like “5”) or a fraction like “5/12” to indicate track 5 of 12. Use leading zeros if your tag editor requires (e.g., “05”). Proper track numbers help Navidrome sort songs in the album’s order.
- Disc Number: If an album spans multiple discs, use this to differentiate disc 1, disc 2, etc. For example, “1/2” for Disc 1 of 2. Ensure all tracks that are on the same disc have the same disc number, and all tracks share the Album name. Navidrome will group multi-disc albums together and may show disc divisions.
- Year/Date: The date associated with the track. While not strictly required, it is useful information and many
views or clients use it. All date fields accept
YYYY,YYYY-MM, orYYYY-MM-DD. Navidrome recognizes several distinct date tags, each with its own meaning:DATE: The recording date of the track (stored internally asrecordingdate; ID3v2.4TDRC).YEAR: Treated as the release date (it is an alias ofreleasedate). Note that a plainYEARtag maps to the release date, not the recording date.RELEASEDATE: The release date of the album (same field asYEAR).ORIGINALDATE/ORIGINALYEAR: The original release date of the album (stored internally asoriginaldate).
- Genre: The genre of the music (e.g., Rock, Jazz). This is a multi-valued field and can help when browsing or creating genre-based playlists.
- Compilation (Part of a Compilation): A special flag for various-artists albums. For a “Various Artists”
compilation album, set this tag on all its tracks so Navidrome treats them as one album. In MP3/ID3 tagging,
this is often labeled “Part of a Compilation” (technically the
TCMPframe) which should be set to “1” (true). In FLAC/Vorbis tags, use a tag namedCOMPILATIONwith value “1”. Not all editors show this field explicitly, but many (like iTunes or Picard) will mark an album as a compilation for you if you specify it. If you can’t find this tag, simply ensuring Album Artist is “Various Artists” usually works, but using the compilation tag is a best practice.
Here’s a complete list of tags that Navidrome import and use by default. For adding custom tags, see the Custom Tags page.
File and Folder Naming (Optional but Helpful)
Navidrome ignores actual file names and folder structure when organizing music (it relies on tags), but a clear naming scheme is still recommended for your own sanity and compatibility with other tools:
- Use a folder structure like
Artist/Album/for your files, and file names like"01 - Song Title.mp3". For example:Music/Queen/A Night at the Opera/01 - Death on Two Legs.mp3. This isn’t required for Navidrome, but keeping your files organized logically makes management easier and reduces confusion. - Keep naming conventions consistent. For instance, decide on a pattern for file names
(
Track - TitleorArtist - Title, etc.) and apply it across your library. Similarly, maintain consistent folder naming (avoid having one folder called “Greatest Hits” and another called “GreatestHits” for example). - If you use a tool like Picard or MediaMonkey, you can often configure it to rename and sort files into folders based on tags automatically. This can help enforce consistency after you’ve tagged everything.
- Remember, if you do rename or move files, Navidrome will update on the next scan (since it scans the library folder). Just make sure the tags inside the files are correct, because that’s still what Navidrome will use to display your music.
Album Art Handling
Including album cover art enhances the Navidrome experience. Here’s how to manage artwork:
- Embed cover art in audio files: Embedding the album cover in each music file’s tags is a reliable way to ensure Navidrome finds it. Most tagging tools allow you to add an image (JPEG/PNG) to the file’s metadata. Navidrome will display embedded cover art when browsing albums or playing songs.
- Use folder images: Additionally, save the album cover image as a file in the album’s folder (common names are
cover.jpg,folder.jpg, orfront.png). By default, Navidrome looks for images with those names. If it finds one, it will use it for the album cover. This is useful if you prefer not to embed large images in every file, or to provide artwork for players that look for folder images. - Image quality: Use reasonably sized images. 500x500 to 1000x1000 pixels is usually plenty. Extremely large images (e.g., 3000x3000) will work, but keep in mind they take more space and can make the UI sluggish. Navidrome will cache thumbnails for performance, but it’s good practice not to go overboard.
- Consistency: Ensure all tracks of an album have the same album art. If you embed art, embed the same image in each track of that album (most tools can do this in batch). If you’re using a folder image, one image in the folder is enough for all songs in that album.
- Handling missing art: If you don’t have art for an album, Navidrome might try to fetch it from the internet (Last.fm or Apple Music) if enabled, but it’s best to supply your own for completeness and offline use. Taking the time to add cover art makes browsing much nicer.
Organizing your music in a logical and consistent folder structure can also help Navidrome find your artwork files. Check the Artwork Resolution page for details.
Handling Multiple Artists and Collaborations
When tagging tracks with multiple artists or collaborators, it’s important to clearly and consistently represent each
artist. Navidrome supports both singular (ARTIST and ALBUMARTIST) and plural (ARTISTS and ALBUMARTISTS) tags.
However, multi-valued tags (ARTISTS and ALBUMARTISTS) are preferred, as they allow Navidrome to more accurately
identify individual artists and improve library organization.
Recommended Approach: Multi-Valued Tags
- Preferred:
- Use multiple
ARTISTStags to explicitly specify each artist individually. - Example (FLAC/Vorbis comments):
ARTISTS=Alice ARTISTS=Bob - Navidrome clearly distinguishes each artist.
- Facilitates better searching, sorting, and browsing.
- Use multiple
Singular vs. Plural Tags
Singular (
ARTIST): Typically a single text entry (e.g., “Artist1 feat. Artist2”).- Navidrome will attempt to parse this field into multiple artists if one of the default separators is
found:
" / "," feat. "," feat "," ft. "," ft ", or"; ". Matching is case-insensitive (so" FEAT. "works too), and only applies to single-valued tags — multi-valued tags are never split. - However, relying on separators is less precise than multi-valued tags.
- Navidrome will attempt to parse this field into multiple artists if one of the default separators is
found:
Plural (
ARTISTS): Explicitly multi-valued tag allowing multiple distinct entries.- Each artist can have individual associated metadata (like MusicBrainz IDs).
- Preferred method, as it avoids ambiguity and parsing errors.
Navidrome treats the display name (the text shown in the UI) and the individual artists (the entries you can browse and click) as two separate things:
- If you have both singular and plural tags, Navidrome uses the singular one (
ARTISTorALBUMARTIST) only as the display name, and takes the individual artists from the plural tag (ARTISTSorALBUMARTISTS). In this case the singular tag is not split — it is shown verbatim. - If you provide only a plural tag (no singular one), the display name is built automatically by joining its
values with
" • "(e.g.Alice • Bob). This joiner is configurable via theScanner.ArtistJoineroption.
This is why the ideal example below sets both: ARTIST controls how the name reads (Alice feat. Bob), while
ARTISTS preserves Alice and Bob as distinct, individually-linkable artists.
If you use Picard, check the scripts available in the Picard specific tips below. These scripts can help set up multi-valued artist tags automatically.
Examples:
Ideal tagging (FLAC/Vorbis Comments example):
TITLE=Sunshine
ARTIST=Alice feat. Bob
ARTISTS=Alice
ARTISTS=Bob
ALBUM=Brighter Days
ALBUMARTIST=Alice
TRACKNUMBER=7
Less ideal (single-valued ARTIST):
TITLE=Sunshine
ARTIST=Alice feat. Bob
ALBUM=Brighter Days
ALBUMARTIST=Alice
In the ideal example, Navidrome clearly identifies each artist separately. In the less ideal example, Navidrome may
split the artist names based on the default separators (like " feat. ", " / ", or "; "), but it’s less accurate.
Note that the display name still shows the full ARTIST string (Alice feat. Bob); the split only affects the
individual artists.
Relying on separators can cause issues with artist names that legitimately contain a separator character. This is
usually not a problem with the default artist separators: the slash separator is " / " (with surrounding spaces)
rather than a bare /, so a name like AC/DC is left intact. (The "; " separator only requires a trailing space,
so Foo; Bar would still be split.) It becomes a problem if you customize the separator list to include a bare "/"
(without spaces), or in role tags (COMPOSER, PERFORMER, …), whose default separators "/" and ";" have no
surrounding spaces — there, AC/DC would be split into AC and DC.
If you need to keep such names intact, you have two options:
- Prefer multi-valued tags (
ARTISTSandALBUMARTISTS), which are never split. - Add the affected names to the
Scanner.ArtistSplitExceptionsconfiguration option (e.g.AC/DC), so Navidrome never splits them, regardless of the configured separators.
If multi-valued tags are not supported by your tag editor, you can, as a last resort, use a common separator
(like " / " or "; ") to combine values in a single tag. Navidrome will attempt to split them based on the separator.
Other role tags (COMPOSER, LYRICIST, ARRANGER, ENGINEER, ..) do not have a plural version. For those, you can add the singular
tag multiple times (for Vorbis/FLAC) or make it multi-valued (for ID3v2.4). Navidrome will recognize and display them
correctly. For example, in a FLAC file, you could have:
COMPOSER: Alice
COMPOSER: Bob
In this case, Navidrome will treat both Alice and Bob as composers for the track.
Single-valued role tags are also split, but on a different set of separators than artist tags: the defaults are "/"
and ";" (with no surrounding spaces required). As with artists, multi-valued role tags are never split.
Multi-Valued Tags Support by Format
- Vorbis/FLAC, Opus: Multi-valued tags are fully supported and straightforward.
- ID3v2.4 (MP3): Supports true multi-valued tags, similar to Vorbis.
- ID3v2.3 (Older MP3 format): Does not officially support multiple artists. Instead, use a consistent
separator (ex:
"; ") if you must combine artists into one tag, though this approach is less ideal. Avoid using this format if possible and prefer the newer ID3v2.4 - Other tag formats (APE, MP4, WMA): Check your tag editor’s documentation for multi-valued tag support. Most modern tools can handle multi-valued tags in any format.
Best Practices:
- Always prefer multi-valued tags (
ARTISTSandALBUMARTISTS) when supported by your tagging software. - If multi-valued tags are unavailable, use one of the default separators consistently (
" / "," feat. "," ft. ", or"; "). - Maintain consistency throughout your library to avoid duplicate or misidentified artist entries.
- Always verify how your tags appear in Navidrome and adjust tagging accordingly.
Proper use of multi-valued tags significantly enhances the accuracy and enjoyment of your music library in Navidrome.
Example: For a song “Sunshine” by Alice featuring Bob on the album Brighter Days (which is primarily Alice’s album):
In a FLAC (Vorbis comments) file, the recommended tagging is:
TITLE=Sunshine
ARTIST=Alice feat. Bob
ARTISTS=Alice
ARTISTS=Bob
ALBUM=Brighter Days
ALBUMARTIST=Alice
TRACKNUMBER=7
In an MP3 using the older ID3v2.3 format (which lacks multi-valued tags), the closest equivalent is:
Title: Sunshine
Artist: Alice / Bob
Album: Brighter Days
Album Artist: Alice
Track: 7
In the FLAC example,
ARTISTgives the display name (Alice feat. Bob) while the twoARTISTSfields preserveAliceandBobas distinct, individually-linkable artists. In the ID3v2.3 example, the two names are combined in a singleARTISTfield with a" / "separator; Navidrome will split them intoAliceandBoband showAlice / Bobas the display name. Both work, but the FLAC method is more explicit and accurate.Note: if you instead put two separate
ARTISTvalues (AliceandBob) with noARTISTStag, the display name becomesAlice • Bob— which is why theARTIST+ARTISTScombination above is preferred.
Differences in Tag Formats (ID3, Vorbis, APE, etc.)
Different audio file formats use different tagging standards. You don’t need to know all the technical details, but it’s useful to understand the basics so you can tag consistently:
- MP3 (ID3 tags): MP3 files use ID3 tags (versions 2.3 and 2.4 are common). Most tagging tools default to ID3v2.3
for compatibility with older players. ID3v2.4 is a newer standard that supports features like multiple values in one
field. Navidrome can read both. If available, use ID3v2.4 for better multi-artist and multi-genre support. Key ID3
tag frames include:
- TIT2 (Title)
- TPE1 (Artist)
- TALB (Album)
- TPE2 (Album Artist, in practice)
- TRCK (Track number)
- TPOS (Disc number, called “Part of a set”)
- TYER/TDRC (Year/Date)
- TCON (Genre)
- TCMP (Compilation flag)
You normally don’t need to remember these codes; tag editors handle them for you. Just be aware that some older software might not show an “Album Artist” field for MP3 because ID3v2.3 didn’t officially have it (those tools might be writing it as a custom tag or using TPE2).
- FLAC, Ogg Vorbis, Opus (Vorbis comments): These formats use Vorbis Comments for tags. Vorbis comments are simple
“FIELD=Value” pairs and are very flexible. Common field names are in all caps by convention: e.g.,
TITLE,ARTIST,ALBUM,ALBUMARTIST,TRACKNUMBER,DISCNUMBER,DATE(year),GENRE. You can have multiple instances of a field to represent multiple values (e.g., twoARTISTlines). Vorbis comments don’t have fixed frames like ID3; you can even add non-standard fields (Picard, for example, can add aMUSICBRAINZ_ALBUMIDtag for its own use). The main thing is to use standard field names so that Navidrome (and other players) know what to do with them. Navidrome will read these tags and support multi-valued fields natively. - APE tags: APE is another tagging format, used primarily in Monkey’s Audio (.ape files) and sometimes WavPack or Musepack. APE tags also consist of key-value pairs (similar to Vorbis comments). Field names might be similar (often not all-caps; could be “Artist”, “Album”, etc.). If you’re dealing with APE files, just ensure your tag editor writes the standard fields. APE tags, like Vorbis, allow multiple entries of the same field name as well. One caveat: Some MP3 files might have APE tags attached (left over from old software or for ReplayGain data). It’s generally best to avoid having both ID3 and APE on the same MP3, as it can confuse some programs. If you encounter this, use your tag tool to remove or synchronize one of them (Navidrome reads ID3 by default for MP3).
- MP4/M4A (AAC files): These use the MP4 container’s metadata format (often called MP4 tags or atoms).
You’ll see tag codes like
©ART(Artist),©alb(Album),aART(Album Artist),trkn(track number), etc. Most tag editors (Picard, iTunes, etc.) let you edit these without worrying about the codes. Navidrome fully supports M4A/MP4 metadata, so just make sure to fill in the equivalent fields (including Album Artist and track numbers) and you’re set. - WMA (Windows Media): Uses ASF tags. If you have WMA files, fill in the standard fields (Title, Artist, Album, Album Artist, Track number, Year, Genre) in your tag editor. Navidrome will read those as well.
- Other formats: Navidrome supports many formats (MP3, FLAC, Ogg, Opus, AAC, WMA, APE, etc.). The best practice is to use a good tagging tool which provides a unified interface for editing tags, regardless of the underlying format. The tool will handle mapping your input to the correct tag type for that file. As long as you fill out the tags consistently in the software, you don’t need to manually worry about the format differences — just be aware when switching formats that the same concept might have a different technical name under the hood.
Tagging Tools and Workflow
Because Navidrome is read-only with respect to your files’ metadata, you’ll need to use external tools to edit tags. Here are some recommendations and tips on workflow:
- Use a tag editor or music manager: Pick a tool that fits your comfort level. For beginners, a user-friendly
tag editor with a GUI is ideal. Some popular options:
- MusicBrainz Picard – Free, open source (Windows/Mac/Linux). Great for auto-tagging files by matching them to the huge MusicBrainz database. Picard can lookup albums by track info or acoustic fingerprint, fill in all tags (including Album Artist and album art), and even rename/move files based on a template. It’s a powerful tool that can greatly speed up tagging and ensure consistency.
- Mp3tag – Free (Windows, with a Mac version available). Excellent for editing tags in bulk. You can manually edit multiple files, copy/paste tag fields, or use online database lookups. Mp3tag has a simple interface but lots of power under the hood.
- beets – Free, command-line (cross-platform). Very powerful for auto-organizing and tagging using MusicBrainz data (or Discogs, using plugins), but it requires comfort with terminal commands. Great if you want automation and don’t mind writing a configuration file.
- Other options: Kid3 (GUI, multi-platform), MusicBee (Windows, a player with strong tagging features), MediaMonkey (Windows), foobar2000 (Windows, has tagging capabilities), or even iTunes/Apple Music for editing tags of files. All of these can write tags that Navidrome will read.
- Workflow tips:
Backup first: Before mass editing tags, especially with auto-tagging tools, back up your music files. Mistakes can happen, and you might not like the results of an automated tag rewrite.
Work album by album (or artist by artist): Load a manageable chunk of files in your tag editor (for example, one album at a time). This ensures all tracks in an album get the same Album and Album Artist, etc., and it’s easier to spot and correct inconsistencies.
Use online databases: Leverage tools like Picard to fetch tags and album art from databases. This can fill in missing info and standardize spelling (for instance, ensuring
" feat. "is used consistently for “featuring”).Review and edit: Even with Picard or other auto-taggers, double-check the tags before saving. Make sure the album and artist names match your preferred format. Sometimes database entries have variations (like an album title including a subtitle or different punctuation).
Save (write) tags: Apply the changes and save the tags to the files. If you’re renaming/moving files as part of this (many tools can do so based on tags), ensure the files end up in the correct location (your Navidrome music library folder).
Caution: If you are retagging files that are already in Navidrome, avoid retagging and moving in one step, as this could cause Navidrome to lose track of the files. Instead, retag and save, rescan, then move the files and rescan again. See details here.
Rescan in Navidrome: Navidrome usually auto-detects changes, but you can trigger a library rescan or restart the server to be sure. Once scanned, check in the Navidrome interface that everything appears as expected. You can check the tags of any file in Navidrome by looking at the “Get Info”->“Raw Tags” tab:
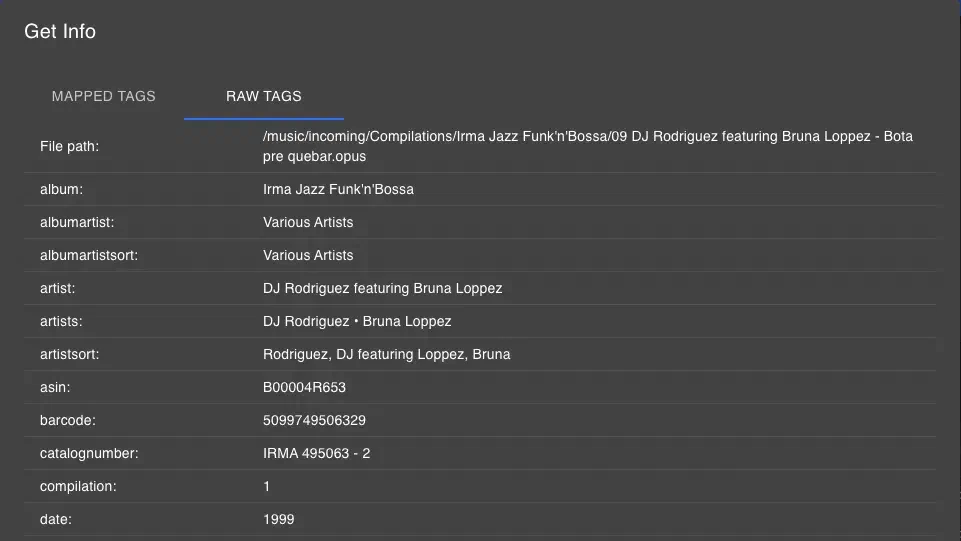
Iterate as needed: If something looks wrong in Navidrome (e.g., an album is split into two entries, or is missing artwork), go back to your tag editor to fix those tags and then re-save and rescan. Common fixes include making Album Artist and Release Dates consistent, correcting typos or extra spaces, or adding missing compilation flags.
Picard specific tips
- In Picard’s settings, you can enable options to embed cover art and save a cover image file. Doing both is ideal (embed for portability, and cover.jpg for any software that looks for it). Picard also allows scripting for file naming — handy if you want to auto-organize your folders as mentioned.
- Because Navidrome matches artists based on their name, enable the “Use standardized artist names” option in Picard (Preferences -> Metadata). This helps ensure consistent naming (e.g., always using “Osees” instead of variations like “Thee Oh Sees”, “Oh Sees”, etc.).
- For a better integration with Navidrome, you can add the following scripts to your Picard configuration, to add
extra tags that can help Navidrome organize your library:
# Multiple artists
$setmulti(albumartists,%_albumartists%)
$setmulti(albumartistssort,%_albumartists_sort%)
$setmulti(artistssort,%_artists_sort%)
# Album Version $set(musicbrainz_albumcomment,%_releasecomment%) $if(%_recordingcomment%, $set(subtitle,%_recordingcomment%))# Release and Original dates $set(releasedate,%date%) $set(date,%_recording_firstreleasedate%) $set(originaldate,%originaldate%) $delete(originalyear)
Final Tips and Recap
- Consistency is key: Uniform tags result in a well-organized Navidrome library. If you notice duplicates or split albums, it’s almost always a tagging inconsistency — fix the tags and the issue will resolve.
- Leverage Album Artist and Compilation tags: These tags are your friends for ensuring albums stay together. Always set Album Artist (even if it’s the same as Artist for a solo album), and use “Various Artists” + the compilation flag for multi-artist albums.
- Keep tags tidy: Little details like extra spaces at the end of names or inconsistent capitalization can lead to multiple entries (e.g., “The Beatles” vs “The Beatles “). Try to keep things tidy. Many tag editors can batch-clean or case-correct tags.
- Continuous tagging: Make tagging part of your routine. When you add new music, tag it properly before (or immediately after) adding it to Navidrome. It’s easier to keep a library organized from the start than to fix a messy library later. Your future self will thank you!
- Use Navidrome’s strengths: Navidrome reads a lot of tags (including comments, lyrics, grouping, mood, etc.). If you want to enrich your library, consider adding lyrics or other info via your editor — Navidrome will display lyrics if present, for example, and has filters for various tags, like Genre, Grouping, Mood, Album Type, etc.
- Enjoy your music: A bit of effort in tagging goes a long way. Once everything is tagged well, Navidrome will present a beautiful, browsable collection. You’ll spend less time searching for songs or fixing metadata and more time listening. Happy tagging!
3.2 - Artwork location resolution
Artists
Fetching images for artists is controlled by the ArtistArtPriority config option.
This is a comma-separated list of places to look for artist images.
The default is artist.*, album/artist.*, external, meaning:
- First try to find an
artist.*image in the artist folder(s) - If not found, try to find an
artist.*image in one of the album folders for this artist - If not found, try to fetch it from an external service
- If not found, use the artist image placeholder (grey star image)
You can also configure a centralized folder for artist images using the ArtistImageFolder config option and adding image-folder to ArtistArtPriority. When configured, Navidrome will look for image files in that folder named after the artist’s MusicBrainz ID or name.
Albums
CoverArt fetching for albums is controlled by the CoverArtPriority config option.
This is a comma-separated list of places to look for album art images.
The default is cover.*, folder.*, front.*, embedded, external, meaning:
- First try to find a
cover.*,folder.*orfront.*image in the album folder(s) - If not found, try to read an embedded image from one of the mediafiles for that album
- If not found, try to fetch it from an external service (currently only Last.fm)
- If not found, use the cover placeholder (blue record image)
Disc Cover Art
Multi-disc albums can have disc-specific artwork. Navidrome uses the DiscArtPriority config option to find disc-level images.
The default is disc*.*, cd*.*, cover.*, folder.*, front.*, discsubtitle, embedded, meaning:
- First try to find a
disc*.*orcd*.*image in the disc’s folder - Then try
cover.*,folder.*, orfront.*in the disc’s folder - The special keyword
discsubtitlematches image files whose filenames equal the disc’s subtitle - Try to read an embedded image from one of the mediafiles for that disc
- If no disc-specific image is found, fall back to the album-level artwork
Example directory layout for a multi-disc album:
Music/
└── Artist - Album/
    ├── disc1/
    │   ├── disc1.jpg        ← matched by disc*.*
    │   ├── 01 - Track.flac
    │   └── 02 - Track.flac
    ├── disc2/
    │   ├── cd2.png          ← matched by cd*.*
    │   ├── 01 - Track.flac
    │   └── 02 - Track.flac
    └── cover.jpg            ← album-level fallback
Forcing the Album Artwork for All Discs
If you prefer every disc in a multi-disc album to display the album cover (instead of any disc-specific image or the embedded image of a track), set DiscArtPriority to an empty string:
DiscArtPriority = ""
With no disc-level sources to try, Navidrome skips straight to the album-level artwork fallback, so all discs share the same cover as the album. This is useful when your library has inconsistent or unwanted disc-specific images (e.g. embedded art that differs from the album cover) and you want a uniform look across discs.
MediaFiles
Some players (including Navidrome’s own WebUI) can display different cover art images for each track in an album. Navidrome resolves mediafile artwork in the following order:
- Try to read an embedded image from the mediafile itself
- For multi-disc albums, fall back to the disc-level artwork (see Disc Cover Art above)
- Fall back to the album cover art
MediaFile cover art can be slow in some systems and can be disabled by
setting EnableMediaFileCoverArt=false.
Playlists
Playlist artwork is resolved in the following order:
- Uploaded image: A custom image uploaded via the web UI (see Artwork Uploads below)
- Sidecar image: An image file with the same base name as the playlist file, placed alongside it
- M3U directive: An image URL specified via the
#EXTALBUMARTURLdirective inside the M3U file. To allow HTTP/HTTPS URLs, setEnableM3UExternalAlbumArttotruein your configuration. Local file paths are always accepted. - Tiled image: An auto-generated mosaic of up to 4 album covers from the playlist
- If none of the above are available, the album cover placeholder is used
Example of a playlist with a sidecar image:
Playlists/
├── My Playlist.m3u
└── My Playlist.jpg          ← sidecar image
Artwork Uploads
Navidrome allows uploading custom images for playlists, artists, and internet radio directly from the web UI. This is controlled by the EnableArtworkUpload config option (enabled by default). When disabled, only admin users can upload artwork.
Supported formats: JPEG, PNG, WebP, GIF
Maximum file size: 10 MB
Storage location: Uploaded images are stored in <DataFolder>/artwork/, organized by entity type (artist/, playlist/, radio/)
Playlist Cover Art
To upload a custom playlist cover, open the playlist in the Navidrome web UI and hover the mouse over the current artwork. You should see a camera icon where you can click to select the image to upload. Uploaded images take priority over all other playlist artwork sources.
Artist Images
Custom artist images can be uploaded via the web UI on the artist detail page. Follow the same process as the playlist cover art.
Internet Radio Images
You can also upload a custom image on the internet radio’s edit page. This image will be used as the station’s artwork instead of fetching its favicon (when available).
Image Format & Quality
By default, Navidrome encodes resized artwork as JPEG (or PNG, for PNG sources and square thumbnails). You can opt into WebP encoding for smaller images by enabling the EnableWebPEncoding config option (default: false), at the cost of more CPU when resizing. Note that some older clients may not be able to display WebP images.
The CoverArtQuality config option controls the encoding quality for resized JPEG and WebP output (default: 75). It does not apply to PNG.
Animated GIFs embedded in or associated with your music files are preserved during resize. They are converted to animated WebP using ffmpeg.
Troubleshooting
When artwork is wrong or missing, the navidrome artwork CLI commands
show what happened. artwork explain prints the priority chain recorded for one item. It shows which
candidate won, why the others lost, and whether a file was missing or present but unreadable.
artwork status shows the queue, how many items have no image, and whether artwork settings changed
since the last full reprocess.
Navidrome doesn’t retry missing artwork by itself. Changing an artwork setting doesn’t update artwork
that is already stored, either. navidrome artwork reprocess handles both. Use --source absent to
retry missing artwork, or --all to apply a setting change. For a single album or artist, admins can
use Refresh Metadata in its context menu.
3.3 - Missing Files
Overview
When using Navidrome, you may encounter missing tracks or albums in your library. When moving or renaming files, Navidrome may not be able to match the old versions of your files with the new ones when scanning your library. This can result in “ghost” (grayed out) tracks or albums in your library.
Only admins can see the missing tracks and albums in the library:
Missing files are not removed from the database on new scans to avoid inadvertently losing information like ratings, and play counts and references in playlists.
You can still get the missing tracks information, including path and when it went missing by clicking in the ? icon:
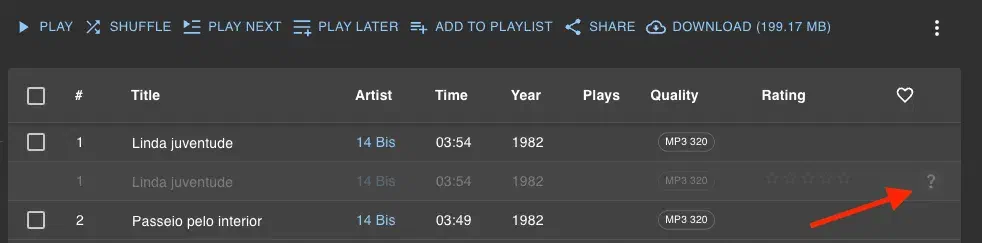
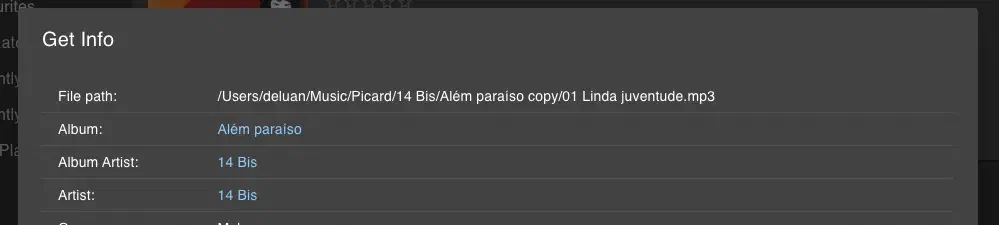
Note that this information is only available for admins.
Common Causes
The main reason this can happen is that the file paths in your music library have changed, and Navidrome was not able to match the new paths with the old ones. This can happen when you move or rename files AND change tags in the same operation.
To learn how Navidrome matches missing files and newly discovered ones, see the documentation on PIDs To avoid getting into this situation, it is recommended to move or rename files first, trigger a quick scan, and then update the tags.
Another common case is when you have a network drive that is not always available, or a removable drive that is not connected:
In these cases, Navidrome will mark the files as missing until the drive is available again.
Reconnecting a Missing File to its Replacement
If the scanner could not match an old file with its new path, you can remap the two by hand from the command line. This moves the play count, rating, starred status and bookmarks from the missing file onto the replacement, the same way the scanner does it automatically.
First list the missing files to get their paths:
navidrome missing list
Then remap a missing file onto the file that replaced it:
navidrome missing fix "Rock/Old Album/track01.mp3" "Rock/New Album/track01.mp3"
The replacement must already be scanned into the library. See
missing in the CLI reference for the other argument forms and
the JSON output option.
Automatically Purging Missing Files
Navidrome lets you control when missing files are automatically removed from the database using the Scanner.PurgeMissing option. This option accepts three possible values:
"never"(default): Just mark files, albums, and artists as missing (they remain in the database, preserving ratings, play counts, and playlist references)."always": Purge any missing files, albums, and artists from the database after every scan."full": Purge missing files, albums, and artists only after a full scan (not after quick/incremental scans).
To set this option, add to your config file:
Scanner.PurgeMissing = "always"
Or set the environment variable:
ND_SCANNER_PURGEMISSING=always
Warning: Purging missing files will permanently delete them from the database, including any associated ratings, play counts, and playlist entries.
How to permanently delete Missing Files
If you are sure that the missing files are not coming back, you can permanently delete them from the database.
Log in as an admin, click on the Settings meu, and click on the Missing Files option.
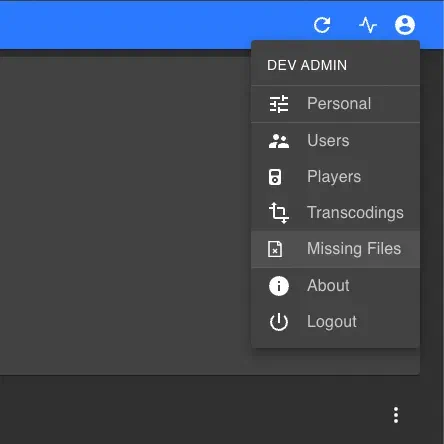
You will see a list of all missing files, with path, size and time they went missing. You will see options to export the list to a CSV file, or delete them from the database:
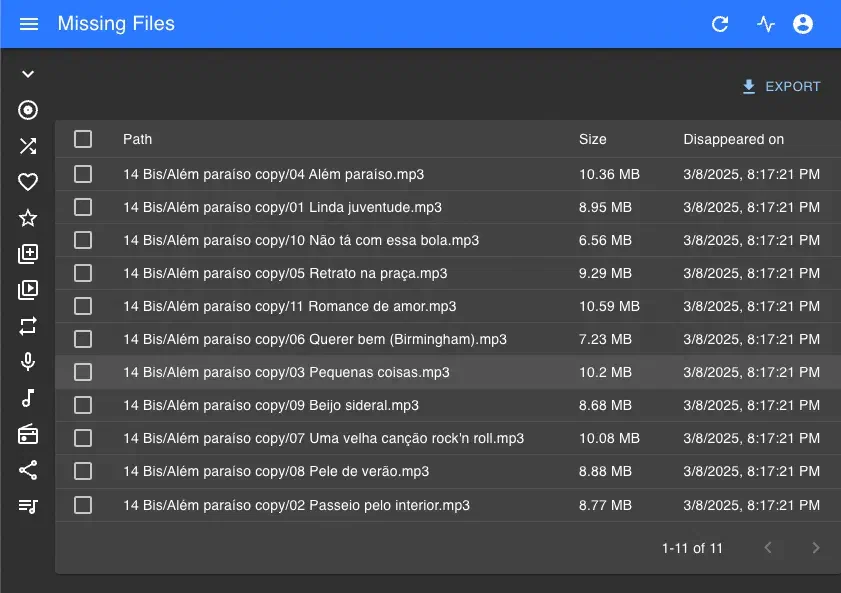
To delete permanently the files from the database, select the ones you want to remove and click on the Remove button.
3.4 - Exclude Content From Library
.ndignore to exclude content from being added to Navidrome’s libraryOverview
Navidrome allows the usage of a .ndignore file to exclude content from being added to Navidrome’s library. These files can be used in the following ways:
- A blank
.ndignorefile can be added to a directory, and as a result Navidrome will ignore that folder and its subfolders from being added to Navidrome’s library. - A
.ndignorefile also supports.gitignoresyntax inside of it to set rules for content to exclude. This allows you to place a single file in your parent Music folder and then use a single file to establish rules on ignoring certain folders, filetypes, or files.
Key behaviors
- Cascading: Patterns from parent directories apply to all subdirectories
- Multiple files: You can place
.ndignorefiles in different directories
A new or updated .ndignore file should be auto-detected by Navidrome, or can be detected with a Quick Scan.
Syntax Usage and Examples
A single .ndignore can be placed at the parent folder of your library and then syntax added to it.
For example, if your ~/Music folder is mounted to Navidrome then you could create ~/Music/.ndignore and add syntax to it. The following examples assume the .ndignore is placed in the parent folder of your library:
# .ndignore supports comments starting with '#'

# Ignore all .flac
*.flac

# ignore specific folders
/untagged/
/unsorted/

# Negate the .flac ignore rule for a favorite album.
!/thursday/taking-inventory-of-a-frozen-lake/*.flac
Limitations
- Brace expansion like
*.{flac,mp3}don’t work – use separate lines instead
Technical Details
- The
.ndignoresyntax utilizes the go-gitignore library. See documentation for additional syntax usage.
4 - Integration
4.1 - External Integrations (A.K.A. Agents)
Navidrome uses external services (through agents) to enrich your music library with artist biographies, images, album covers, similar artists, and more. Multiple agents can be configured, and they are tried in priority order. If one fails or returns no results, the next one is tried.
How Agents Work
The Agents config option controls which agents are enabled and in what order. It accepts a comma-separated list of agent names.
The default is "deezer,lastfm,listenbrainz", meaning Deezer is tried first, then Last.fm, then ListenBrainz. A built-in local agent is always appended automatically as a final fallback.
To disable a specific agent, either remove it from the Agents list or set its individual *.Enabled option to false. To disable all external integrations at once, set EnableExternalServices to false.
Last.fm
Last.fm provides the broadest set of metadata among the built-in agents.
Provides: Artist biographies, artist images, similar artists, top songs, album covers, similar songs
Configuration: Requires API keys. Set the
config options
LastFM.ApiKey and LastFM.Secret. You can obtain these values by creating a free API account in Last.fm:
- Go to https://www.last.fm/api/account/create and create an API account. Only the Application Name field is mandatory:
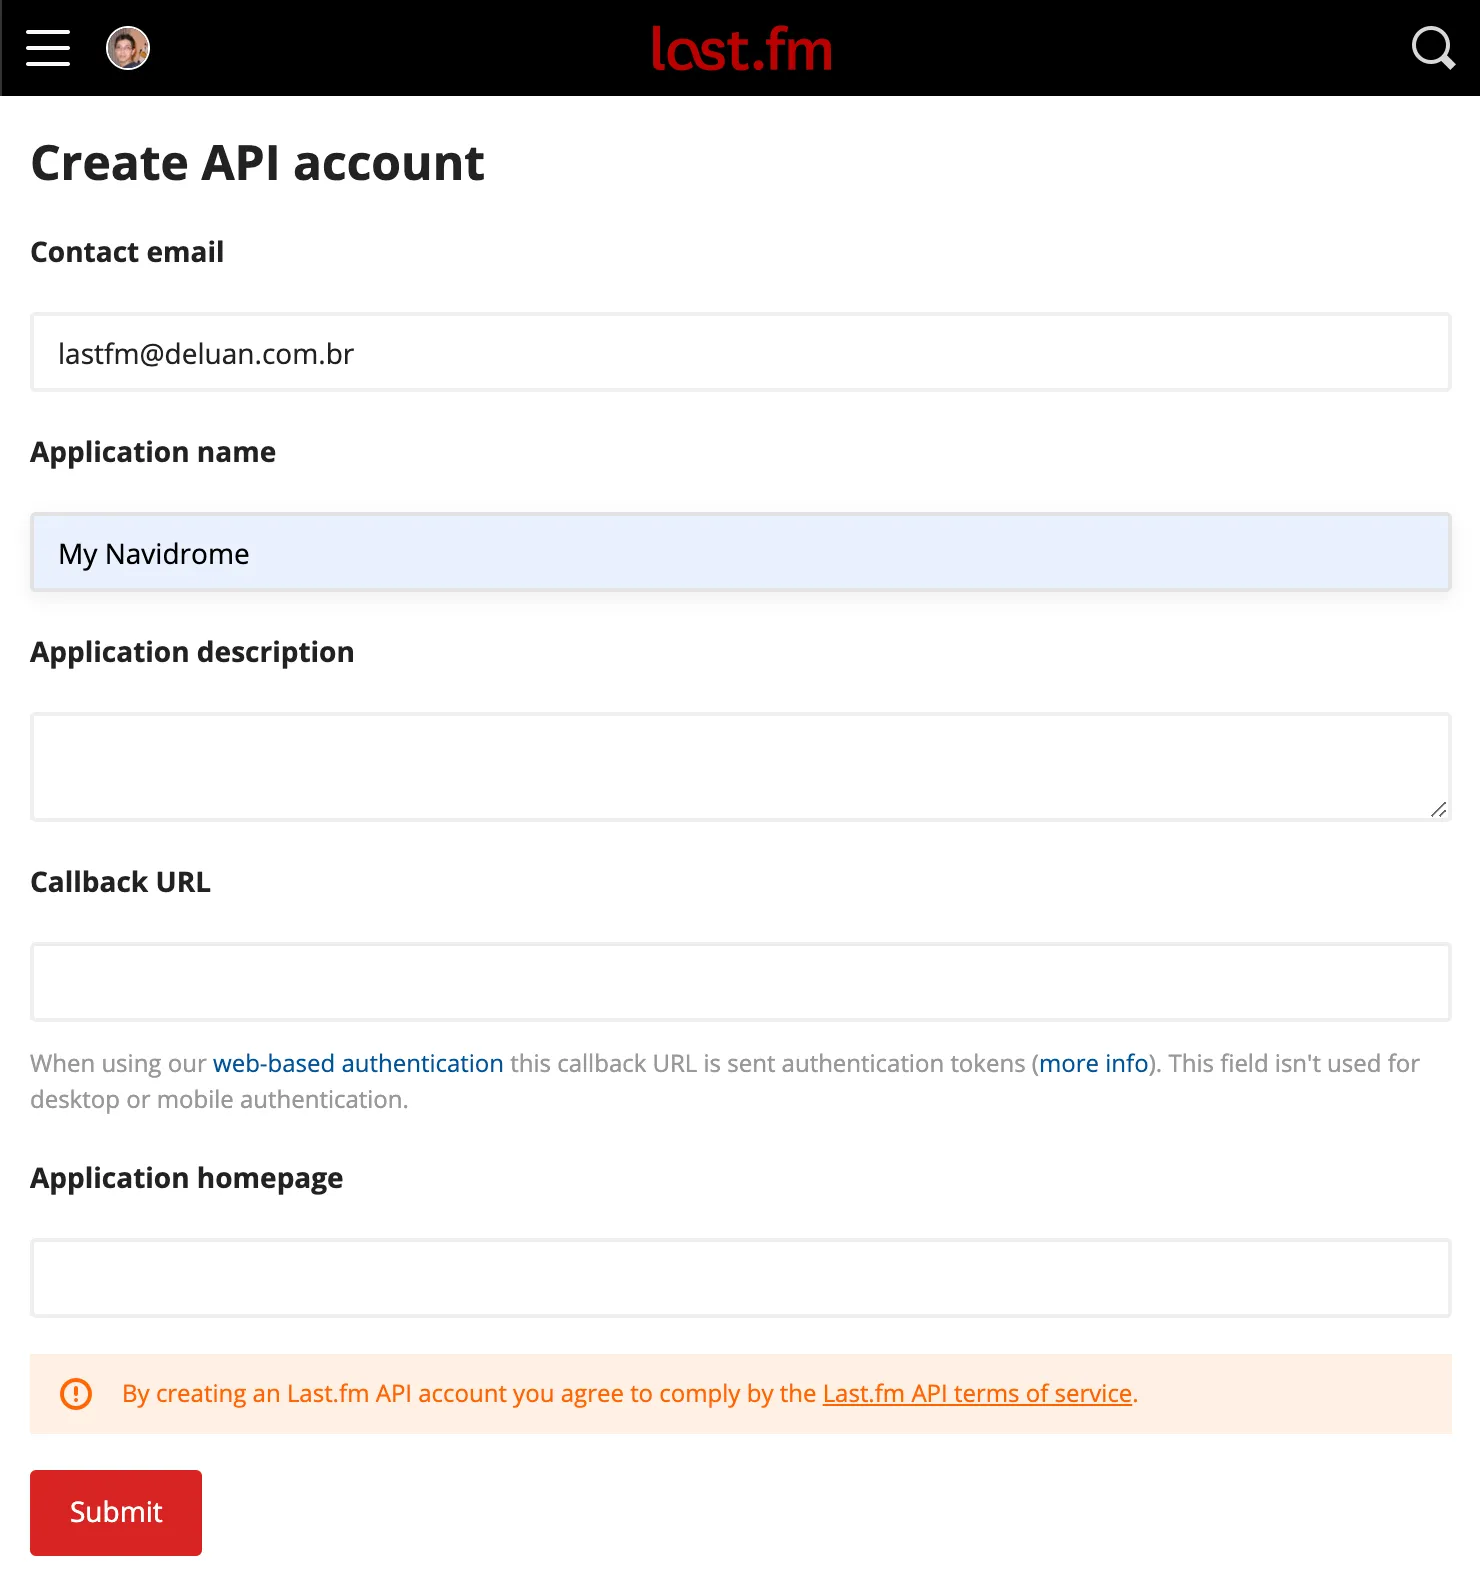
- After submitting the form, you can get the API Key and Shared Secret from the Account Created page:
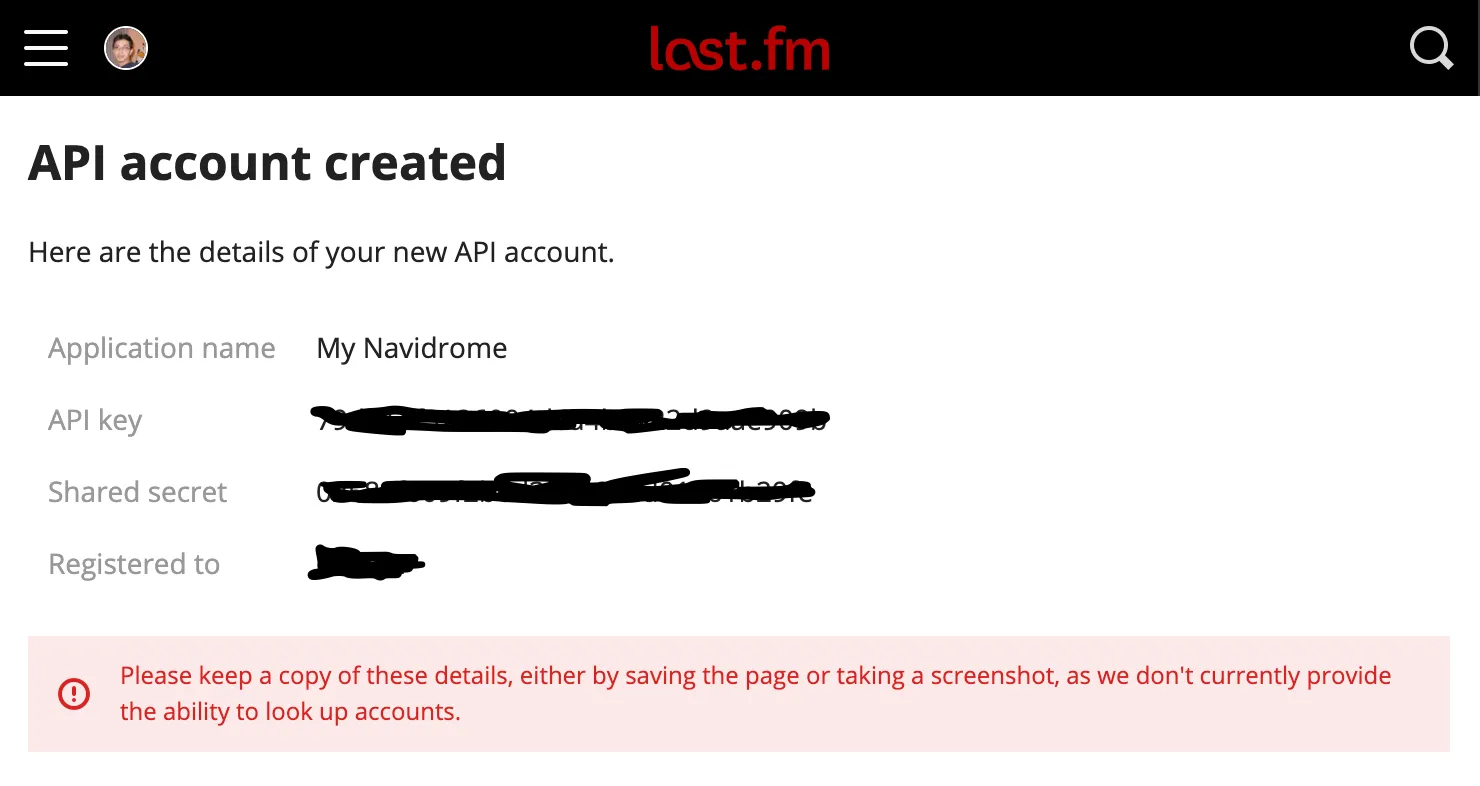
- Copy the values above to your configuration file as
LastFM.ApiKeyandLastFM.Secret(or set them as environment variablesND_LASTFM_APIKEYandND_LASTFM_SECRET) - After the configuration is done, you can set up scrobbling for your user.
Last.fm can be completely disabled by setting LastFM.Enabled to false.
Deezer
Deezer’s public API doesn’t require API keys or authentication, making it the simplest external integration.
Provides: Artist images, artist biographies, similar artists, top songs
Configuration: Enabled by default, no setup required. To disable it, set Deezer.Enabled to false in your configuration file or set the environment variable ND_DEEZER_ENABLED to false.
ListenBrainz
ListenBrainz provides metadata based on MusicBrainz data and community listening statistics. It works best when your music files have MusicBrainz IDs in their tags.
Provides: Artist URLs, similar artists, top songs, similar songs
Configuration: Enabled by default, no setup required for metadata. To disable it, set ListenBrainz.Enabled to false.
ListenBrainz also supports scrobbling, which requires per-user authorization.
Local Agent
The local agent is always active and serves as the final fallback. It provides top songs based on your own library’s play counts and ratings. No external service is contacted.
Extending with Plugins
Navidrome’s external metadata capabilities can be extended through plugins. Plugins can provide additional metadata agents for artist and album information and images, lyrics providers, and scrobblers. See the Plugins documentation for more information.
One example is AudioMuse-AI, which provides similar songs and artists based on sonic analysis of your own files, powering Instant Mix and similar-song features without relying on external metadata services.
4.2 - AudioMuse-AI
AudioMuse-AI is a self-hosted service that analyzes the actual audio content of your music library — tempo, timbre, energy, and other sonic characteristics — and uses that analysis to find songs that sound similar. Unlike the external metadata agents, which rely on third-party databases like Last.fm or Deezer, AudioMuse-AI works entirely from your own files, so it can find matches even for obscure or unreleased music.
It integrates with Navidrome through a plugin, the AudioMuse-AI-NV-plugin. Once set up, you get:
- Instant Mix in the Navidrome web UI: open any song’s context menu and build a queue of sonically similar tracks
- Similar songs and similar artists in Subsonic clients such as Symfonium, Feishin, Substreamer, Tempus, and Wavio, through the standard
getSimilarSongs/getSimilarSongs2(songs/radio) andgetArtistInfo/getArtistInfo2(related artists) endpoints - The OpenSubsonic
sonicSimilarityextension, which clients can use to fetch sonic matches and build song-to-song transitions
AudioMuse-AI and its Navidrome plugin are developed and maintained by the community, not by the Navidrome team. Review their documentation and source code before installing, and report issues with them in their own repositories.
Requirements
- The latest versions of all three components, kept aligned: Navidrome, the AudioMuse-AI core, and the Navidrome plugin. A version mismatch is the most common cause of problems, so always update the three together.
- Docker and Docker Compose for AudioMuse-AI (or one of its native builds).
- Navidrome and AudioMuse-AI must be able to reach each other over the network.
Step 1 — Deploy AudioMuse-AI
AudioMuse-AI runs as a small stack: a web app, a worker, PostgreSQL, and Redis. The provided Docker Compose file wires all of this for you — normally you only set the database credentials and timezone in its .env file. Follow the deployment instructions in the AudioMuse-AI documentation. If you prefer not to use Docker, there are native builds for Linux, macOS, and Windows on their releases page.
Once the stack is running, open the AudioMuse-AI web interface (port 8000 by default). The Setup Wizard appears on first start:
- Pick Navidrome as the media server and enter your Navidrome URL, user, and password.
- In the AudioMuse-AI authentication section, set a username, password, and API token. You will need this token later to configure the plugin.
- Save and finish the wizard.
Then run a first analysis before anything else: AudioMuse-AI can only find similar songs after it has analyzed them. Start a new analysis from its main page and let it finish — this can take a while on a large library. When it is done, confirm it works by using Similar Song on any track in the AudioMuse-AI UI.
Step 2 — Configure Navidrome
Make sure the plugin system is enabled (it is by default), and add audiomuseai to your Agents list. The order matters: Navidrome uses the first agent that supports sonic similarity, so keep audiomuseai first.
services:
  navidrome:
    image: deluan/navidrome:latest
    ports:
      - "4533:4533"
    environment:
      - ND_PLUGINS_ENABLED=true
      - ND_PLUGINS_AUTORELOAD=true
      - ND_AGENTS=audiomuseai,lastfm,deezer
    volumes:
      - ./data:/data
      - /path/to/music:/music:ro
Step 3 — Install the plugin
- Download the latest
audiomuseai.ndpfile from the plugin releases page. - Copy it into your Navidrome plugins folder (
<DataFolder>/pluginsby default). - Restart Navidrome, or click “Rescan” in the Plugins section of the web UI (with
Plugins.AutoReloadenabled, the plugin is picked up automatically).
See Installing Plugins for details on the general installation flow.
Step 4 — Configure the plugin
In the Navidrome web UI, go to Settings > Plugins, enable the AudioMuse-AI plugin, and open its settings:
- API URL: the address where Navidrome can reach the AudioMuse-AI core app, for example
http://192.168.1.50:8000. Use a host and port the Navidrome container can actually reach — notlocalhost, unless both run in the same network namespace. - API token: the same token you set in the Setup Wizard in Step 1.
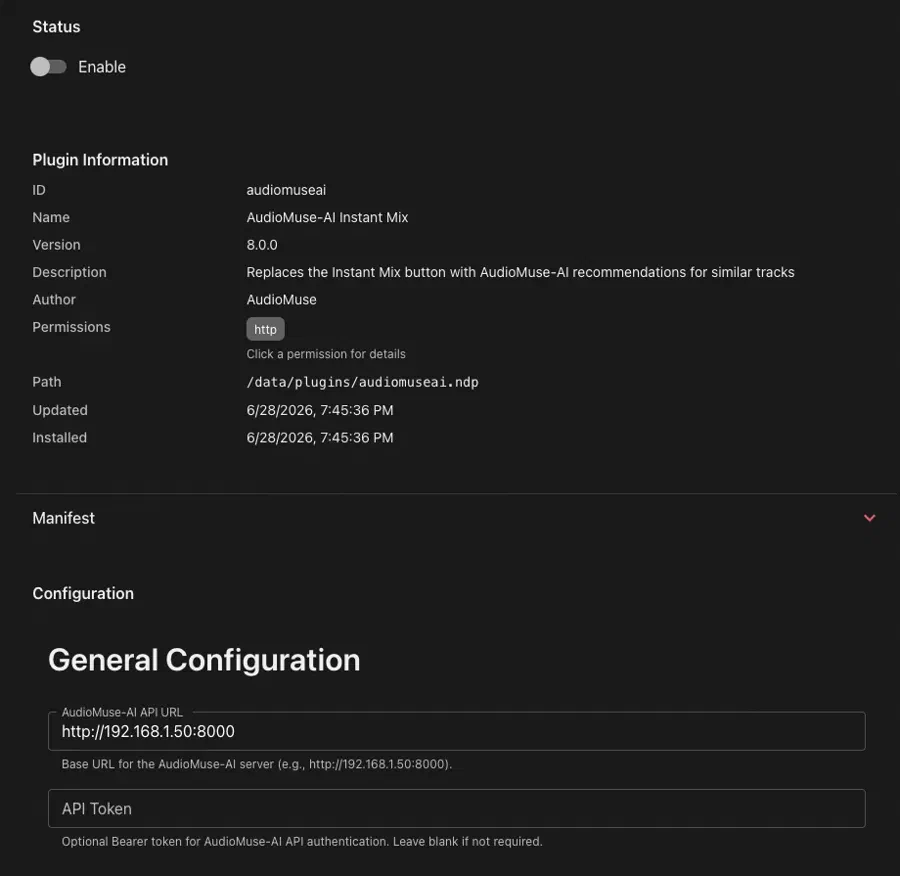
Prefer the command line? Plugins can also be enabled and configured from the CLI. See the plugin command reference.
Verify it works
Use Instant Mix on any song in the Navidrome web UI — it should build a queue of similar songs. You can also watch both sides of the integration in the logs:
docker compose logs -f navidrome | grep audiomuseai
On the AudioMuse-AI side, you should see API calls arriving each time you trigger Instant Mix or a similar-songs request.
Using it
- Web UI: open a song’s context menu (the three-dots button) and select Instant Mix. This requires
EnableExternalServicesto be on (the default).
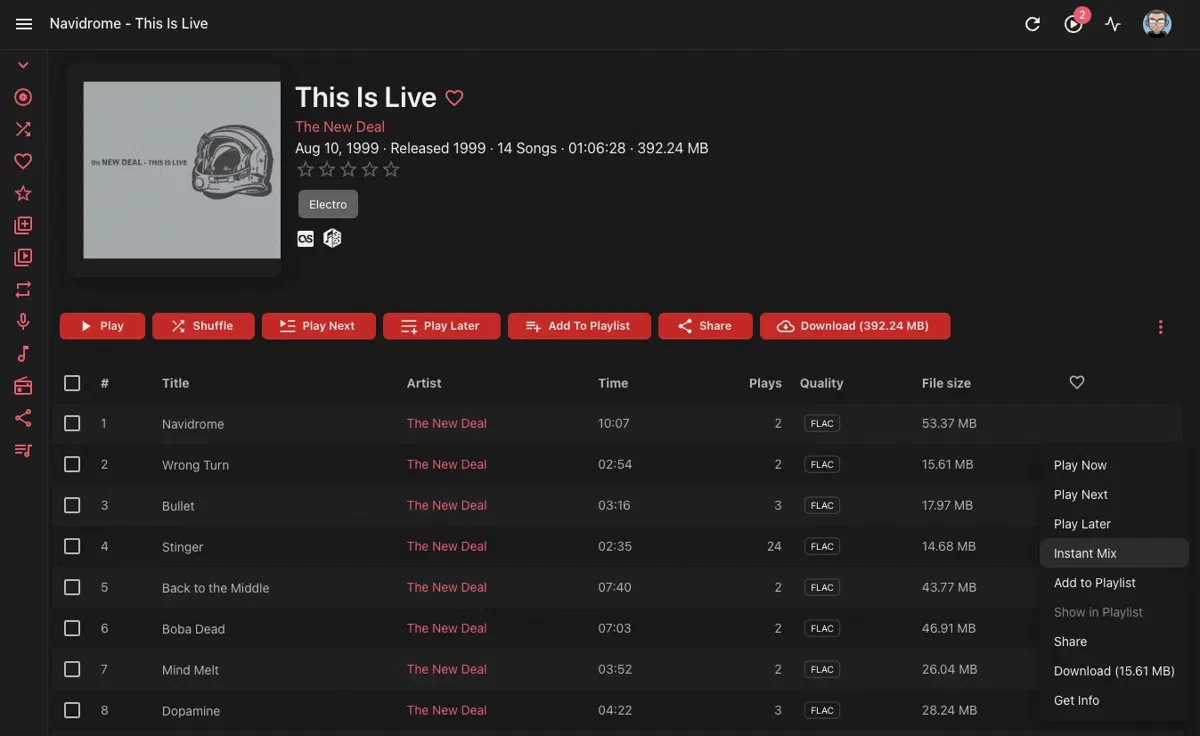
- Subsonic clients: similar songs and artist radio work automatically through the standard
getSimilarSongs/getSimilarSongs2endpoints, and related/similar artists throughgetArtistInfo/getArtistInfo2— all now answered by AudioMuse-AI’s sonic analysis instead of external metadata services.
OpenSubsonic sonicSimilarity extension
With the plugin active, Navidrome advertises the sonicSimilarity OpenSubsonic extension via getOpenSubsonicExtensions, adding two endpoints that clients can use directly:
getSonicSimilarTracks: returns the tracks most sonically similar to a given song (id), with a similarity score for each match.findSonicPath: builds a smooth “path” of songs from a start song to an end song (startSongId,endSongId), where each step is sonically close to the previous one — useful for gradual mood or genre transitions.
When no plugin providing sonic similarity is loaded, the extension is not advertised and these endpoints return a 404 error.
Troubleshooting
401 Unauthorizedin the Navidrome log: the API token is missing or wrong. Set the same token in the plugin settings and in the AudioMuse-AI Setup Wizard.- No requests in the AudioMuse-AI log: Navidrome cannot reach the API URL. Check the host, port, and network path, and confirm the URL is reachable from inside the Navidrome container.
- Empty or poor results: the library has not been analyzed yet, or the analysis is incomplete. Run the analysis in AudioMuse-AI and wait for it to finish.
- Odd errors in general: update Navidrome, the plugin, and the AudioMuse-AI core to their latest versions. Most issues come from one of the three being out of date.
For plugin-specific debugging, set Plugins.LogLevel to "debug" — see Checking Logs.
4.3 - Externalized Authentication
Externalized authentication is a relatively advanced topic. You can check the Quick Start guide for a beginner-friendly introduction.
Navidrome works out of the box behind a reverse proxy without enabling externalized authentication.
You only need to enable externalized authentication if you want the proxy to handle the authentication. In other cases, enabling the feature without securing the reverse proxy configuration can leave your Navidrome setup vulnerable to impersonation attacks.
Configuration
Externalized authentication is disabled by default. To enable the feature, configure a trusted authentication source (your reverse proxy) with the ExtAuth.TrustedSources option. This option takes a comma-separated list of either:
- An IPv4 or IPv6 range in CIDR notation.
- An
@(at sign) when listening on a UNIX socket (see theAddressoption).
When enabled via the ExtAuth.TrustedSources option, Navidrome validates the requests’ source IP address against the ranges configured in ExtAuth.TrustedSources. If no range matches the address, externalized authentication is not used even if the authenticated user header is present (see below), and falls back to a standard authentication mechanism. For requests received through a UNIX socket, IPs can’t be validated and Navidrome will use the authenticated user header if and only if ExtAuth.TrustedSources contains @.
With externalized authentication enabled, Navidrome gets the username of the authenticated user from incoming requests’ Remote-User HTTP header. The header can be changed via the ExtAuth.UserHeader configuration option.
When using external authentication, you can configure ExtAuth.LogoutURL to redirect users to your authentication provider’s logout endpoint after they log out of Navidrome. This ensures users are fully logged out of both Navidrome and the external auth provider (SSO, OIDC, etc.).
If a user is successfully authenticated by the proxy but does not exist in the Navidrome database, it will be created with a random password. The first user created in a fresh installation (whether through externalized authentication or direct login) will always be an admin user.
You might also be interested in the EnableUserEditing option, which allows disabling the User page that lets users change their Navidrome password.
Sharing endpoint
If you plan to use the Sharing feature, where you can create unauthenticated links to parts of your library, you’ll need to whitelist the /share/* URLs.
Subsonic endpoint
The subsonic endpoint also supports externalized authentication, and will ignore the subsonic authentication parameters (u, p, t and s) if the authenticated user header is present. If the header is absent or has an empty value, Navidrome will fall back to the standard subsonic authentication scheme.
If your reverse proxy does not support the standard subsonic authentication scheme, or if the subsonic clients you want to use don’t support an alternate authentication mechanism also supported by your proxy (such as BasicAuth), you can still configure your proxy to bypass authentication on /rest/* URLs and let Navidrome perform authentication for those requests. In that case, your users will have to update their (initially random) password in Navidrome, to use it with their subsonic client.
Most reverse proxies and authentication services don’t support the subsonic authentication scheme out of the box.
A handful of clients claim to support BasicAuth (e.g. DSub and Symfonium on Android, and play:Sub on iOS), but even then it might not work as you expect (as it is not standardized by the subsonic specification): you will likely need to generate a subsonic error response instead of a proper BasicAuth authentication failure response. Otherwise, some clients might display an unexpected error such as “server unreachable” when the credentials are incorrect, and other clients might refuse to connect altogether even with valid credentials.
Navidrome Web App
The Navidrome web app uses a mix of internal and subsonic APIs, and receives subsonic credentials from the server to use for requests against the subsonic API. As the credentials received from the server likely won’t match those in your dedicated authentication service, you need to handle subsonic requests from the Navidrome web app (identified as the subsonic client NavidromeUI via the c query parameter) in a special way. You can either:
- Ignore the subsonic authentication parameters and authenticate those requests the same way as non-subsonic requests. This relies on the fact that requests to the subsonic API will look the same to the proxy as requests to the internal API (e.g. same session cookies).
- Bypass authentication on your proxy for those requests and let Navidrome handle it. This relies on the fact that the web app receives the subsonic credentials from the server when it loads, and it can load only if the proxy has already authenticated the user.
Note that if you don’t intend to support third-party subsonic clients, you can simply place the subsonic endpoint behind the same protection rule as the rest of the application, i.e. you don’t need any special handling to bypass authentication.
Security
When you enable externalized authentication by configuring trusted sources, you must ensure that all the trusted sources are configured to:
- Not let untrusted clients set the user header themselves (i.e. remove the header if they do).
- Not set the header if the request is not authenticated (e.g. when the authentication is bypassed for the subsonic endpoints).
Make sure to check the externalized authentication section in the dedicated Security Considerations page.
Examples
For the examples below, it is assumed that you are familiar with the various products in use, i.e. reverse proxy, authentication service but also Navidrome.
The examples focus on the integration between the products, and provide configuration snippets stripped down to the relevant parts, which you can adapt to the specifics of your deployment.
Caddy with forward_auth
In this example, Navidrome is behind the Caddy reverse proxy, and Authentik is used to authenticate requests, with the help of Caddy’s forward_auth middleware.
Caddyfile excerpt stripped down to the relevant parts:
example.com

# Remove any client-supplied user header
request_header -Remote-User

reverse_proxy /outpost.goauthentik.io/* http://authentik:9000

@protected not path /share/* /rest/*
forward_auth @protected http://authentik:9000 {
  uri /outpost.goauthentik.io/auth/caddy
  copy_headers X-Authentik-Username>Remote-User
}

# Authentik uses the Authorization header if present, so should be able to
# authenticate subsonic clients that support BasicAuth. Requests from the
# Navidrome Web App will be authenticated via the existing session cookie.
# If you want to have Navidrome authenticate subsonic requests, remove this
# forward_auth block.
@subsonic path /rest/*
forward_auth @subsonic http://authentik:9000 {
  uri /outpost.goauthentik.io/auth/caddy
  copy_headers X-Authentik-Username>Remote-User

  # Some clients that claim to support basicauth still expect a subsonic
  # response in case of authentication failure instead of a proper basicauth
  # response.
  @error status 1xx 3xx 4xx 5xx
  handle_response @error {
    respond <<SUBSONICERR
      <subsonic-response xmlns="http://subsonic.org/restapi" status="failed" version="1.16.1" type="proxy-auth" serverVersion="n/a" openSubsonic="true">
        <error code="40" message="Invalid credentials or unsupported client"></error>
      </subsonic-response>
      SUBSONICERR 200
  }
}

reverse_proxy navidrome:4533
Note that if you want to whitelist the unprotected paths as part of your Authentik configuration instead of doing it in Caddy, the copy_headers subdirective won’t work as expected: Authentik won’t set the X-Authentik-Username header for whitelisted paths, but Caddy will still copy the header with an incorrect value. In order to make it work, you need a workaround:
forward_auth http://authentik:9000 {
  uri /outpost.goauthentik.io/auth/caddy
  # copy_headers subdirective removed
}

# Only set the Remote-User header if the request was actually authentified (user
# header set by Authentik), as opposed to whitelisted (user header not set).
@hasUsername `{http.reverse_proxy.header.X-Authentik-Username} != null`
request_header @hasUsername Remote-User {http.reverse_proxy.header.X-Authentik-Username}
Traefik with ForwardAuth
In this example, Navidrome is behind the Traefik reverse proxy, and Authelia is used to authenticate requests, with the help of Traefik’s ForwardAuth middleware. Each service has its own subdomain. Docker Compose is used to deploy the whole thing.
The error response rewriting for subsonic authentication failure is not implemented, which means that subsonic clients are expected to handle correctly BasicAuth error responses (HTTP 401 with WWW-Authenticate header).
docker-compose.yml excerpt stripped down to the relevant parts:
services:
  authelia:
    image: authelia/authelia:4.38.8
    labels:
      # The login page and user dashboard need to be reachable from the web
      traefik.http.routers.authelia.rule: Host(`auth.example.com`)
      traefik.http.routers.authelia.entrypoints: https
      # Standard authentication middleware to be used by web services
      traefik.http.middlewares.authelia.forwardauth.address: http://authelia:9091/api/verify?rd=https://auth.example.com/
      traefik.http.middlewares.authelia.forwardauth.authResponseHeaders: Remote-User
      # Basicauth middleware for subsonic clients
      traefik.http.middlewares.authelia-basicauth.forwardauth.address: http://authelia:9091/api/verify?auth=basic
      traefik.http.middlewares.authelia-basicauth.forwardauth.authResponseHeaders: Remote-User
      # Security middleware for the entrypoints
      traefik.http.middlewares.drop-untrusted-auth-headers.headers.customrequestheaders.Remote-User:

  navidrome:
    image: deluan/navidrome:0.52.0
    labels:
      # Default rule which uses Authelia's web-based authentication. If you enable
      # navidrome's Sharing feature, you can configure Authelia to bypass
      # authentication for /share/* URLs, so you don't need an extra rule here.
      traefik.http.routers.navidrome.rule: Host(`music.example.com`)
      traefik.http.routers.navidrome.entrypoints: https
      traefik.http.routers.navidrome.middlewares: drop-untrusted-auth-headers@docker,authelia@docker
      # Requests to the subsonic endpoint use the basicauth middleware, unless
      # they come from the Navidrome Web App ("NavidromeUI" subsonic client), in
      # which case the default authelia middleware is used.
      traefik.http.routers.navidrome-subsonic.rule: Host(`music.example.com`) && PathPrefix(`/rest/`) && !Query(`c`, `NavidromeUI`)
      traefik.http.routers.navidrome-subsonic.entrypoints: https
      traefik.http.routers.navidrome-subsonic.middlewares: drop-untrusted-auth-headers@docker,authelia-basicauth@docker
    environment:
      # Navidrome does not resolve hostnames in this option, and by default
      # traefik will get assigned an IP address dynamically, so all IPs must be
      # trusted.
      # This means that any other service in the same docker network can make
      # requests to navidrome, and easily impersonate an admin.
      # If you assign a static IP to your traefik service, configure it here.
      ND_EXTAUTH_TRUSTEDSOURCES: 0.0.0.0/0
      # Since authentication is entirely handled by Authelia, users don't need to
      # manage their password in Navidrome anymore.
      ND_ENABLEUSEREDITING: false
We recommended applying the drop-untrusted-auth-headers on the entrypoints if possible (instead of configuring it on each service individually as shown here).
If you want to add support for the subsonic authentication scheme in order to support all subsonic clients, you can have a look at the Traefik plugin BasicAuth adapter for Subsonic which transforms subsonic authentication parameters into a BasicAuth header that Authelia can handle, and performs the error response rewriting.
4.4 - Monitoring Navidrome
Currently, Navidrome supports monitoring and alerting using Prometheus/OpenMetrics standard. Example Grafana dashboard:

Overview
Prometheus is a service that takes data from a metrics endpoint and collects it. Grafana is a dashboard service that can take data from a Prometheus server and display it. Navidrome has an easy way to create a metrics endpoint that Prometheus can use. Once you point Prometheus to this endpoint, and Grafana to your Prometheus server, you will be able to monitor your Navidrome instance.
The easiest way to do this is using docker-compose and Docker networks.
Configuration
You need to set ND_PROMETHEUS_ENABLED to enable Prometheus metrics endpoint.
Setting custom ND_PROMETHEUS_METRICSPATH is highly recommended if your Navidrome
instance is publicly available.
Minimal docker compose example file with metrics enabled, and Prometheus and Grafana containers:
version: '3'
services:
  navidrome:
    image: deluan/navidrome
    user: 1000:1000 # should be owner of volumes
    ports:
      - "4533:4533"
    environment:
      ND_PROMETHEUS_ENABLED: "true"
      ND_PROMETHEUS_METRICSPATH: "/metrics_SOME_SECRET_KEY"
    volumes:
      - "./data:/data"
      - "./music:/music"
    networks:
      - metrics-network
  prometheus:
    image: prom/prometheus
    container_name: prometheus
    command:
      - '--config.file=/prometheus/prometheus.yml'
    ports:
      - 9090:9090
    restart: unless-stopped
    volumes:
      - ./etc/prometheus:/etc/prometheus
      - ./prometheus:/prometheus
    networks:
      - metrics-network
  grafana:
    image: grafana/grafana
    container_name: grafana
    ports:
      - 3000:3000
    restart: unless-stopped
    environment:
      - GF_SERVER_ROOT_URL=<your external grafana endpoint here>
      - GF_SERVER_SERVE_FROM_SUB_PATH=false # if your external grafana endpoint has a subpath or not
    volumes:
      - ./etc/grafana:/etc/grafana/provisioning/datasources
    networks:
      - metrics-network
networks:
  metrics-network:
    driver: bridge
Example prometheus.yml config to parse this instance:
global:
  scrape_interval: 10s
scrape_configs:
  - job_name: 'navidrome'
    metrics_path: /metrics_SOME_SECRET_KEY
    scheme: http
    static_configs:
      - targets: ['navidrome:4533']
Dashboard
Grafana dashboards are available here: #24397 #18038.
Simple to install but fully fledged Grafana docker compose configuration can be found here.
5 - Administration
5.1 - Automated Backup
Navidrome version 0.54.x introduces a backup feature that allows the music server’s data to get periodically exported. This guide will walk you through configuring backups using both a configuration file and environment variables, where to locate the backups, and how to restore from a backup.
Note: The backup process ONLY backs up the database (users, play counts, etc.). It does NOT back up the music or the config.
Configuring Backup with config.toml
To configure backups using the navidrome.toml file, insert the following lines to set up backups:
[Backup]
Path = "/path/to/backup/folder"
Count = 7
Schedule =  "0 0 * * *"
- Backup.Path: The directory where backups will be stored. Replace “/path/to/backup/folder” with the desired path.
- Backup.Count: The number of backup files to keep.
- Backup.Schedule:
cron-like syntax to define how often backups occur. The example above schedules a backup every 24 hours at midnight.
Configuring Backup with Environment Variables
Alternatively, you can configure backups using environment variables ND_BACKUP_PATH, ND_BACKUP_SCHEDULE, and ND_BACKUP_COUNT.
environment:
  ND_BACKUP_PATH: /backup
  ND_BACKUP_SCHEDULE: "0 0 * * *"
  ND_BACKUP_COUNT: 7
volumes:
  - ./data:/data
  - ./backup:/backup
Manually Creating a Backup
You can manually create a backup via the navidrome backup create command:
sudo navidrome backup create
If you use docker compose, you can do the same with:
sudo docker compose run <service_name> backup create
# service_name is usually `navidrome`
When manually creating a backup, no prune cycle is run, so none of the existing backups will be pruned. However,
next time the automated backup process runs, the normal prune cycle will run and potentially remove several backups
until the number of backups is down to the configured backup count setting. To manually run a prune cycle, use the
navidrome backup prune command:
sudo navidrome backup prune
If you use docker compose, you can do the same with:
sudo docker compose run <service_name> backup prune
# service_name is usually `navidrome`
Locating Backup
Once configured, Navidrome will store backups in the directory specified by the BackupFolder or ND_BACKUP_PATH setting. To verify the location:
- Check the Config File: If using a configuration file, look for the
Backupconfig node and confirm that all three options are configured. - Check Environment Variables: If using environment variables, ensure that all three variables is set correctly.
Restoring a Backup
When you restore a backup, the existing data in the database is wiped and the data in the backup gets copied into the database.
Note: YOU MUST BE SURE TO RUN THIS COMMAND WHILE THE NAVIDROME APP IS NOT RUNNING/LIVE.
Restore a backup by running the navidrome backup restore command.
Restoring a backup should ONLY be done when the service is NOT running. You’ve been warned.
Additional Resources
For more detailed configuration options and examples, refer to the Navidrome Configuration Options page. This resource provides comprehensive guidance on customizing Navidrome to fit your needs.
By following this guide, you can effectively set up and manage backups for your Navidrome music server, ensuring your data is protected and easily recoverable.
5.2 - Command-Line Interface (CLI)
Navidrome has a built-in CLI for administration, maintenance, and troubleshooting. Each command has its own page. This page covers what the commands share.
Quick start
Show the list of commands:
navidrome --help
Show help for one command or subcommand:
navidrome <command> --help
navidrome <command> <subcommand> --help
If you run navidrome with no command, it starts the server.
Commands
| Command | What it does |
|---|---|
artwork | Inspect artwork and resolve it again |
backup | Create, prune, and restore database backups |
doctor | Check the database for problems |
inspect | Print the tags of music files as Navidrome reads them |
missing | List missing files and remap them onto existing files |
plugin | List, configure, enable, and disable plugins |
pls | List, export, and import playlists |
scan | Scan the music library |
search | Rebuild the full-text search index |
service | Install and control Navidrome as an OS service |
user | Create, edit, list, and delete users |
Global flags
Every command accepts these flags.
| Flag | Description |
|---|---|
-c, --configfile | Config file to load. Default is ./navidrome.toml |
-n, --nobanner | Don’t print the startup banner |
--musicfolder | Folder with your music |
--datafolder | Folder for application data, such as the database. Navidrome needs write access to it |
--cachefolder | Folder for cache data, such as transcoded audio and images. Navidrome needs write access |
-l, --loglevel | Log level. One of error, info, debug, or trace |
--logfile | File to write logs to. Without it, Navidrome logs to stderr |
Commands read the same config file and ND_ environment variables as the server. Run them with the
same settings as your server, or they will look at a different database. The server also takes
flags such as --port and --address. Run navidrome --help to see them, and see
Configuration Options for every setting.
navidrome -c /etc/navidrome/navidrome.toml --nobanner user list
Running the CLI in Docker
If Navidrome runs in a container, run CLI commands in a container too. That way they use the same
/data, /music, config file, and environment variables as your server.
Docker Compose
Use docker compose run with the name of your Navidrome service. It is usually navidrome:
# Show CLI help
docker compose run --rm navidrome --help

# Run a full scan
docker compose run --rm navidrome scan --full

# List users
docker compose run --rm navidrome user list
To run a command in the container that is already running, use docker compose exec. Put the
navidrome binary name before the command:
docker compose exec navidrome navidrome user list
Docker run
Start a one-off container with the same image tag, volumes, and environment variables as your main Navidrome container:
docker run --rm -it \
  --user $(id -u):$(id -g) \
  -v /path/to/music:/music:ro \
  -v /path/to/data:/data \
  --env-file /path/to/navidrome.env \
  -e ND_CONFIGFILE=/data/navidrome.toml \
  deluan/navidrome:latest \
  user list
-it gives the command a terminal. Commands that ask for input need it, such as user create,
which asks for a password.
Notes and best practices
- Flags change between releases. Run
--helpto see the flags of the version you have. - In scripts, pass
--configfileso the command reads the config you expect. - Stop Navidrome before you run
backup restoreorsearch rebuild. backup restore,backup prune, andmissing fixcan’t be undone. Check the paths and IDs you pass, and runnavidrome backup createfirst.
5.2.1 - navidrome artwork
The artwork commands tell you why a cover is wrong or an artist image is missing, without opening
the database. They also queue artwork to resolve again, one item at a time or in bulk. See
Artwork resolution for how Navidrome picks an image.
Usage
navidrome artwork <subcommand> [flags]
All commands also accept the global flags.
Artwork kinds
Each kind of artwork has a short code. Not every subcommand accepts every kind.
| Code | Kind | explain | refresh | reprocess | cancel |
|---|---|---|---|---|---|
ar | Artist | ✓ | ✓ | ✓ | ✓ |
al | Album | ✓ | ✓ | ✓ | ✓ |
pl | Playlist | ✓ | ✓ | ✓ | ✓ |
ra | Radio | ✓ | ✓ | ✓ | ✓ |
mf | Media file | ✓ | ✓ | ✓ | |
dc | Disc | ✓ |
reprocess skips media files. A track’s artwork comes only from its embedded tags, and Navidrome
reads them at scan time or the first time someone views the track. Media files still end up in the
queue, so cancel can remove them.
Disc artwork has no stored state. Navidrome resolves it on every request and caches the result by
content, so refresh has nothing to clear.
explain accepts playlists and radios. It shows their stored state and queue row, but they have no
priority chain to walk.
Subcommands
| Subcommand | Description |
|---|---|
status | Show the queue, where artwork comes from, items with no image, and the settings state |
explain | Show why one item got the artwork it has |
refresh | Clear the artwork state of some items and queue them again |
reprocess | Queue artwork in bulk, by kind or by current source |
cancel | Remove pending artwork work in bulk, by kind or by queue priority |
artwork status
Shows the queue by kind and priority, how many items use each source, how many items have no image, and whether artwork settings changed since the last full reprocess.
navidrome artwork status
Flags
This subcommand has no flags.
Output
The Absent block splits items with no image in two. NO IMAGE counts items where every candidate
answered and none had an image. FAILED counts items where Navidrome ran out of retries, for example
because a provider kept timing out. Those are the best candidates for another try.
Absent (resolved, no image found)
  KIND      NO IMAGE  FAILED
  artist    212       37
  album     48        0
Navidrome retries neither group by itself. artwork reprocess --source absent retries both, and
--source failed retries only the ones that gave up.
The Config block compares a fingerprint of six settings: CoverArtPriority, ArtistArtPriority,
ArtistImageFolder, Agents, EnableExternalServices, and EnableM3UExternalAlbumArt.
Config
  State:                fingerprint changed — stored artwork keeps the old resolution; run 'artwork reprocess --all' to apply it
  Stored fingerprint:   7e537a22febc07d3
  Current fingerprint:  c49003a68a82ee68
  Fingerprint inputs (changing any of these makes the stored artwork stale):
    CoverArtPriority:           cover.*, folder.*, front.*, embedded, external
    ...
Changing one of these settings does not update artwork that is already stored. Stored artwork
keeps what the old settings found, and Navidrome logs a warning at startup. Run
artwork reprocess --all to apply the new settings to the whole library. A full reprocess with no
filters also saves the new fingerprint, and the warning goes away.
artwork explain
Shows why one item got the artwork it has. The output has the item’s stored artwork state, its queue row, the settings that decide its artwork, and the priority chain. The chain shows which candidate won and why each one above it lost.
navidrome artwork explain [<kind>] <id> [--live]
You can name the item three ways. Use a bare ID, a full artwork ID such as al-<id>, or a
<kind> <id> pair. For a bare ID, Navidrome looks up the kind itself, so artists, albums, playlists,
radios, and media files don’t need <kind>. Discs have no table to look up, so a disc always needs
its kind. A disc artwork ID is the album ID and the disc number, joined by a colon.
By default, explain prints the chain the server recorded the last time it resolved the item. That
is what really happened, and reading it costs no new lookups. The header shows when Navidrome
recorded it. --live walks the chain again right now, and the header reads Chain (walked now).
Discs have no stored state, so explain always walks a disc’s chain on the spot.
Flags
| Flag | Default | Description |
|---|---|---|
--live | false | Walk the chain again now, with real external lookups, instead of printing the recorded chain. Also starts plugin agents, which may open external connections |
Examples
# Explain an album by its bare ID
navidrome artwork explain 6XTD9naRGpIrZLoA99pH1r

# The same album, by its full artwork ID
navidrome artwork explain al-6XTD9naRGpIrZLoA99pH1r

# Walk the chain again now
navidrome artwork explain al 6XTD9naRGpIrZLoA99pH1r --live

# Explain disc 2 of an album
navidrome artwork explain dc 6XTD9naRGpIrZLoA99pH1r:2
Output
Item
  Kind:  album (al)
  ID:    6XTD9naRGpIrZLoA99pH1r
  Name:  OK Computer

Stored
  Source:        folder
  Hash:          fa90ba01c3d4e5f6
  Source path:   /music/Radiohead/OK Computer/cover.jpg
  Attempted at:  2026-04-19T03:22:11Z

Queue
  (not queued)

Config
  CoverArtPriority:  cover.*, folder.*, front.*, embedded, external
  Agents:            lastfm, spotify

Chain (recorded 2026-04-19T03:22:11Z)
  CANDIDATE  OUTCOME  DETAIL
  cover.*    hit      /music/Radiohead/OK Computer/cover.jpg

Result
  resolved from folder
The Chain table uses these outcomes:
| Outcome | Meaning |
|---|---|
hit | This candidate produced the image |
miss | Navidrome looked and found nothing |
unreadable | A file exists, but Navidrome could not open or decode it |
skipped | Navidrome never tried this candidate. DETAIL says why |
error | A lookup or processing step failed. DETAIL has the error |
Watch for unreadable. It points to a damaged file you can fix, while miss means nothing was
there. Stored state alone can’t tell the two apart.
When resolution fails, the Queue block shows why. While Navidrome is still retrying,
Last attempt failed lists the steps of the latest attempt. After it stops retrying,
Gave up after lists the steps of the final one. If Navidrome found a candidate but could not
process it, or an external lookup failed, Result says indeterminate rather than not resolved.
Nothing proved the item has no artwork, and a retry may still find some.
Older Navidrome versions did not record chains, and explain tells you when it resolved an item
before recording started. Run it with --live to see the chain. A live run is also worth comparing
against Stored. If stored says external:lastfm and the live walk resolves from folder, the
stored state is stale. Run artwork refresh to fix it.
By default explain makes no external requests, because it reads the recorded chain. --live walks
the chain with real lookups. This matters most when you are debugging rate limiting, since a
diagnostic run shouldn’t add to the load on the provider.
explain for artists and albums, and reprocess for its lookup estimate, load the plugins named in
Agents. They load only those, because a plugin that isn’t a configured agent can’t supply an
image. Loading a plugin creates the services its manifest asks for, such as a key-value store.
Plugins load but don’t start unless you pass explain --live. With it, each plugin runs its
initialization, which may open external connections.
artwork refresh
Clears the stored artwork state of each item and queues it at the highest priority. Admins can do the same for one album or artist in the web UI, with Refresh Metadata in the context menu.
navidrome artwork refresh [<kind>] <id>...
IDs work the same as in explain. Use bare IDs, full artwork IDs like al-<id>, or one <kind>
followed by several IDs of that kind. Bare and full IDs carry their own kind, so you can mix kinds in
one call. If Navidrome can’t find an ID, it reports the ID, skips it, and refreshes the rest.
The old state is gone, so the item shows a placeholder until Navidrome resolves it again.
Flags
This subcommand has no flags.
Examples
# Refresh one album by its bare ID
navidrome artwork refresh 6XTD9naRGpIrZLoA99pH1r

# Refresh an album and an artist in one call
navidrome artwork refresh al-6XTD9naRGpIrZLoA99pH1r ar-1dfeR4HaWDbWqFHLkxsg1d

# Refresh two albums
navidrome artwork refresh al 1dfeR4HaWDbWqFHLkxsg1d 6XTD9naRGpIrZLoA99pH1r
artwork reprocess
Queues artwork in bulk. reprocess is the only way to retry absent artwork, because Navidrome never
goes back to an item with no image by itself. It is also how you apply an artwork setting change to
the whole library. See artwork status.
navidrome artwork reprocess [--kind ...] [--source ...] [--all] [--dry-run] [-y]
You must pass --kind, --source, or --all. Without one, the command fails, so you can’t
resolve the whole library again by accident. --source alone covers every kind. If you name a
source that no item uses, the command fails and lists the sources in use.
Before it queues anything, the command prints a breakdown and an estimate of external lookups, then asks you to confirm. A running server works through queued items in the background. A stopped server starts on them at its next startup.
Flags
| Flag | Default | Description |
|---|---|---|
--kind | Kinds to reprocess: ar, al, pl, ra. Repeatable | |
--source | Only items that resolve from these sources now, such as folder, embedded, external:lastfm, absent, or failed. Repeatable | |
--all | false | Reprocess every kind |
--dry-run | false | Show what the command would queue, then exit without queueing |
-y, --yes | false | Skip the confirmation prompt |
failed selects absent items where Navidrome gave up after its retries.
Examples
# Preview artists that use Last.fm images now
navidrome artwork reprocess --kind ar --source external:lastfm --dry-run

# Retry only the items that gave up, for example after a provider outage
navidrome artwork reprocess --source failed

# Retry every item that has no image
navidrome artwork reprocess --source absent

# Apply a changed artwork setting to the whole library
navidrome artwork reprocess --all
Unlike refresh, reprocess does not clear existing artwork first. Images stay in place until new
ones replace them. It can still send a lot of external requests, so run it with --dry-run first
and read the estimate.
artwork cancel
Removes pending artwork work from the queue. reprocess fills the queue, and cancel empties it.
navidrome artwork cancel [--kind ...] [--priority ...] [--all] [--dry-run] [-y]
You must pass --kind, --priority, or --all. Like reprocess, the command prints a breakdown
and asks you to confirm before it deletes anything.
Use --priority to call off a bulk job and keep everything else. reprocess queues items at
recheck priority, and on a large library that can mean tens of thousands of external lookups.
Cancel recheck to stop that job. Items you refreshed by hand sit at bump, so they stay queued.
Queue priorities, highest first:
| Priority | Queued by |
|---|---|
bump | artwork refresh, a request for an item with no artwork state, or saving a radio |
scan | The scanner, for items it added or changed |
backfill | Nothing in current versions. You can still cancel rows an older version queued |
recheck | artwork reprocess, and the hourly check for items with no artwork state |
Flags
| Flag | Default | Description |
|---|---|---|
--kind | Kinds to cancel: ar, al, pl, ra, mf. Repeatable | |
--priority | Only rows queued at these priorities: bump, scan, backfill, recheck. Repeatable | |
--all | false | Cancel every kind at every priority |
--dry-run | false | Show what the command would cancel, then exit without cancelling |
-y, --yes | false | Skip the confirmation prompt |
Examples
# See what is queued at recheck priority
navidrome artwork cancel --priority recheck --dry-run

# Call off a bulk reprocess and keep manual refreshes queued
navidrome artwork cancel --priority recheck

# Empty the queue
navidrome artwork cancel --all --yes
cancel only touches the queue. It leaves resolved artwork and the state explain reports alone.
The worker keeps running, and items the server already picked up still finish. The hourly check can
queue an item with no artwork state again, so a cancel lasts longest for items that already have
artwork. The command applies the selection again when you confirm, so it also cancels anything
queued after the preview.
5.2.2 - navidrome backup
The backup commands make a copy of the Navidrome database, delete old copies, and restore a copy.
Navidrome can also make backups on a schedule. See Automated Backup.
Backups go to the folder in the Backup.Path setting. Each backup file has a name like
navidrome_backup_2026.04.01_04.00.00.db, with the date and time it was made.
Usage
navidrome backup <subcommand> [flags]
The alias bkp works too, so navidrome bkp create is the same as navidrome backup create.
All commands also accept the global flags.
Subcommands
| Subcommand | Description |
|---|---|
create | Make a backup of the database now |
prune | Delete old backups and keep the newest ones |
restore | Replace the database with a backup |
backup create
Makes a backup of the database. This command doesn’t delete old backups, even when you have more
than Backup.Count. Run backup prune for that.
navidrome backup create [-d <folder>]
Flags
| Flag | Default | Description |
|---|---|---|
-d, --backup-dir | Backup.Path | Folder to write the backup to |
Examples
# Back up to the folder in Backup.Path
navidrome backup create

# Back up to another folder
navidrome backup create --backup-dir /mnt/backups/navidrome
backup prune
Deletes old backups and keeps the newest ones. It only looks at files named like
navidrome_backup_<date>_<time>.db, and leaves other files in the folder alone.
navidrome backup prune [-d <folder>] [-k <count>] [-f]
By default, prune keeps as many backups as Backup.Count. If the number to keep is 0, prune
deletes every backup. It asks you to type YES first, unless you pass --force.
Flags
| Flag | Default | Description |
|---|---|---|
-d, --backup-dir | Backup.Path | Folder with the backups |
-k, --keep-count | Backup.Count | Number of backups to keep. 0 deletes all backups |
-f, --force | false | Don’t ask for confirmation when you delete all backups |
Examples
# Keep the number of backups set in Backup.Count
navidrome backup prune

# Keep only the newest 7 backups
navidrome backup prune --keep-count 7

# Delete all backups without a prompt
navidrome backup prune --keep-count 0 --force
backup restore
Replaces the current database with a backup. It asks you to type YES first, unless you pass
--force.
navidrome backup restore --backup-file <file> [-f]
If --backup-file is a file name or a relative path, the command looks for it in the Backup.Path
folder. An absolute path works from anywhere.
Flags
| Flag | Default | Description |
|---|---|---|
-b, --backup-file | Backup file to restore. Required | |
-f, --force | false | Skip the confirmation prompt |
Examples
# Restore a backup from the Backup.Path folder
navidrome backup restore --backup-file navidrome_backup_2026.04.01_04.00.00.db

# Restore a backup from another folder
navidrome backup restore --backup-file /mnt/backups/navidrome/navidrome_backup_2026.04.01_04.00.00.db

# With Docker Compose, stop the server first
docker compose stop navidrome
docker compose run --rm navidrome backup restore --backup-file navidrome_backup_2026.04.01_04.00.00.db
docker compose start navidrome
Stop Navidrome before you run navidrome backup restore. Everything that changed after the backup
is lost, such as new users, play counts, and playlists.
5.2.3 - navidrome doctor
The doctor command checks the database for problems. It only reads the database and never changes
your data. Run it when Navidrome logs errors such as database disk image is malformed, or when
every scan fails.
Usage
navidrome doctor
Flags
doctor has no flags of its own. It accepts the global flags.
Examples
# Check the database
navidrome doctor

# Stop a script when the database has problems
navidrome doctor || exit 1

# Check the database with Docker Compose
docker compose run --rm navidrome doctor
What it checks
doctor runs two checks.
- Integrity check. Looks for corruption in the database file. If the damage is only in the
search index,
doctortells you to runnavidrome search rebuild. Damage anywhere else can’t be fixed automatically. Restore a backup withnavidrome backup restore, or try SQLite’s.recovercommand. - Foreign key check. Looks for orphaned rows, which point to rows that no longer exist. This is
not corruption.
navidrome scan -fclears some of them in library data, and you have to delete the rest by hand.
The integrity check stops after a fixed number of problems. When it hits that limit, the damage may
be bigger than the list shows, and doctor won’t suggest a search index rebuild.
Output
A healthy database looks like this:
Checking database integrity...
Integrity check passed.
Checking foreign keys...
Foreign key check passed.
Database is healthy.
doctor exits with status 1 when a check finds a problem or can’t finish, so you can use it in
scripts.
5.2.4 - navidrome inspect
The inspect command prints the tags of one or more music files, the way Navidrome reads them. Use
it when an album shows up split in two, or a tag you set doesn’t appear in Navidrome. For each file
it prints the raw tags stored in the file and the mapped tags Navidrome uses. See
Tagging for how Navidrome maps tags.
Usage
navidrome inspect [flags] <file> [<file>...]
All commands also accept the global flags.
Flags
| Flag | Default | Description |
|---|---|---|
-f, --format | jsonindent | Output format. One of pretty, toml, yaml, json, jsonindent |
pretty prints a text block for each file, with the raw and mapped tags in TOML. json prints
everything on one line, and jsonindent prints indented JSON.
Examples
# Print the tags of one file as indented JSON
navidrome inspect "/music/Artist/Album/01 Track.flac"

# Print the tags of every MP3 in a folder, as YAML
navidrome inspect --format yaml /music/Artist/Album/*.mp3

# Easy-to-read output
navidrome inspect --format pretty "/music/Artist/Album/01 Track.flac"

# Inspect a file with Docker Compose. Use the path inside the container
docker compose run --rm navidrome inspect "/music/Artist/Album/01 Track.flac"
Notes
inspect skips files that are not audio files, and files it can’t read. It logs a warning for each
one and goes on with the rest.
5.2.5 - navidrome missing
The missing commands list files marked as missing, and remap a missing file onto an existing one.
The scanner marks a file missing when it no longer finds it on disk. When you rename or move a file,
the scanner normally reconnects it and carries over play counts, ratings, starred status, and
bookmarks. If the scanner can’t match the two files, the old entry stays missing and the new file
starts with no history. missing fix does that remap by hand.
See Missing Files for why files go missing, how to review them in the web UI, and how to purge them for good.
Usage
navidrome missing <subcommand> [flags]
All commands also accept the global flags.
Subcommands
| Subcommand | Description |
|---|---|
list | List all files marked as missing |
fix | Remap a missing file onto an existing file |
missing list
Lists all files marked as missing. The CSV output has these columns: id, library id, title, album, artist, and path.
navidrome missing list [-f csv|json]
Flags
| Flag | Default | Description |
|---|---|---|
-f, --format | csv | Output format. One of csv, json |
Examples
# List missing files as CSV
navidrome missing list

# List missing files as JSON
navidrome missing list --format json
missing fix
Moves the data of a missing file onto an existing file.
navidrome missing fix <missing> <target>
The first argument is the missing file. The second is the file that gets its data. Each argument can
be a media file ID, a library-relative path, or a libraryID:path pair. Use an ID or a
libraryID:path pair when the same path exists in more than one library.
Flags
This subcommand has no flags.
Examples
# Remap by library-relative path
navidrome missing fix "Rock/Old Album/track01.mp3" "Rock/New Album/track01.mp3"

# Remap by media file ID
navidrome missing fix 3Unsdwsei9i2ZvRtFKRfwA 7KpqZmXe4Ab2NvTuGHRcxQ

# Pick the library with a libraryID:path pair
navidrome missing fix 2:"Podcasts/ep01.mp3" 2:"Podcasts/episode-01.mp3"
The target file must already be in the library and must not be missing. Run a scan first if you
just added it. You can’t undo the remap, so make a backup with navidrome backup create before you
fix many files.
5.2.6 - navidrome plugin
The plugin commands list, check, configure, enable, and disable plugins. They do the same things as
the plugin screens in the web UI. See Plugins for how the plugin
system works.
Usage
navidrome plugin <subcommand> [flags]
All commands also accept the global flags.
Commands that work with installed plugins need the plugin system enabled. Plugins.Enabled is on
by default. You can still use plugin info and plugin validate on a .ndp package file when the
plugin system is disabled.
Subcommands
| Subcommand | Description |
|---|---|
list | List installed plugins |
info | Show details for an installed plugin or a .ndp package |
validate | Check the manifest of an installed plugin or a .ndp package |
enable | Enable a plugin |
disable | Disable a plugin |
edit | Change a plugin’s config, permissions, or both |
rescan | Find plugins added to or removed from the plugins folder |
plugin list
Lists installed plugins.
navidrome plugin list [-f table|csv|json]
Flags
| Flag | Default | Description |
|---|---|---|
-f, --format | table | Output format. One of table, csv, json |
Examples
# List installed plugins as a table
navidrome plugin list

# List installed plugins as JSON
navidrome plugin list -f json
plugin info
Shows details for an installed plugin or a .ndp package file. An argument that ends in .ndp is a
package file. Anything else is the ID of an installed plugin.
navidrome plugin info <id|file.ndp> [-f text|json]
Flags
| Flag | Default | Description |
|---|---|---|
-f, --format | text | Output format. One of text, json |
Examples
# Show details for an installed plugin
navidrome plugin info my-plugin

# Check a downloaded package before you install it
navidrome plugin info ./my-plugin-1.2.0.ndp
plugin validate
Checks the manifest of an installed plugin or a .ndp package file. For an installed plugin, it
also checks the stored configuration when one exists. It reads the argument the same way as info.
navidrome plugin validate <id|file.ndp>
Flags
This subcommand has no flags.
Examples
# Check an installed plugin
navidrome plugin validate my-plugin

# Check a package file
navidrome plugin validate ./my-plugin-1.2.0.ndp
plugin enable
Enables an installed plugin.
navidrome plugin enable <id>
Flags
This subcommand has no flags.
Examples
navidrome plugin enable my-plugin
plugin disable
Disables an installed plugin.
navidrome plugin disable <id>
Flags
This subcommand has no flags.
Examples
navidrome plugin disable my-plugin
plugin edit
Changes a plugin’s config, the users and libraries it can access, and whether it can write to libraries. Pass at least one flag. The flags come in pairs, and you can’t use both flags of a pair in one call.
navidrome plugin edit <id> [flags]
Flags
| Flag | Default | Description |
|---|---|---|
--config | Plugin config as a JSON string | |
--config-file | File to read the plugin config JSON from. Use - to read from stdin | |
--users | Usernames the plugin can access, as alice,bob or ["alice","bob"] | |
--all-users | false | Give the plugin access to all users |
--libraries | Library IDs the plugin can access, as 1,2 or [1,2] | |
--all-libraries | false | Give the plugin access to all libraries |
--write-access | false | Let the plugin write to libraries |
--no-write-access | false | Don’t let the plugin write to libraries |
The pairs are --config and --config-file, --users and --all-users, --libraries and
--all-libraries, and --write-access and --no-write-access.
Examples
# Set a plugin's config
navidrome plugin edit my-plugin --config '{"apiKey":"abc123"}'

# Read the config from stdin
cat config.json | navidrome plugin edit my-plugin --config-file -

# Give access to all users and let the plugin write to libraries
navidrome plugin edit my-plugin --all-users --write-access

# Limit the plugin to two libraries
navidrome plugin edit my-plugin --libraries 1,2
plugin rescan
Looks in the plugins folder again and picks up plugins you added or removed. The folder comes from
Plugins.Folder, which defaults to the plugins folder inside DataFolder.
navidrome plugin rescan
Flags
This subcommand has no flags.
Examples
# Pick up a new .ndp file you copied into the plugins folder
navidrome plugin rescan
5.2.7 - navidrome pls
The pls commands list playlists, export them to M3U files, and import M3U files as playlists.
Navidrome also imports M3U files it finds in your library when it scans. You don’t need
pls import for those. See AutoImportPlaylists and PlaylistsPath in
Configuration Options.
Usage
navidrome pls --playlist <name-or-id> [--output <file>]
navidrome pls <subcommand> [flags]
pls with no subcommand exports one playlist. pls export does the same, and it
can also export many playlists at once.
All commands also accept the global flags.
Flags
These flags are for pls with no subcommand.
| Flag | Default | Description |
|---|---|---|
-p, --playlist | Name or ID of the playlist to export. Required | |
-o, --output | File to write the playlist to. Without it, or with -, prints to stdout |
Examples
# Print a playlist to stdout
navidrome pls --playlist "Road Trip Mix"

# Write a playlist to a file
navidrome pls --playlist "Road Trip Mix" --output ./road-trip.m3u8
Subcommands
| Subcommand | Description |
|---|---|
list | List playlists |
export | Export playlists to M3U files |
import | Import M3U files as playlists |
pls list
Lists playlists, sorted by owner. The CSV output has these columns: playlist id, playlist name, owner id, owner name, and public.
navidrome pls list [-u <user>] [-f csv|json]
Flags
| Flag | Default | Description |
|---|---|---|
-u, --user | Only list playlists of this username or user ID | |
-f, --format | csv | Output format. One of csv, json |
Examples
# List all playlists as CSV
navidrome pls list

# List the playlists of one user as JSON
navidrome pls list --user alice --format json
pls export
Exports one playlist or many playlists to M3U files.
navidrome pls export [-p <playlist>] [-u <user>] [-o <folder>]
What it does depends on the flags you pass:
- With
--playlistand no--output, it prints that playlist to stdout. - With
--playlistand--output, it writes that playlist to a file in the output folder. - Without
--playlist, it writes every playlist to the output folder. Add--userto export only the playlists of one user.--outputis required here.
--output is a folder, and the folder must already exist. This is different from pls --output,
which takes a file. Each file gets the name of its playlist, such as Road Trip Mix.m3u. If two
playlists have the same name, Navidrome adds the first 6 characters of the playlist ID to the file
name, such as Road Trip Mix_3Unsdw.m3u.
Flags
| Flag | Default | Description |
|---|---|---|
-p, --playlist | Name or ID of one playlist to export | |
-o, --output | Folder to write the M3U files to | |
-u, --user | Only export playlists of this username or user ID |
Examples
# Export all playlists to a folder
navidrome pls export --output ./playlists

# Export the playlists of one user
navidrome pls export --user alice --output ./playlists

# Export one playlist to a folder
navidrome pls export --playlist "Road Trip Mix" --output ./playlists
pls import
Imports one or more M3U files as playlists. Navidrome matches each entry in the file to a track in your library. For each file, it prints how many tracks matched and how many it didn’t find. If one file fails, the command prints the error and goes on with the rest.
navidrome pls import [-u <user>] [--sync] <file> [<file>...]
By default, the first admin user owns the imported playlists. Pass --user to pick another owner.
A synced playlist follows its M3U file. You can’t edit its tracks in Navidrome. If the file is in
your library, the scanner updates the playlist when the file changes. Without --sync, the
playlist keeps the tracks from the import, and you can edit them.
Flags
| Flag | Default | Description |
|---|---|---|
-u, --user | First admin | Username or user ID of the playlist owner |
--sync | false | Mark the imported playlists as synced |
Examples
# Import one file
navidrome pls import ./road-trip.m3u

# Import many files for one user
navidrome pls import --user alice ./playlists/*.m3u

# Import a playlist from the library and keep it synced with the file
navidrome pls import --sync "/music/Playlists/Favorites.m3u"

# With Docker Compose, mount the files so the container can read them
docker compose run --rm -v ./playlists:/playlists navidrome pls import /playlists/road-trip.m3u
5.2.8 - navidrome scan
The scan command scans your music library for new, changed, and removed files. Use it to start a
scan from a script, to force a full scan, or to scan only some folders.
Usage
navidrome scan [flags]
All commands also accept the global flags.
Flags
| Flag | Default | Description |
|---|---|---|
-f, --full | false | Check all folders and ignore modification times |
-t, --target | Scan only this folder, as a libraryID:folderPath pair. Repeatable | |
--target-file | File with folders to scan, one libraryID:folderPath pair per line |
Navidrome also has a --subprocess flag. The server uses it to run scans, so don’t pass it
yourself.
Examples
# Scan for changes
navidrome scan

# Full scan
navidrome scan --full

# Scan only two folders, in two libraries
navidrome scan -t 1:Music/Rock -t 2:Audiobooks

# Read the folders to scan from a file
navidrome scan --target-file ./scan-targets.txt

# Full scan with Docker Compose
docker compose run --rm navidrome scan --full
Scan targets
A target is a library ID and a folder in that library, joined by a colon. The folder path is
relative to the root folder of the library. For example, 1:Music/Rock is the Music/Rock folder
in library 1.
To find library IDs, run navidrome user list. Its libraries column shows each library as
id:path. See Multi-Library for how libraries work.
A target file has one target on each line. The command skips empty lines. If you pass both
--target-file and --target, the command uses only the file.
5.2.9 - navidrome search
The search command maintains the full-text search index.
Usage
navidrome search <subcommand> [flags]
All commands also accept the global flags.
Subcommands
| Subcommand | Description |
|---|---|
rebuild | Delete the search index and build it again from the library data |
search rebuild
Deletes the full-text search index and builds it again from your library data. The index only holds copies of data stored elsewhere in the database, so you lose nothing. Navidrome checks the new index before it saves it.
navidrome search rebuild [-f]
Use it in two cases:
navidrome doctorreports that the corruption is limited to the search index.- Search misses items that are in your library.
doctorcan’t detect an index that is out of sync but not corrupt, so a rebuild is the thing to try.
Without --force, the command asks you to type YES to continue.
Flags
| Flag | Default | Description |
|---|---|---|
-f, --force | false | Skip the confirmation prompt |
Examples
# Check the database, then rebuild a corrupted search index
navidrome doctor
navidrome search rebuild

# With Docker Compose, stop the server first
docker compose stop navidrome
docker compose run --rm navidrome search rebuild
docker compose start navidrome
Stop Navidrome before you run navidrome search rebuild.
5.2.10 - navidrome service
The service commands install Navidrome as a service in your OS service manager, then start, stop,
and check it. The service manager is systemd on most Linux systems, launchd on macOS, and the
Service Control Manager on Windows. navidrome service --help shows the one your system uses.
The installation guides for Linux, macOS, and Windows show the full setup.
Usage
navidrome service <subcommand> [flags]
The alias svc works too, so navidrome svc status is the same as navidrome service status.
All commands also accept the global flags.
Subcommands
| Subcommand | Description |
|---|---|
install | Install Navidrome as a service |
uninstall | Remove the service |
start | Start the service |
stop | Stop the service |
status | Show whether the service is running |
execute | Run Navidrome in the foreground, as the service manager does |
service install
Installs Navidrome as a system service. Before it installs, it prints the working directory, music folder, data folder, and log location the service will use. You usually need root or Administrator rights to install a service.
navidrome service install [-u <user>] [-w <folder>] [-c <config file>]
If you pass --configfile, the service uses that config file. Without it, the service looks for
navidrome.toml in its working directory. The service manager restarts Navidrome if it fails.
Logs go to the data folder, unless you set LogFile.
On Linux, the systemd unit also reads environment variables from /etc/sysconfig/navidrome if that
file exists.
Flags
| Flag | Default | Description |
|---|---|---|
-u, --user | OS user that runs the service | |
-w, --working-directory | Folder of the navidrome binary | Working directory of the service |
Examples
# Install the service with a config file, run by the navidrome user
sudo navidrome service install --user navidrome --configfile /etc/navidrome/navidrome.toml

# Install with a different working directory
sudo navidrome svc install --working-directory /var/lib/navidrome
service uninstall
Removes the service from the service manager. Your music and data folders stay as they are.
navidrome service uninstall
Flags
This subcommand has no flags.
Examples
sudo navidrome svc uninstall
service start
Starts the service.
navidrome service start
Flags
This subcommand has no flags.
Examples
sudo navidrome svc start
service stop
Stops the service. Navidrome gets 10 seconds to shut down cleanly.
navidrome service stop
Flags
This subcommand has no flags.
Examples
sudo navidrome svc stop
service status
Prints whether the service is Running, Stopped, or Unknown.
navidrome service status
Flags
This subcommand has no flags.
Examples
navidrome svc status
service execute
Runs Navidrome in the foreground as a service. The service manager runs this command to start
Navidrome, so you don’t need it. To run Navidrome in the foreground yourself, run navidrome.
navidrome service execute
Flags
This subcommand has no flags.
The service command is for native installs. In Docker, Compose, or Kubernetes, the container
platform starts and stops Navidrome.
5.2.11 - navidrome user
The user commands create, edit, list, and delete Navidrome users.
These commands need at least one admin user in the database. On a new install, create the first admin in the web UI.
Usage
navidrome user <subcommand> [flags]
All commands also accept the global flags.
Subcommands
| Subcommand | Alias | Description |
|---|---|---|
create | c | Create a user |
edit | e | Change a user |
list | List users | |
delete | d | Delete a user |
user create
Creates a user. The command asks for the password twice. Press Enter with no password to cancel.
There is no flag for the password, so run the command in a terminal. With docker run, add -it.
navidrome user create --username <username> [flags]
Without --library-ids, the user can access all libraries. Admins can always access all libraries,
so the command ignores --library-ids when you pass --admin. If a library ID doesn’t exist, the
command fails and creates nothing.
Flags
| Flag | Default | Description |
|---|---|---|
-u, --username | Username to log in with. Required | |
--name | The username | Display name of the user |
-e, --email | Email address of the user | |
-a, --admin | false | Make the user an admin |
-i, --library-ids | All libraries | Comma-separated IDs of the libraries the user can access |
Examples
# Create an admin user
navidrome user create --username alice --email [email protected] --admin

# Create a regular user who can access libraries 1 and 3 only
navidrome user create --username bob --name "Bob Smith" --library-ids 1,3
user edit
Changes a user. Find the user by username or ID, then pass the flags for what you want to change. If nothing changes, the command says so.
navidrome user edit --user <username-or-id> [flags]
Some flags come in pairs, and you can’t use both flags of a pair in one call. The pairs are
--set-admin and --set-regular, --email and --remove-email, and --name and
--remove-name.
--set-admin gives the user access to all libraries. --set-regular keeps the libraries the user
has, so add --library-ids to limit them.
Flags
| Flag | Default | Description |
|---|---|---|
-u, --user | Username or ID of the user to change. Required | |
--set-admin | false | Make the user an admin |
--set-regular | false | Make the user a regular user |
--set-password | false | Ask for a new password |
-e, --email | New email address | |
--remove-email | false | Clear the email address |
--name | New display name | |
--remove-name | false | Clear the display name |
-i, --library-ids | Comma-separated IDs of the libraries the user can access. Replaces the current list. Ignored with --set-admin |
Examples
# Make an admin a regular user
navidrome user edit --user alice --set-regular

# Change a password. The command asks for the new one
navidrome user edit --user alice --set-password

# Limit a user to libraries 1 and 2
navidrome user edit --user bob --library-ids 1,2
user list
Lists all users. The CSV output has these columns: user id, username, user’s name, user email,
admin, created at, updated at, last access, last login, and libraries. The libraries column lists
each library as id:path, separated by |.
navidrome user list [-f csv|json]
Flags
| Flag | Default | Description |
|---|---|---|
-f, --format | csv | Output format. One of csv, json |
Examples
# List users as CSV
navidrome user list

# List users as JSON
navidrome user list --format json
user delete
Deletes a user. The command doesn’t ask for confirmation. It won’t delete the last user.
navidrome user delete --user <username-or-id>
Flags
| Flag | Default | Description |
|---|---|---|
-u, --user | Username or ID of the user to delete. Required |
Examples
navidrome user delete --user alice
5.3 - Security Considerations
Permissions
You should NOT run Navidrome as root.
Ideally you should have it running under its own user and enable the EnforceNonRootUser configuration option.
Navidrome only needs read-only access to the Music Folder, and read-write permissions to the Data Folder.
Encrypted passwords
To be able to keep compatibility with the Subsonic API and its clients, Navidrome needs to store user’s passwords in its database. By default, Navidrome encrypts the passwords in the DB with a shared encryption key, just for the sake of obfuscation as this key can be easily found in the codebase.
This key can be overridden by the config option PasswordEncryptionKey. Once this option is set and Navidrome is restarted, it will re-encrypt all passwords with this new key. This is a one-time only configuration, and after this point the config option cannot be changed anymore or else users won’t be able to authenticate.
Network configuration
Even though Navidrome comes with an embedded, full-featured HTTP server, you should seriously consider running it behind a reverse proxy (Ex: Caddy, Nginx, Traefik, Apache) for added security, including setting up SSL. There are tons of good resources on the web on how to properly setup a reverse proxy.
When using Navidrome in such configuration, you may want to prevent Navidrome from listening to all IPs configured
in your computer, and only listen to localhost. This can be achieved by setting the Address flag to localhost.
Externalized authentication
When externalized authentication is enabled, Navidrome trusts the authenticated user header (configured with the ExtAuth.UserHeader option, by default Remote-User).
In principle, the authenticated user header is ignored if requests don’t come from a reverse proxy trusted with the ExtAuth.TrustedSources option. This check can however be fooled by requests with a forged source IP address if the reverse proxy can be bypassed (e.g. a request sent by a compromised service running next to Navidrome).
When using externalized authentication in a fresh installation, the first user created through this method will automatically be granted admin privileges, consistent with the behavior when creating the first user through the web interface.
Listening on a UNIX socket
If you are listening on a UNIX socket (Address option) and enable externalized authentication (ExtAuth.TrustedSources configured with the special value @), any process able to write to the socket can forge authenticated requests.
Make sure to properly protect the socket with user access controls (see the UnixSocketPerm option).
Reverse proxy with a dynamic IP address
Navidrome does not support resolving hostnames in the ExtAuth.TrustedSources configuration option.
In scenarios where the reverse proxy has a dynamic IP address, for example when you use docker, you might consider using 0.0.0.0/0 to allow requests from the reverse proxy. This essentially disables the check, so you have to make sure that only the reverse proxy can send requests to Navidrome.
In particular with docker and docker-compose, without extra configuration containers are usually placed on the same default network and can therefore freely communicate.
Potential HPP vulnerability
When externalized authentication is enabled, Navidrome currently does not disable the other authentication methods. This could potentially create an HTTP Parameter Pollution vulnerability if the reverse proxy is misconfigured, or due to a bug or oversight in Navidrome.
You should make sure that the authenticated user header is always set for requests against protected endpoints. As a rule of thumb, for an externalized authentication setup, the only endpoints that are not protected are /rest/* (depending on whether your proxy can handle the subsonic authentication scheme) and /share/*.
Transcoding configuration
To configure transcoding, Navidrome’s WebUI provide a screen that allows you to edit existing transcoding configurations and to add new ones. That is similar to other music servers available in the market that provide transcoding on-demand.
The issue with this is that it potentially allows an attacker to run any command in your server. This married with the fact that some Navidrome installations don’t use SSL and/or run it as a super-user (root or Administrator), is a recipe for disaster!
In an effort to make Navidrome as secure as possible, we decided to disable the transcoding
configuration editing in the UI by default. If you need to edit it (add or change a configuration),
start Navidrome with the ND_ENABLETRANSCODINGCONFIG set to true. After doing your changes,
don’t forget to remove this option or set it to false.
Limit login attempts
To protect against brute-force attacks, Navidrome is configured by default with a login rate limiter,
It uses a Sliding Window
algorithm to block too many consecutive login attempts. It is enabled by default and you don’t need to do anything.
The rate limiter can be fine tuned using the flags AuthRequestLimit and AuthWindowLength and can be disabled by
setting AuthRequestLimit to 0, though it is not recommended.
5.4 - Anonymous Data Collection
Overview
Navidrome includes an anonymous usage statistics feature designed to help improve the project for all users. This page explains what data is collected, how it is used, and how to opt out if you prefer not to participate.
Key Principles
- Anonymous Data Only: Navidrome collects only non-personal, anonymous data to guide future improvements.
- What’s Collected: See Collected Data.
- What’s NOT Collected: No emails, IP addresses, usernames, or other identifiable data. See Excluded Data.
- Opt-Out Available: Enabled by default, but you can disable it anytime.
- In-House Data Handling: Collected data goes to an open-source server hosted by the project—no third-party services.
- Full Transparency: Logs and UI indicators show when data is sent and what it contains.
What Will Be Collected?
Below is a plain-English explanation of what each field is generally intended to represent. Each field corresponds to a piece of information about the running application or its environment:
Top-level Fields
InsightsID: A unique, randomly generated identifier for a given Navidrome instance. It’s a random ID that allows reports from the same instance to be grouped together. It is NOT directly connected to any of your data, and it cannot be used to directly identify you or your instance.
Version: Shows which Navidrome version each report came from. In aggregate analysis, this tells you how many users are on a particular version and can highlight upgrade patterns.
Uptime: The amount of time an instance has been running. When aggregated, this helps gauge the overall stability and average runtime before restarts across the community.
Build Information
Information about custom builds. Aggregated, this can reveal common build configurations used by the community, and if there are any issues (e.g. performance impact or high memory usage) specific to certain build configurations.
Build.Settings: Key-value pairs representing the compile-time settings for Navidrome (build tags, compiler options, etc.).
Build.GoVersion: The version of Go used to compile Navidrome.
OS Information
OS.Type: Operating system type (e.g., “linux”, “windows”, “darwin”). When aggregated, this shows the distribution of OS usage.
OS.Distro: OS distribution name for Linux-based systems (e.g., “ubuntu”, “debian”). Useful in aggregate form to see which Linux distributions are most common.
OS.Version: The version of the operating system or distribution. Aggregating these versions helps track environment trends and legacy OS usage.
OS.Containerized: Whether Navidrome is running in a containerized environment (Docker, Kubernetes, etc..)
OS.Arch: CPU architecture (e.g., “amd64”, “arm”). This allows to understand how Navidrome is typically deployed (e.g., on Raspberry Pis vs. standard x86 servers).
OS.NumCPU: The number of logical CPUs available. Aggregated, it helps form a picture of typical hardware profiles used across deployments.
Memory Information
Aggregated memory usage helps analyze typical resource consumption patterns and, together with other metrics, help identify causes for memory leaks.
Mem.Alloc: Current memory allocated by the Go runtime (in bytes).
Mem.TotalAlloc: Memory allocated over the lifetime of the application.
Mem.Sys: Total memory requested from the underlying system.
Mem.NumGC: Number of completed garbage collection runs. Collected in aggregate, this shows a high-level overview of how Navidrome manages memory across various deployments.
File System Information
Each FS-related field captures information about the directories or storage mediums used by Navidrome. Aggregating this data can help understand how frequently different types of storage are configured and where media content is commonly stored. This information is just the type of the filesystem (ex: nfs, ext4, ntfs…) used for each type of storage, not the actual path.
FS.Music: File system type for storing music files.
FS.Data: File system type storing Navidrome’s database.
FS.Cache: File system type storing cached data.
FS.Backup: The file system type for backups.
Each of these includes Type, describing the kind of storage (e.g., local disk, network mount). Aggregating them
shows how widely different storage setups are used, and their impact on performance.
Library Information
These fields represent aggregate counts of media items and user data within each instance’s library. Across many deployments, they help illustrate general usage trends of the Navidrome library functionality.
Library.Tracks: Total number of songs (tracks).
Library.Albums: Total number of albums.
Library.Artists: Count of distinct artists.
Library.Playlists: Number of playlists.
Library.Shares: Number of shares (public links).
Library.Radios: The count of radio station entries or streaming sources.
Library.ActiveUsers: Number of currently active users in the last 7 days. This helps understand the average load the server is operating under.
Library.ActivePlayers: Number of currently active players in the last 7 days. This allows to understand what are the most used players.
Configuration Settings
These are various Navidrome configuration flags and settings. In aggregate, they help show which features are commonly enabled or how the service is typically set up across the community. These are mostly boolean flags or simple settings, NO identifiable data is collected (paths, ids, tokens, etc..). For a reference of what each one represents, take a look at the configuration options page in the documentation.
- Config.LogLevel
- Config.LogFileConfigured
- Config.TLSConfigured
- Config.ScanSchedule
- Config.TranscodingCacheSize
- Config.ImageCacheSize
- Config.EnableArtworkPrecache
- Config.EnableDownloads
- Config.EnableSharing
- Config.EnableStarRating
- Config.EnableLastFM
- Config.EnableListenBrainz
- Config.EnableSpotify
- Config.EnableMediaFileCoverArt
- Config.EnableJukebox
- Config.EnablePrometheus
- Config.SessionTimeout
- Config.SearchFullString
- Config.RecentlyAddedByModTime
- Config.PreferSortTags
- Config.BackupSchedule
- Config.BackupCount
- Config.DefaultBackgroundURL
- Config.DevActivityPanel
- Config.EnableCoverAnimation
In Summary:
When gathered from many Navidrome instances, these metrics and settings are invaluable in understanding the aggregate
patterns of usage, deployment environments, media collections, and configuration preferences. This aggregated data
is not intended for diagnosing single-instance issues; rather, it provides a high-level view of how Navidrome is
deployed and used by its community overall.
Here’s a sample of the data sent: https://gist.github.com/deluan/1c8944fb92329c1658d96bb72a8e8db4
Data Retention
- Sent daily
- Retained for 30 days, then permanently deleted.
What Will NOT Be Collected?
To protect your privacy, the following will not be collected:
- No Personal Information: No emails, usernames, or anything identifiable.
- No Network Information: No IP addresses or device fingerprints.
- No Detailed Playback History: Individual song plays are not tied to specific users.
- No Library Details: Song/artist/album/playlist names are excluded.
- No Sensitive Configuration Data: Passwords, tokens, or logs with personal info are never collected.
Why Collect This Data?
Collecting anonymous usage statistics helps:
- Identify popular platforms and configurations.
- Prioritize features and fixes based on usage patterns.
- Ensure updates don’t unintentionally disrupt the majority of users.
Privacy and Transparency
Transparency Measures
- Human-Readable Documentation: This page explains all details in a clear, accessible way.
- Log Transparency: Each data submission logs:
- The exact payload sent.
- The destination URL. Example:
Sent Insights data (for details see http://navidrome.org/docs/getting-started/insights data="{\"id\":\"4c457065-101a-435a-b158-244b573579cd\",\"version\":\"0.53.3-SNAPSHOT (7f47e0a53)\",\"uptime\":0,\"build\":{\"settings\":{\"-buildmode\":\"exe\",\"-compiler\":\"gc\",\"-ldflags\":\"-extldflags '-static -latomic' -w -s -X github.com/navidrome/navidrome/consts.gitSha=7f47e0a53 -X github.com/navidrome/navidrome/consts.gitTag=v0.53.3-SNAPSHOT\",\"-tags\":\"netgo\",\"CGO_ENABLED\":\"1\",\"GOAMD64\":\"v1\",\"GOARCH\":\"amd64\",\"GOOS\":\"linux\",\"vcs\":\"git\",\"vcs.modified\":\"true\",\"vcs.revision\":\"7f47e0a5373d1ea067de8929c828ee0cd85a0795\",\"vcs.time\":\"2024-12-15T02:01:46Z\"},\"goVersion\":\"go1.23.4\"},\"os\":{\"type\":\"linux\",\"distro\":\"qts\",\"version\":\"5.2.2\",\"arch\":\"amd64\",\"numCPU\":4},\"mem\":{\"alloc\":2750544,\"totalAlloc\":9076584,\"sys\":14243080,\"numGC\":4},\"fs\":{\"music\":{\"type\":\"ext2/ext3/ext4\"},\"data\":{\"type\":\"ext2/ext3/ext4\"},\"cache\":{\"type\":\"ext2/ext3/ext4\"},\"backup\":{\"type\":\"ext2/ext3/ext4\"}},\"library\":{\"tracks\":85200,\"albums\":6255,\"artists\":1319,\"playlists\":26,\"shares\":19,\"radios\":7,\"activeUsers\":1},\"config\":{\"logLevel\":\"debug\",\"transcodingCacheSize\":\"100GB\",\"imageCacheSize\":\"50GB\",\"enableArtworkPrecache\":true,\"enableDownloads\":true,\"enableSharing\":true,\"enableStarRating\":true,\"enableLastFM\":true,\"enableListenBrainz\":true,\"enableMediaFileCoverArt\":true,\"enableSpotify\":true,\"enableCoverAnimation\":true,\"sessionTimeout\":\"168h0m0s\",\"recentlyAddedByModTime\":true,\"backupSchedule\":\"5 4 * * *\",\"backupCount\":5,\"devActivityPanel\":true,\"defaultBackgroundURL\":true}}" server="https://insights.navidrome.org/collect" status="200 OK" - UI Indicator: You will be able to see the last submission date/time in the About dialog:
How to Opt-Out
Data collection is enabled by default, but you can disable it anytime, by setting the new config option
EnableInsightsCollector (or ND_ENABLEINSIGHTSCOLLECTOR env var) to false. If you have EnableExternalServices
set to false, it will also disable the insights collection.
Detailed instructions will be provided in the release notes.
Data Collection Server
The data collection server is open-source and hosted by the Navidrome project, ensuring secure, in-house handling. Check it out: Navidrome Insights Server.
Thank You for Your Support
By allowing anonymous usage statistics, you’re contributing to the future of Navidrome. Your trust is invaluable, and if you’re uncomfortable, you can always opt out—no questions asked.
For questions or concerns, feel free to reach out via:
Thank you for being part of the Navidrome community!
Deluan
Navidrome Developer